Removing embroidery can be a daunting task, especially if you are dealing with intricate designs or delicate fabrics.
The thought of undoing all those tiny stitches can make anyone's head spin.
Whether you are a seasoned crafter or a beginner, knowing the fastest way to get rid of embroidery can save you time and frustration.
Imagine being able to correct mistakes or repurpose fabric without the hassle of painstakingly picking out each thread.
This comprehensive guide will walk you through various methods and tools to efficiently remove embroidery stitches from different types of fabrics.
From high-tech gadgets to simple household items, we've got you covered with the best solutions to make your embroidery removal process a breeze.
Key Takeaways:
- Use the right tools: Curved seam rippers, embroidery erasers, and small scissors are essential for quick and effective embroidery removal.
- Work slowly and carefully: Rushing the process can damage the fabric, so take your time to avoid mistakes.
- Understand your fabric: Different fabrics require different techniques and tools for safe and efficient embroidery removal.

Understanding the Embroidery Removal Process
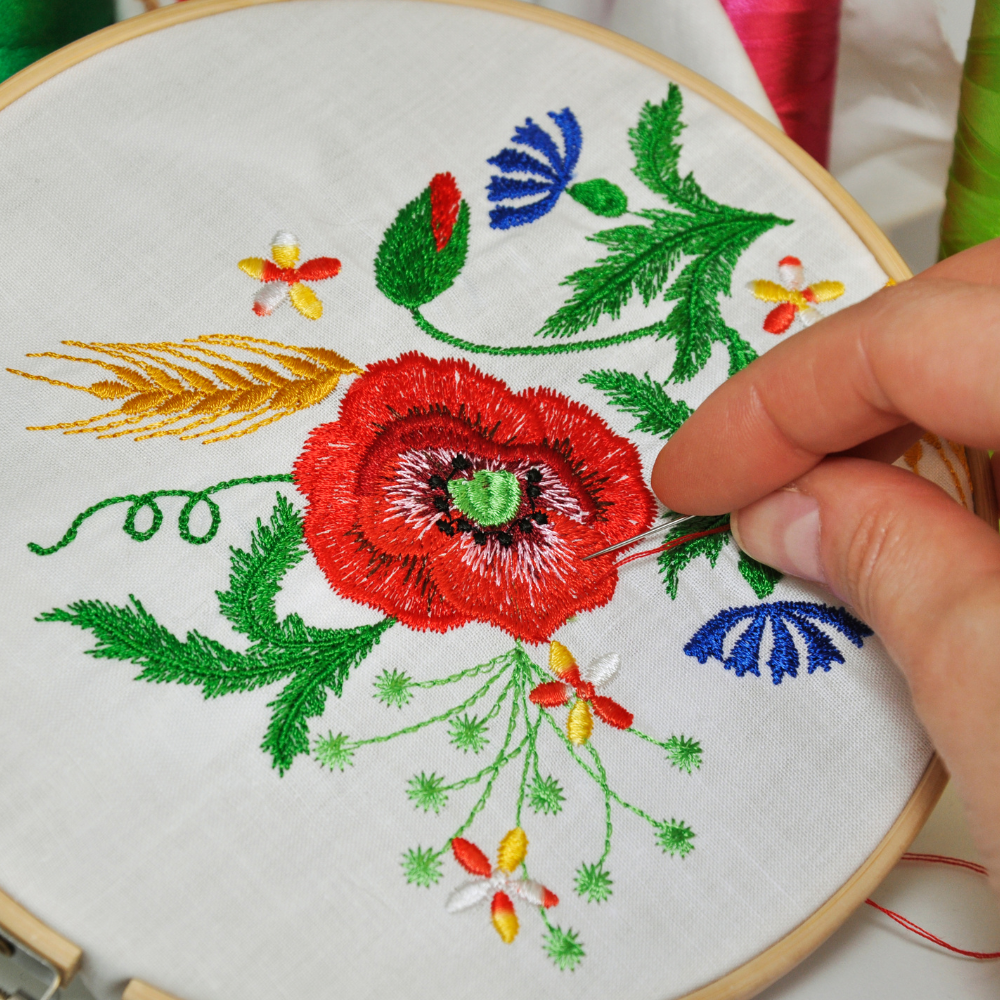
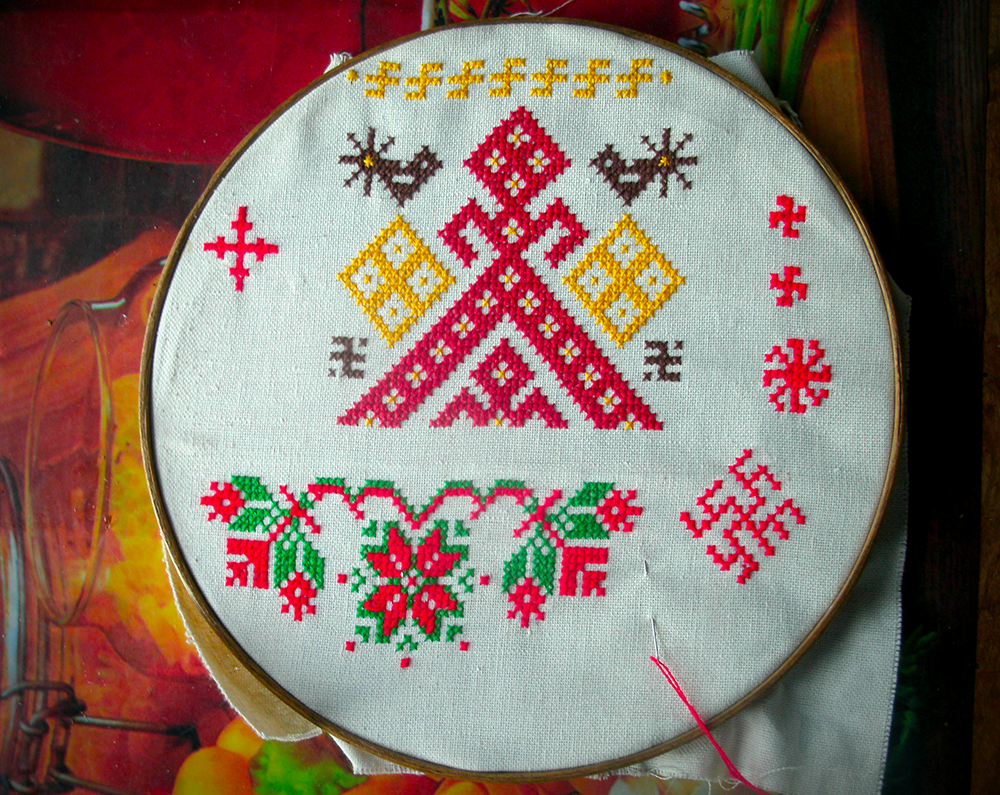
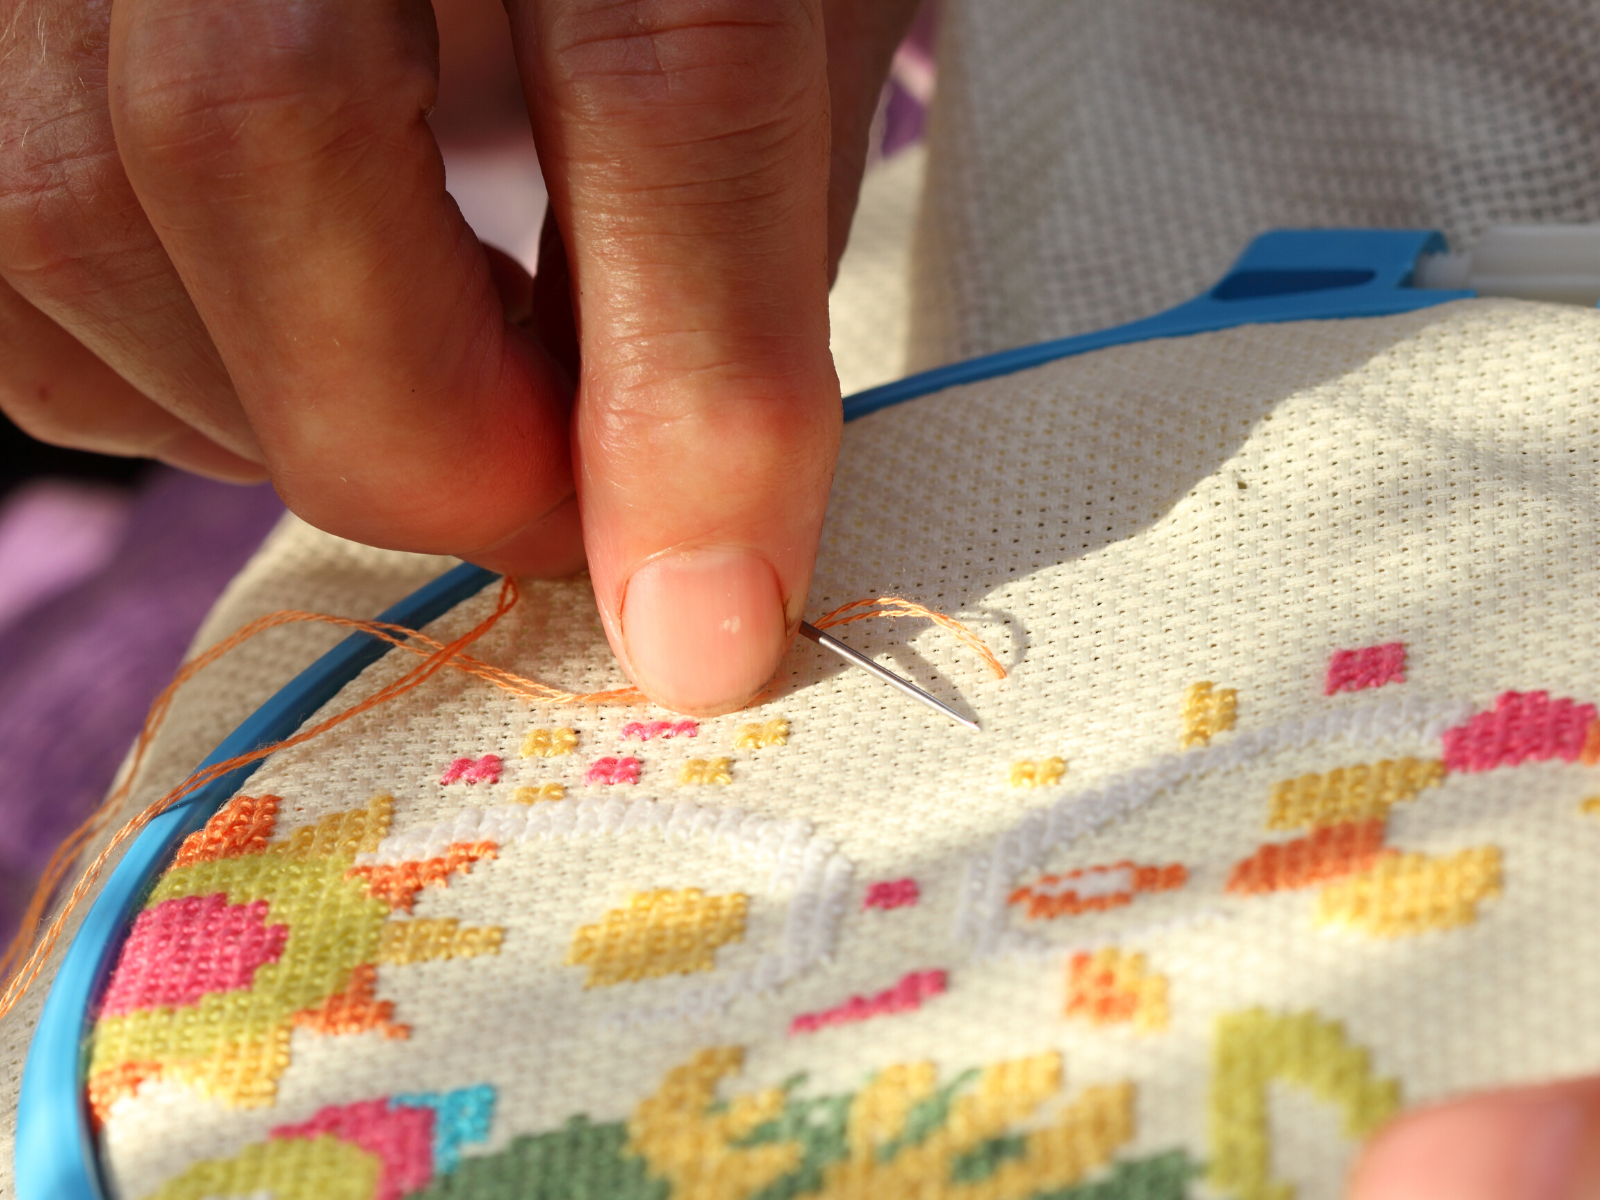
Removing embroidery involves cutting and pulling out stitches without damaging the fabric.
The process can vary depending on whether you are dealing with machine embroidery or hand embroidery.
Machine embroidery stitches are often tighter and more numerous, making them more challenging to remove.
Hand embroidery, on the other hand, usually involves fewer stitches but can still be tricky if the threads are tightly woven.
Tools You Need for Removing Embroidery
Ready to tackle those stubborn embroidery stitches?
Let's dive into the essential tools you'll need to make the process a breeze.
Curved Seam Ripper
A curved seam ripper is a must-have tool for removing embroidery. Its curved blade allows you to get under the stitches easily and cut them without damaging the fabric. This tool is especially useful for removing tight stitches and working in small areas.
Embroidery Eraser
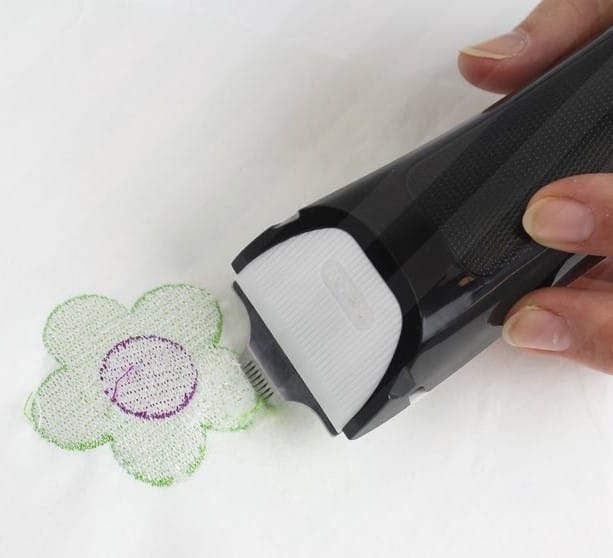
An embroidery eraser is a specialized tool designed to remove embroidery stitches quickly. It works like a small electric shaver, cutting the threads close to the fabric. This tool is ideal for large embroidery designs and can save you a lot of time.
Small Scissors
Small, sharp scissors are essential for cutting threads in tight spaces. They allow for precise cuts and are less likely to damage the fabric compared to larger scissors.
Removing Embroidery
Ready to say goodbye to that old embroidery design?
Follow these simple steps to remove stitches without damaging your fabric.
Step 1: Assess the Embroidery Design
Before you start removing stitches, take a close look at the embroidery design. Identify the starting and ending points of the stitches and note any areas where the threads are particularly tight or dense.
Step 2: Cut the Stitches
Using your curved seam ripper or small embroidery scissors, carefully cut the stitches. Work slowly and methodically, cutting a few stitches at a time. For machine embroidery, you may need to make multiple passes to cut through all the threads.
Step 3: Gently Pull the Threads
Once you have cut a section of stitches, gently pull the loose threads from the fabric. Use tweezers if necessary to grip the threads and pull them out without damaging the fabric.
Step 4: Remove Remaining Stitches
After you have removed the main stitches, there may still be some remaining threads embedded in the fabric. Use your embroidery eraser or a disposable razor to gently rub the fabric and remove these threads.
Step 5: Clean Up the Fabric
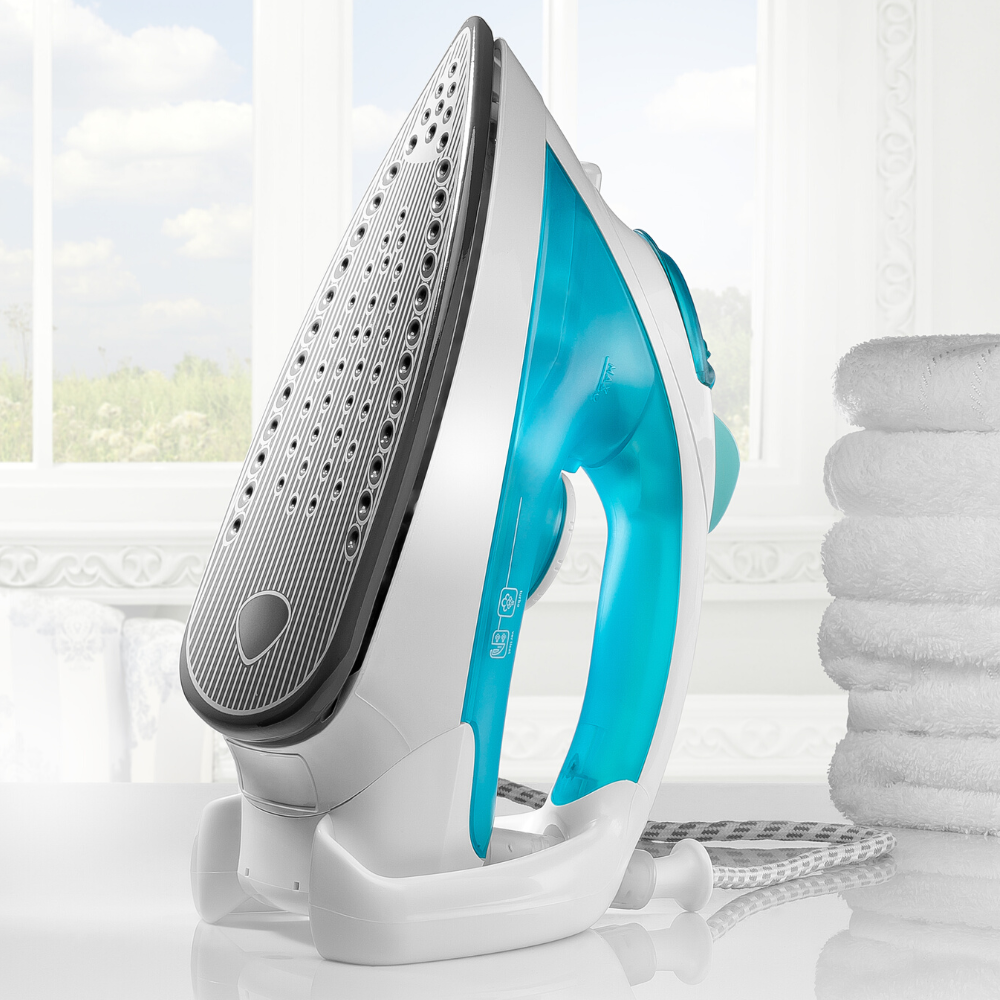
Use a lint roller to pick up any loose threads and clean the fabric. If there are visible holes or stitch marks, use a steam iron to gently press the fabric and minimize these imperfections.


Tips for Removing Embroidery from Fabrics
Removing embroidery can be a daunting task, especially when dealing with different types of fabrics.
Here are some tailored tips to make the process easier and safer for your material.
Cotton
Cotton is a durable fabric that can withstand most embroidery removal methods. Use a curved seam ripper or small scissors to cut the stitches, and then gently pull the threads out. Be careful not to pull too hard, as this can stretch the fabric.
Silk
Silk is a delicate fabric that requires extra care when removing embroidery. Use a small portion of the seam ripper to cut the stitches, and then gently pull the threads out with tweezers. Avoid using an embroidery eraser or disposable razor, as these tools can damage the fabric.
Linen
Linen is a sturdy fabric that can handle most embroidery removal methods. Use a curved seam ripper or small scissors to cut the stitches, and then gently pull the threads out. If there are any remaining stitches, use a disposable razor to gently rub the fabric and remove them.
Common Mistakes to Avoid
One of the most common mistakes people make when removing embroidery is rushing the process.
This can lead to mistakes and damage the fabric. Take your time and work slowly to avoid these issues.
Another frequent error is using the wrong tools.
Not all seam rippers, scissors, or tweezers are created equal.
Using tools that are too large or too sharp can easily tear delicate fabrics like silk or stretch more resilient ones like cotton.
Always choose the right tool for the fabric you're working with.
Many people also forget to work from the back of the fabric.
Removing stitches from the front can distort the design and make it harder to see what you're doing. Working from the back allows you to see the stitches more clearly and reduces the risk of damaging the fabric.
Additionally, applying too much force is a common mistake.
Whether you're pulling out embroidery threads or using a seam ripper, excessive force can stretch or tear the fabric.
Gentle, steady pressure is the key to preserving the integrity of the material.
Lastly, neglecting to clean up loose threads can leave your fabric looking messy and unfinished.
Always take the time to carefully remove all remnants of the embroidery to ensure a clean, professional look.
Using Stitch Erasers for Efficient Removal
Stitch erasers are a game-changer when it comes to removing embroidery quickly and efficiently.
These tools are specifically designed to cut threads without damaging the fabric.
By using a stitch eraser, you can significantly speed up the entire process, making it the fastest way to remove embroidery.
Simply glide the eraser over the stitched area, and watch as the threads are easily removed, leaving your garment ready for a new piece of art.
When using a stitch eraser, it's essential to consider the fabric type and the density of the stitching.
For delicate fabrics like silk, use the eraser gently to avoid tearing the material.
On sturdier fabrics like cotton, you can apply a bit more pressure.
Always start with a small section to ensure the method works well with your specific garment.
This tool is particularly useful for large embroidery projects where traditional methods might be too time-consuming.
Role of Fabric Type in Embroidery Removal
Understanding the fabric type is crucial in the embroidery removal process.
Different materials require different approaches to ensure the stitches are removed without causing damage.
For instance, removing embroidery from a cotton shirt is relatively straightforward, but silk or linen may need more delicate handling.
Knowing your fabric type helps you choose the right tools and methods, ensuring a smooth and damage-free removal.
For heavier fabrics like denim or canvas, using small scissors or a curved seam ripper can be effective.
These tools allow you to cut threads precisely without pulling on the fabric.
On the other hand, for lighter fabrics, a more gentle approach, such as using a needle to carefully lift and cut threads, is advisable.
This attention to detail ensures that your garment remains in good condition, ready for its next sewing project or new piece of embroidery art.
Using the Wrong Tools
Using the wrong tools can make the embroidery removal process more difficult and increase the risk of damaging the fabric.
Make sure you have the right tools for the job, such as a curved seam ripper, embroidery eraser, and small scissors.
Not Assessing the Fabric
Different fabrics require different techniques and tools for safe and efficient embroidery removal.
Make sure you understand the fabric you are working with and adjust your methods accordingly.
Advanced Techniques for Removing Embroidery
Are you tired of those outdated or misplaced embroidery designs ruining your favorite garments?
Fear not!
Advanced techniques for removing embroidery can save the day and breathe new life into your wardrobe.
Whether you're dealing with a large, intricate design or a small, stubborn stitch, these innovative methods will help you remove embroidery like a pro.
Say goodbye to unsightly threads and hello to a fresh, clean canvas with these expert tips!
Using a Hair Trimmer
A hair trimmer can be an effective tool for removing embroidery, especially for large designs. The trimmer works like an embroidery eraser, cutting the threads close to the fabric. Be sure to use a trimmer with a fine blade to avoid damaging the fabric.
Using a Razor Blade
A razor blade can be used to cut stitches in tight spaces. Be very careful when using a razor blade, as it can easily cut the fabric. Use the blade to gently cut the stitches, and then pull the threads out with tweezers.
Using a Steam Iron
A steam iron can help minimize visible holes and stitch marks after removing embroidery. Use the iron on a low setting and gently press the fabric to smooth out any imperfections.
Tips for Avoiding Damage to the Fabric
Embroidery can add a beautiful touch to any fabric, but what happens when you need to remove it?
The key to a successful and damage-free embroidery removal lies in your approach.
Ready to master the art of embroidery removal without compromising your fabric?
Let's dive into these essential embroidery tips!
Work Slowly and Carefully
Rushing the embroidery removal process can lead to mistakes and damage the fabric. Take your time and work slowly to avoid these issues.
Use the Right Tools
Using the right tools can make the embroidery removal process easier and reduce the risk of damaging the fabric. Make sure you have a curved seam ripper, embroidery eraser, and small scissors on hand.
Understand the Fabric
Different fabrics require different techniques and tools for safe and efficient embroidery removal. Make sure you understand the fabric you are working with and adjust your methods accordingly.
Art of Embroidery Removal: Fabric's Best Friend
Removing embroidery can be a challenging task that involves cutting and pulling out stitches without damaging the fabric, but with the right tools and techniques, it can be done quickly and efficiently.
The process can vary depending on whether you are dealing with machine embroidery or hand embroidery.
Using tools, such as a curved seam ripper, embroidery eraser, and small scissors, can make the process much smoother.
Different fabrics require different techniques and tools for safe and efficient embroidery removal.
Working slowly and carefully, and understanding the fabric you are working with, can help you avoid mistakes and damage to the fabric.
Whether you are dealing with machine or hand embroidery, understanding the embroidery removal process and using the right tools can save you time and frustration.
Embroidery FAQ
Embroidery can add a touch of elegance and personalization to any garment, but what happens when you need to remove it?
Whether it's a design gone wrong or an outdated logo, removing embroidery can seem daunting. Fear not!
This FAQ section is here to guide you through the process with ease and precision.
From the fastest methods to the best tools, we've got all your questions covered.
Let's dive in and make your fabric look as good as new!
What is the fastest way to remove embroidery from a cotton shirt?
The fastest way to remove embroidery from a cotton shirt is to use a curved seam ripper to cut the stitches, then gently pull the loose threads out with tweezers. Use a lint roller to clean up the fabric and a steam iron to minimize any visible holes or stitch marks.
Can I use a hair trimmer to remove embroidery?
Yes, a hair trimmer can be an effective tool for removing embroidery, especially for large designs. The trimmer works like an embroidery eraser, cutting the threads close to the fabric. Be sure to use a trimmer with a fine blade to avoid damaging the fabric.
How can I avoid damaging the fabric when removing embroidery?
To avoid damaging the fabric when removing embroidery, work slowly and carefully, use the right tools, and understand the fabric you are working with. Using a curved seam ripper, embroidery eraser, and small scissors can make the process easier and reduce the risk of damage.
Looking to swiftly remove those stitches? Check out Sterling W's video!
Want even more content about creativity and art?
Be sure to check out all of our creative chronicles!
Interested in embroidery?
You might want to check out some of our other articles:
-What do you do with embroidery after you're finished?
-Is it easy to remove embroidery?
-Does removing embroidery leave a mark?
-Can you remove direct embroidery?