
From magazine pages and scraps to old artwork and hand-decorated paper, what happens when ordinary paper becomes a material for something entirely new?
Paper is one of those materials so familiar that it's easy to assume we already know what it can do.
We draw on it. Paint on it. Print on it. Fold it. Cut it. Write on it. Wrap things in it.
And, eventually, we often throw it away.
A scrap left over from another project may seem too small to matter.
An old magazine or newspaper has served its original purpose.
A piece of scrapbook paper might sit unused because the shape isn't quite right for another project.
An old drawing or painting may end up tucked into a drawer because we don't want to display it—but don't quite want to throw it away, either.
But what happens when we stop looking at those things as finished—or useless—and start looking at them as materials waiting for another possibility?
- What if an old artwork doesn't have to remain an old artwork?
- What if the scrap isn't actually the end of the project?
- What if it's the beginning of another one?
That's where our first experiment begins.
Welcome to the Materials Lab, an ongoing Creativity Chronicles exploration of materials, making, and creative possibility.
Rather than simply asking what something is supposed to be used for, we're getting curious about what happens when we experiment.
And for our first question, we're starting with something wonderfully ordinary: what else can paper become?
One answer is surprisingly small.
A bead.
But as it turns out, that's only the beginning.
The Experiment: Paper → Bead → ?
At its simplest, a paper bead begins with a strip of paper.
The strip is cut, rolled tightly around a narrow form, secured with adhesive, and—depending on the intended use—finished or sealed.
What began as a flat, flexible piece of paper becomes a small three-dimensional object.
Simple enough.
Except changing almost any part of that process can change the result.
Use a different paper, and the bead may roll or behave differently.
Change the thickness, and its shape can change.
Cut the strip differently, and you can create a completely different bead.
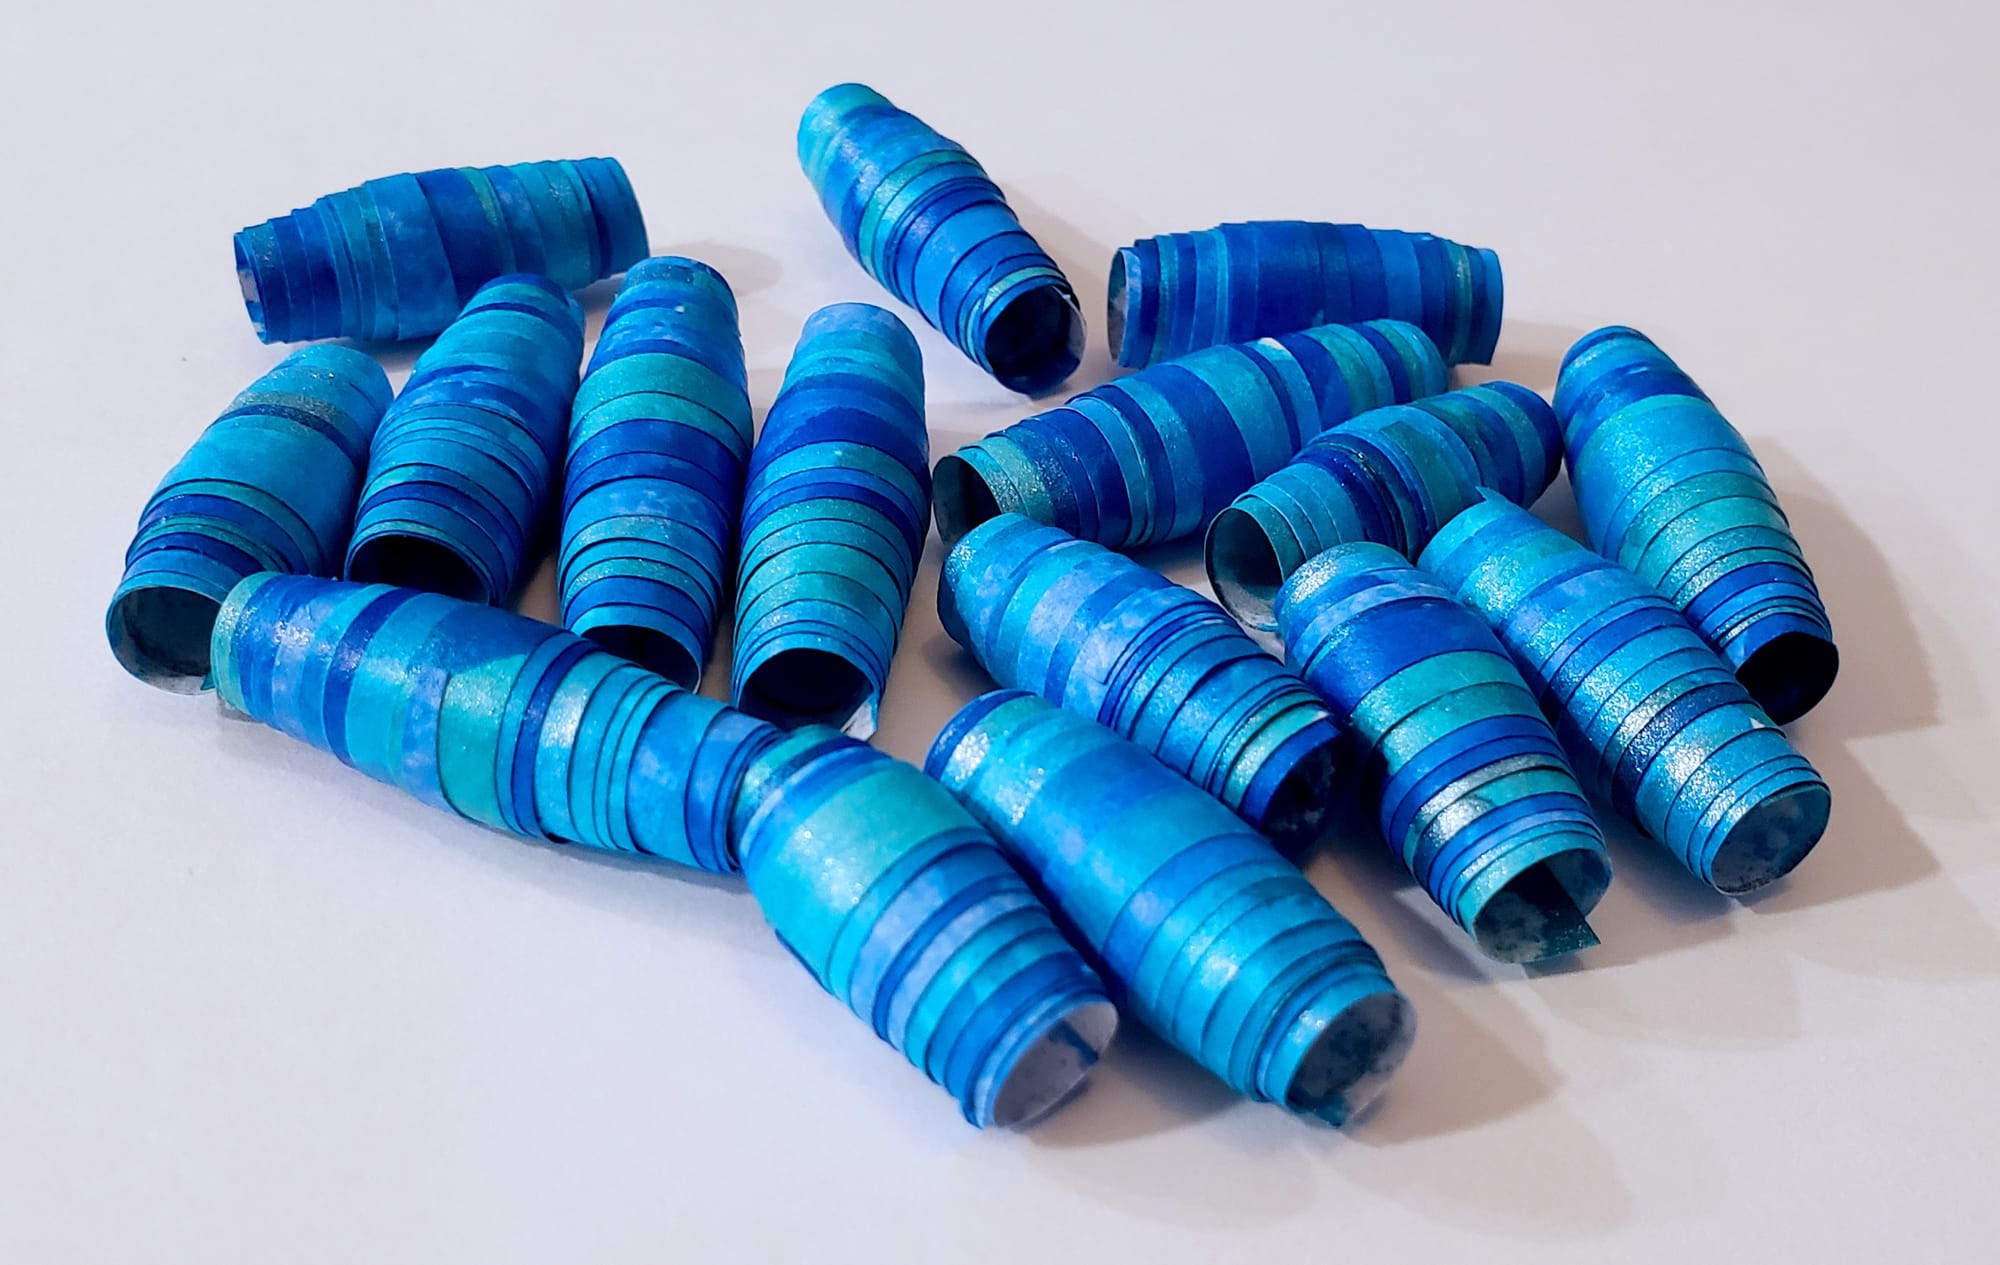
Change the colors or marks on the paper, and those colors rearrange themselves as layer after layer wraps around the center.
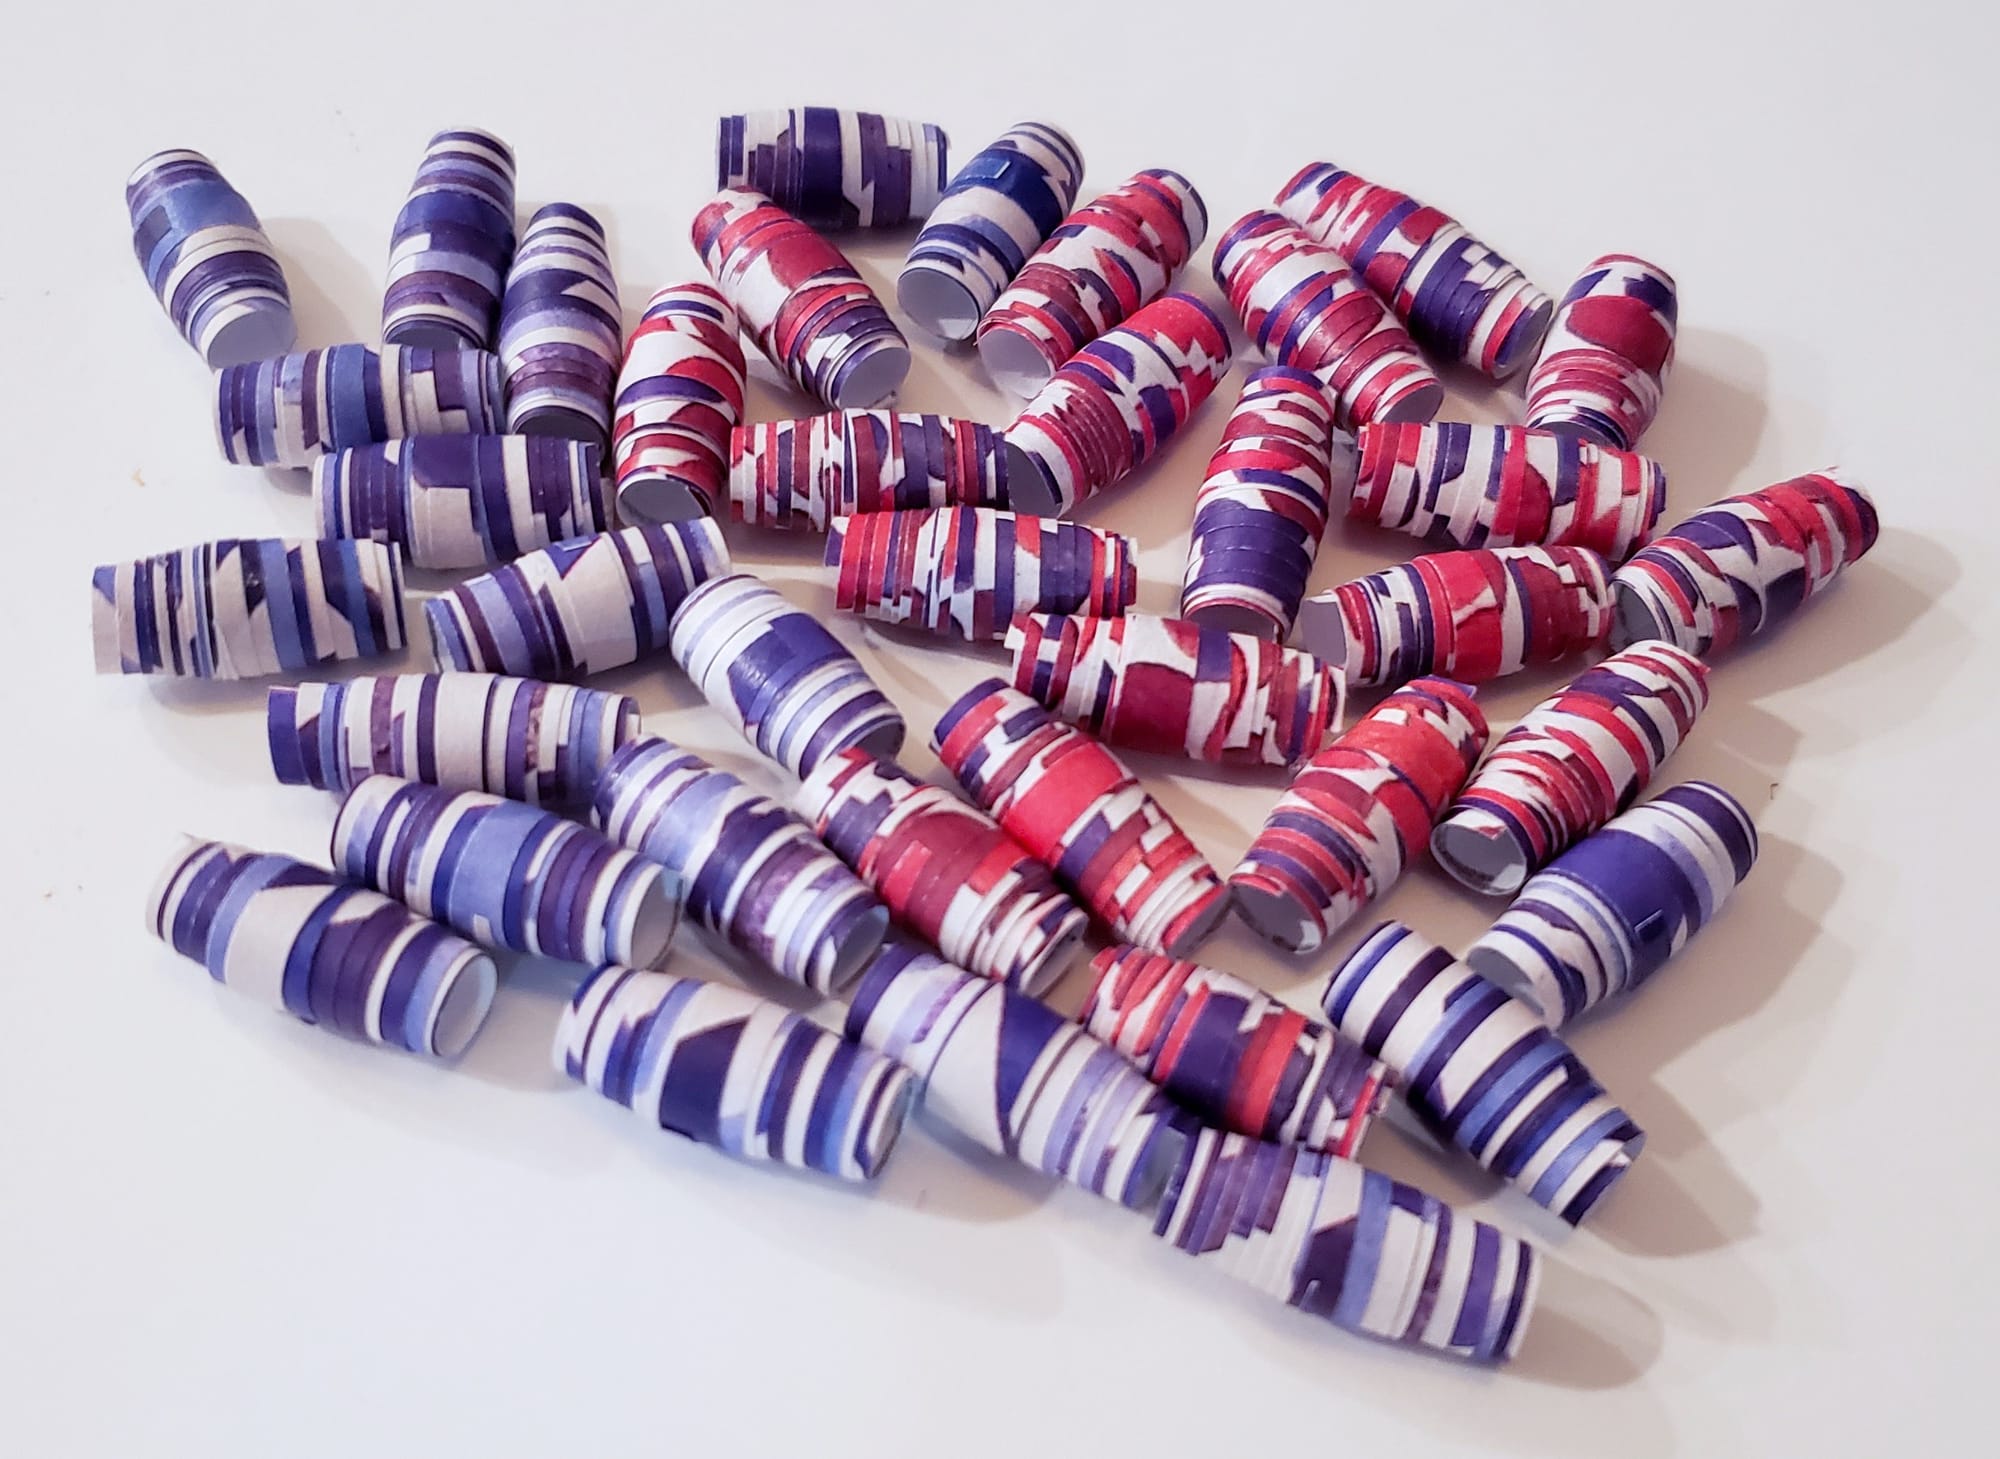
Even an image that looks one way while lying flat can become nearly unrecognizable once it's rolled.
That makes paper beads less like a single craft recipe and more like a tiny playground for material experimentation.
So we're not only asking: how do you make a paper bead?
There are plenty of tutorials that can answer that question.
We're more interested in what happens when we start changing the variables.
What are we curious about?
- What kinds of paper can become beads?
- How do different papers behave when they're cut and rolled?
- How do thickness, texture, color, and pattern affect the result?
- What happens when printed images or existing artwork are transformed into beads?
- Can we deliberately create artwork knowing that it will eventually be cut apart and rolled?
- How does the shape of the paper strip change the finished bead?
- What happens when something doesn't work quite as expected?
- And once we've transformed paper into beads, what can those beads become next?
That last question is important.
Because this experiment isn't really about proving that paper can become a bead.
We already know that it can.
The more interesting idea is transformation.
A piece of paper can become an artwork.
An artwork can become raw material.
That material can become a bead.
And that bead might become an earring, necklace, bracelet, bookmark dangle, charm, ornament, mixed-media element—or something we haven't thought of yet.
Paper → pattern → bead → object.
At each stage, we're looking at essentially the same material differently.
And that is what makes paper beads such a fitting place to begin the Materials Lab.
The experiment doesn't require the newest or most expensive supplies.
In fact, some of its most interesting possibilities begin with things we might already have: scraps, discarded papers, old artwork, magazines, newspaper, or leftover materials from something else.
We're not searching for one universally “best” paper or one perfect way to make a bead.
We're asking a more open-ended question: what changes when we try?
And then, naturally: what else can it become?
Start With the Paper You Have
One of the most appealing things about paper beads is that the experiment doesn't have to begin with a trip to the art store.
It can begin by looking around.
An old magazine.
A leftover piece of scrapbook paper.
A scrap from another project.
A drawing you don't particularly want anymore.
A sheet of paper covered in experimental marks.
Even something that was never intended to become an art material in the first place.
Paper is everywhere—and once you know that it can become a bead, it's surprisingly difficult to stop looking at scraps and wondering:
Would that roll?
That's an important distinction.
We're not necessarily searching for the best paper for making paper beads.
We're asking what different papers might contribute to the process—and whether materials we already have can become something useful, interesting, or completely unexpected.
Some papers begin with an obvious advantage.
Scrapbook paper already offers carefully designed colors and patterns.
Magazine pages can contain interesting photographs, typography, gradients, and unexpected combinations of color.
Newspaper offers text, photographs, and a completely different visual character.
But paper doesn't need to arrive beautifully printed.
A plain sheet can become its own experiment.
An old artwork can become raw material.
A scrap that seems too small or strangely shaped for one project might be exactly what another project needs.
And because only portions of the original surface remain recognizable after the paper is cut and rolled, even papers we wouldn't necessarily choose to display on their own can produce interesting beads.
That's part of the invitation here:
Start with what you have—and see what it becomes.
 Jessica Carey
 Jessica Carey
Experiment #1: Different Papers, Different Beads
I've encountered paper beads at several different points in my creative life.
I first learned the basic technique during student teaching in the 2015–2016 school year.
Years later, I returned to it independently and began experimenting with making my own decorated papers.
More recently, I revisited paper beads during Paper Bead Earrings at Perennial, taught by artist and instructor Korey Calloway.
That means there hasn't been one carefully controlled experiment where I lined up every possible kind of paper, cut each piece to precisely the same dimensions, and compared the results.
And that's okay.
The Materials Lab doesn't have to pretend an experiment happened differently than it did.
Instead, we can begin with what those different experiences have already shown—and use them to figure out what questions are worth exploring next.
 Jessica Carey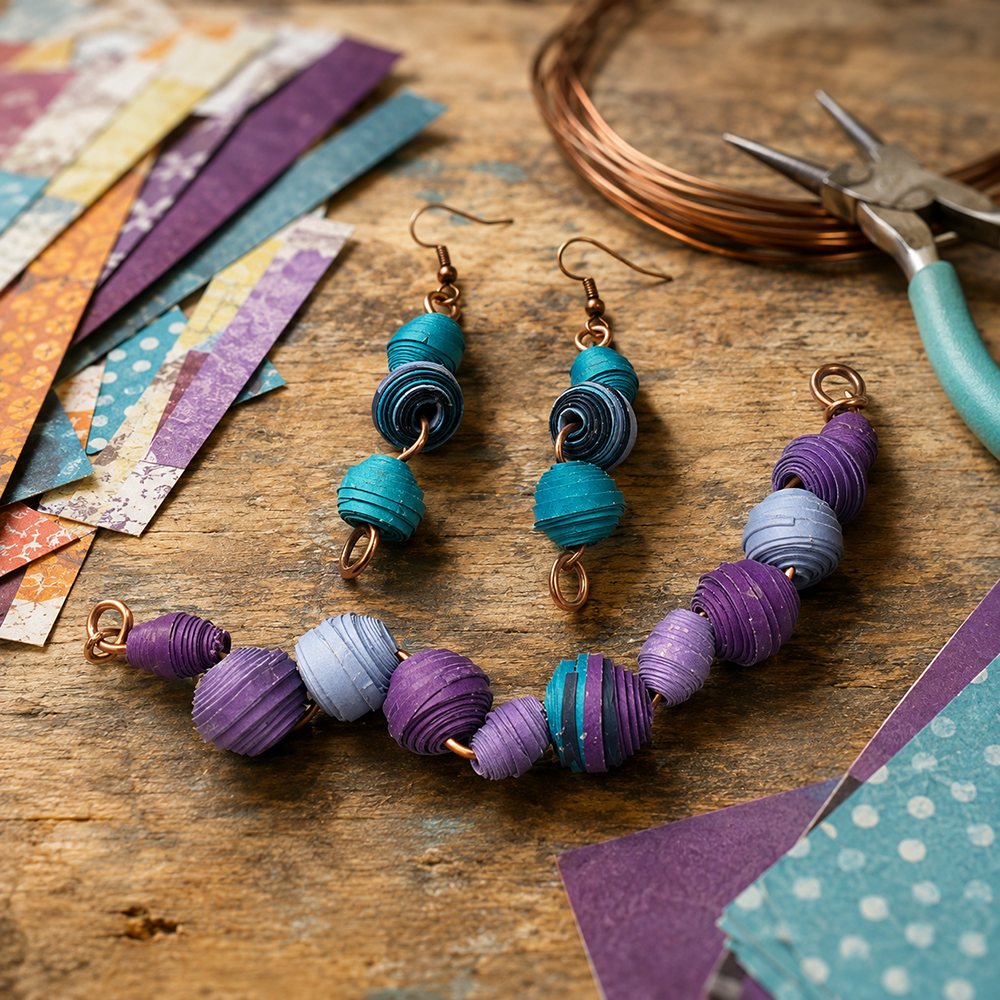
Scrapbook Paper
Scrapbook paper almost seems made for this kind of transformation.
It's already available in an enormous range of colors, patterns, illustrations, and designs, which gives you plenty to play with before you ever pick up the scissors.
But there's an interesting catch: the pattern you choose isn't necessarily the pattern you'll get.
A design that reads clearly across a flat sheet becomes fragmented when it's cut into a narrow strip.
Then the strip wraps around itself repeatedly, hiding some areas while bringing others together.
A large motif may practically disappear.
Small areas of color that didn't seem particularly important on the original sheet may suddenly dominate the bead.
And two strips cut from different areas of the exact same piece of scrapbook paper can produce beads that look surprisingly different.
That unpredictability isn't necessarily a problem.
It's part of the experiment.
Magazine Pages
Magazine paper introduces another kind of unpredictability because you're often starting with something that wasn't designed as a repeating pattern at all.
You're starting with images.
A photograph.
An advertisement.
Typography.
A person's clothing.
A landscape.
A block of color tucked into the corner of a page.
Once that page becomes a narrow strip, the original subject begins to matter less than its individual visual ingredients.
A photograph doesn't necessarily remain recognizable as a photograph.
Instead, you may get bands of color, tiny fragments of text, shifts between light and dark, or combinations you never would have deliberately designed.
It changes the way you look through an old magazine.
Instead of asking: do I like this picture?
You can start asking: do I like these colors?
Because those may be what survive the transformation.
Cardstock
Cardstock introduces another variable: thickness.
It was among the materials available during the Perennial class, alongside scrapbook paper, magazine pages, and other scraps.
And thickness matters because we're no longer evaluating paper only by what appears on its surface.
We're physically manipulating it.
We're asking it to bend.
To wrap.
To layer over itself.
To hold a new shape.
A thicker paper therefore raises useful questions that a thinner magazine page may not:
- How tightly can it roll?
- How much bulk does each layer add?
- Does it create a larger or differently shaped bead?
- Does a particular strip shape work better with it?
- At what point does thickness stop being helpful and start fighting against the process?
Those are exactly the kinds of questions worth returning to in future experiments.
Newspaper and Other Thin Papers
Newspaper presents almost the opposite possibility.
It's thin, lightweight, and visually distinctive.
Instead of polished decorative patterns, it gives us typography, columns, photographs, blank spaces, and the characteristic visual texture of a newspaper page.
And again, the interesting question isn't simply: can newspaper become a paper bead?
It's what happens when it does.
- What happens to all that tiny text once it's wrapped around itself?
- How does a thinner paper affect the size and density of the bead?
- Does it need a longer strip or additional layers to create the shape you want?
- How does it compare with glossy magazine paper or heavier scrapbook paper?
And because newspaper isn't something I've tested as extensively as some of the other papers, those questions don't need invented answers.
They can remain questions for the Lab.
That's one of the advantages of treating this as an ongoing experiment rather than a definitive guide.
Old Artwork
Then there's one of my favorite possibilities: using artwork as the paper.
Maybe it's a drawing you made years ago.
Maybe it's an experiment that didn't turn out the way you hoped.
Maybe it's a painting or color study you enjoyed making but don't particularly want to keep.
Maybe it's simply a page covered in marks.
Cutting artwork apart can initially feel strange because we're accustomed to thinking that once something becomes art, its form should somehow become permanent.
But it doesn't have to.
An artwork can become a material for another artwork.
The original composition may disappear, but pieces of it remain: colors, lines, marks, textures, gestures, mistakes, and unexpected combinations.
Instead of asking whether an old artwork is good enough to keep, paper beads offer another possibility: what if it isn't finished becoming something?
What We've Learned So Far
Even without turning this into a laboratory-controlled comparison, one thing becomes clear remarkably quickly: “paper” isn't really one material.
Thickness, texture, flexibility, surface, imagery, and pattern can all influence what happens when paper is transformed.
The Perennial class made that especially visible.
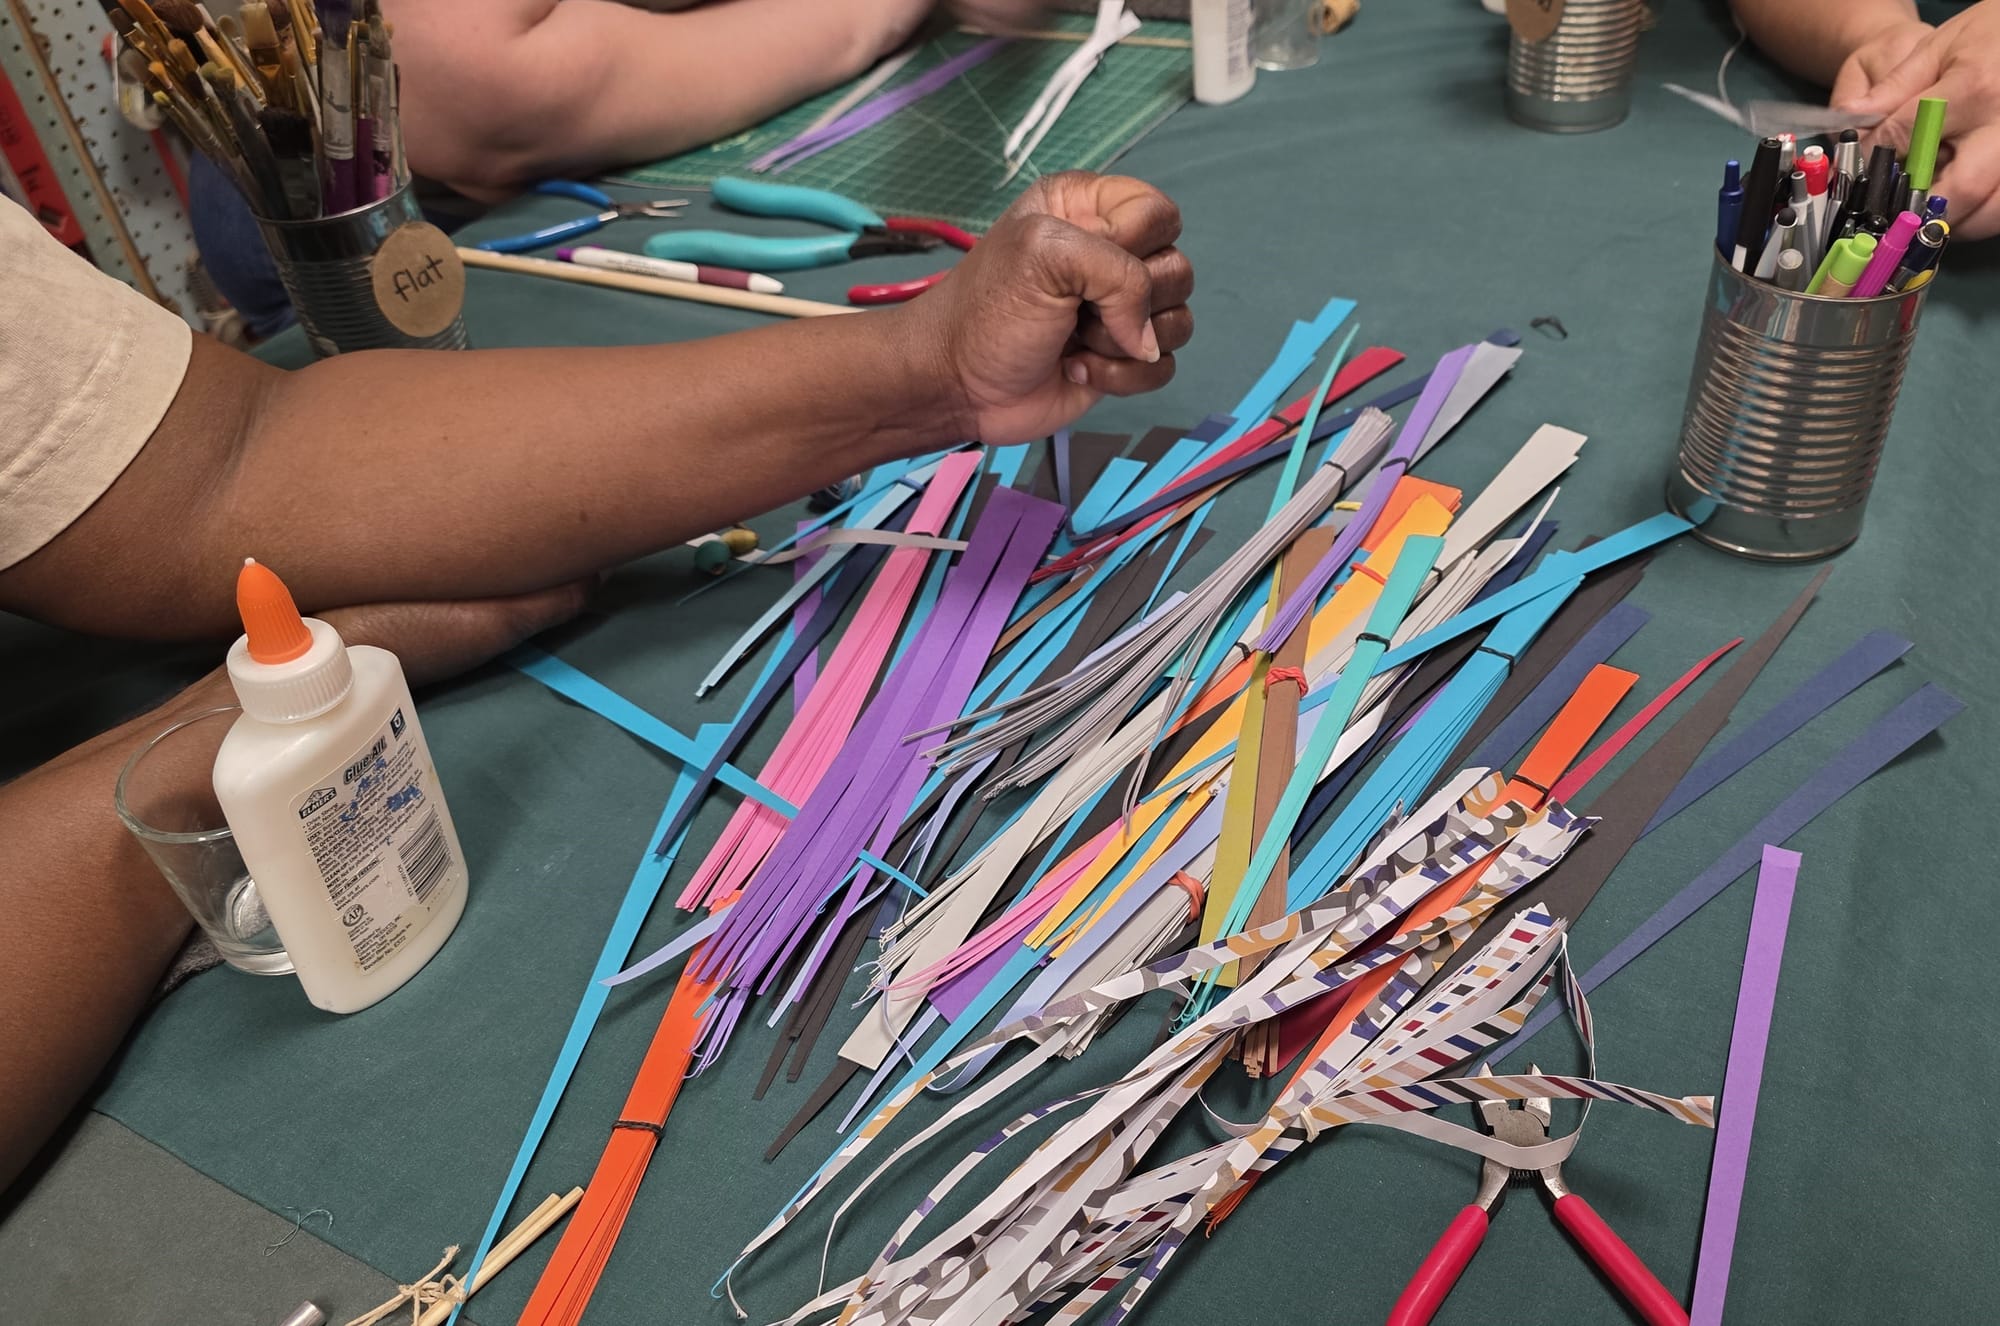
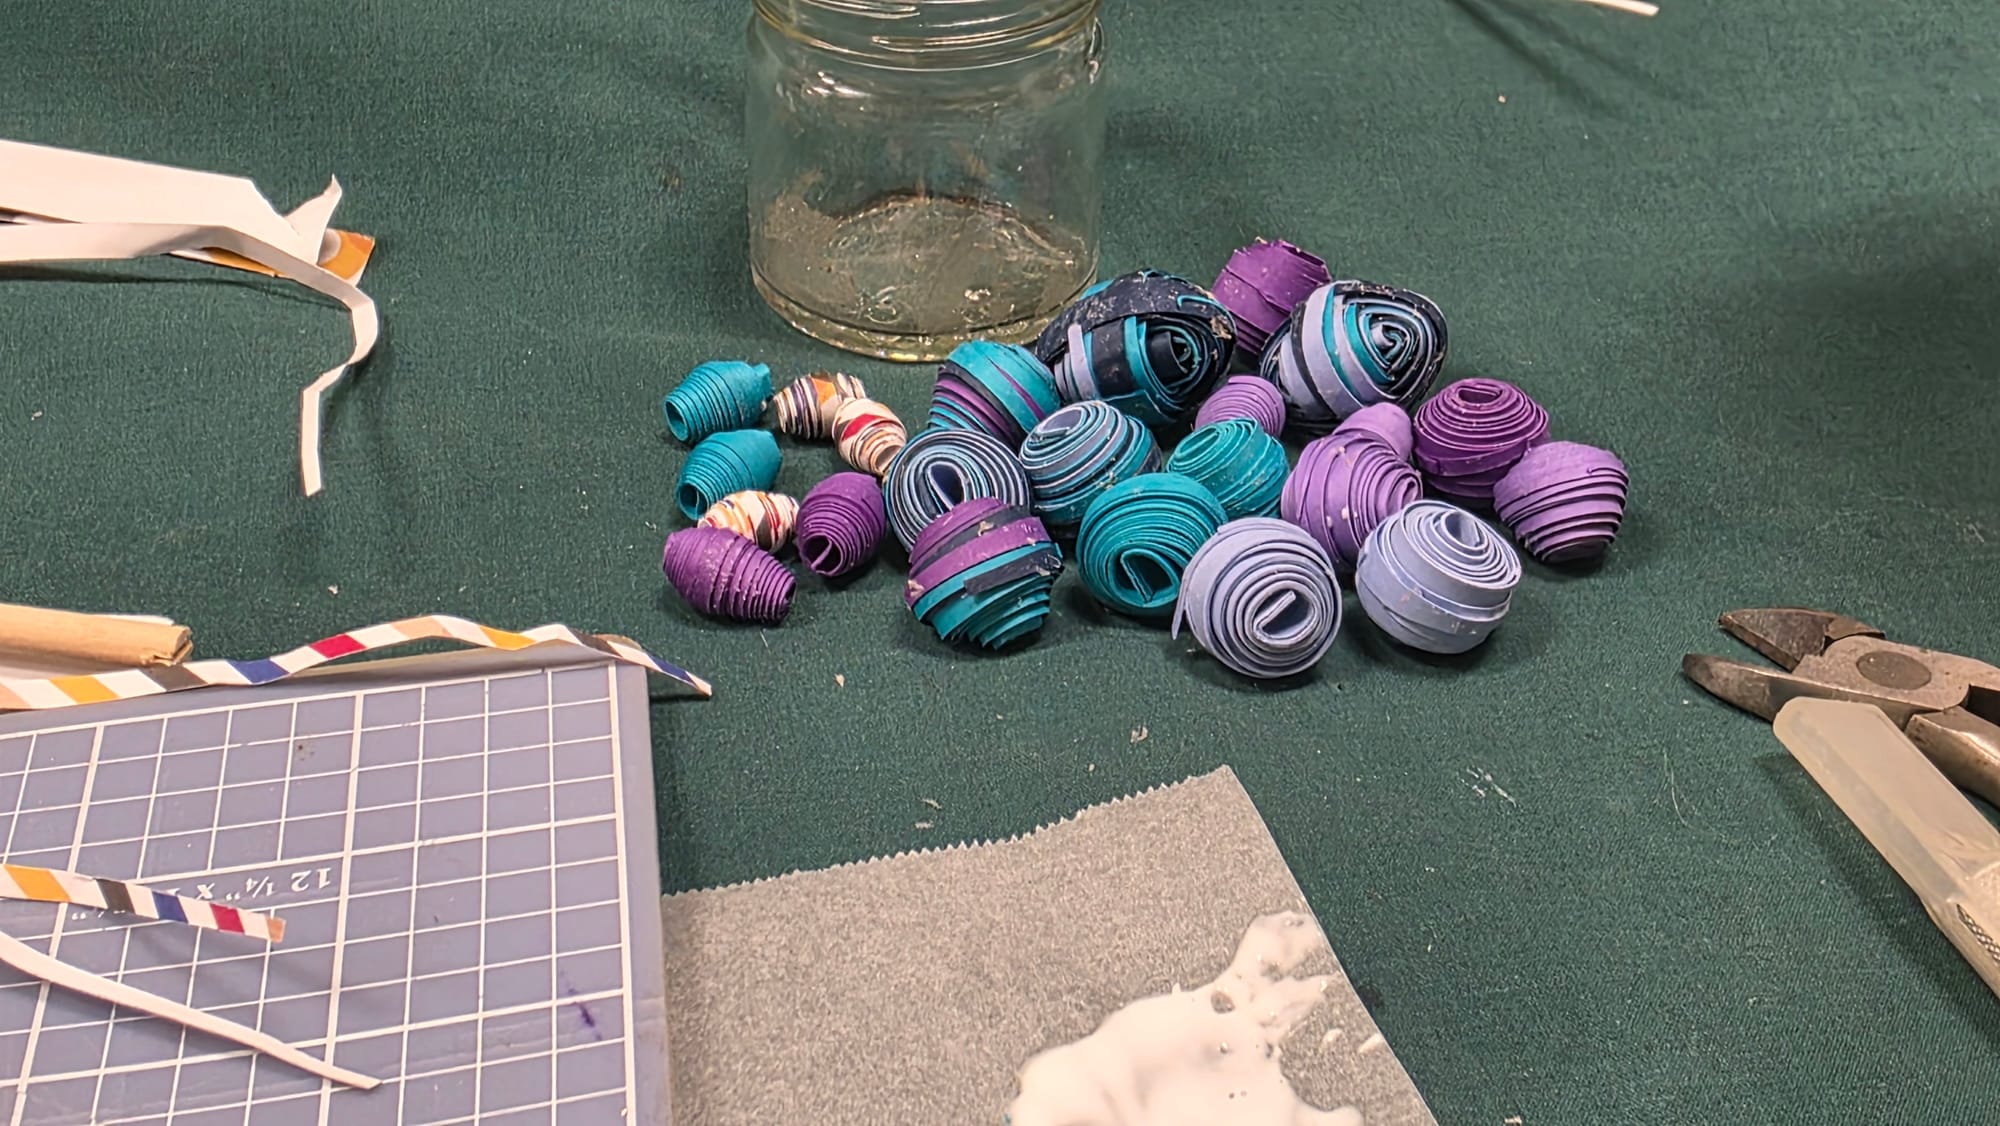
Cardstock, scrapbook paper, magazine pages, and colorful scraps were spread across the table, and even though everyone was working from the same basic idea, the resulting beads developed different sizes, shapes, colors, and personalities.
But Korey introduced another possibility that made the experiment even bigger: what if we don't roll the paper at all?
Enter the Pillow Bead
Until the Perennial class, most of my experience with paper beads involved rolling long strips around a narrow form.
Then Korey showed us pillow beads.
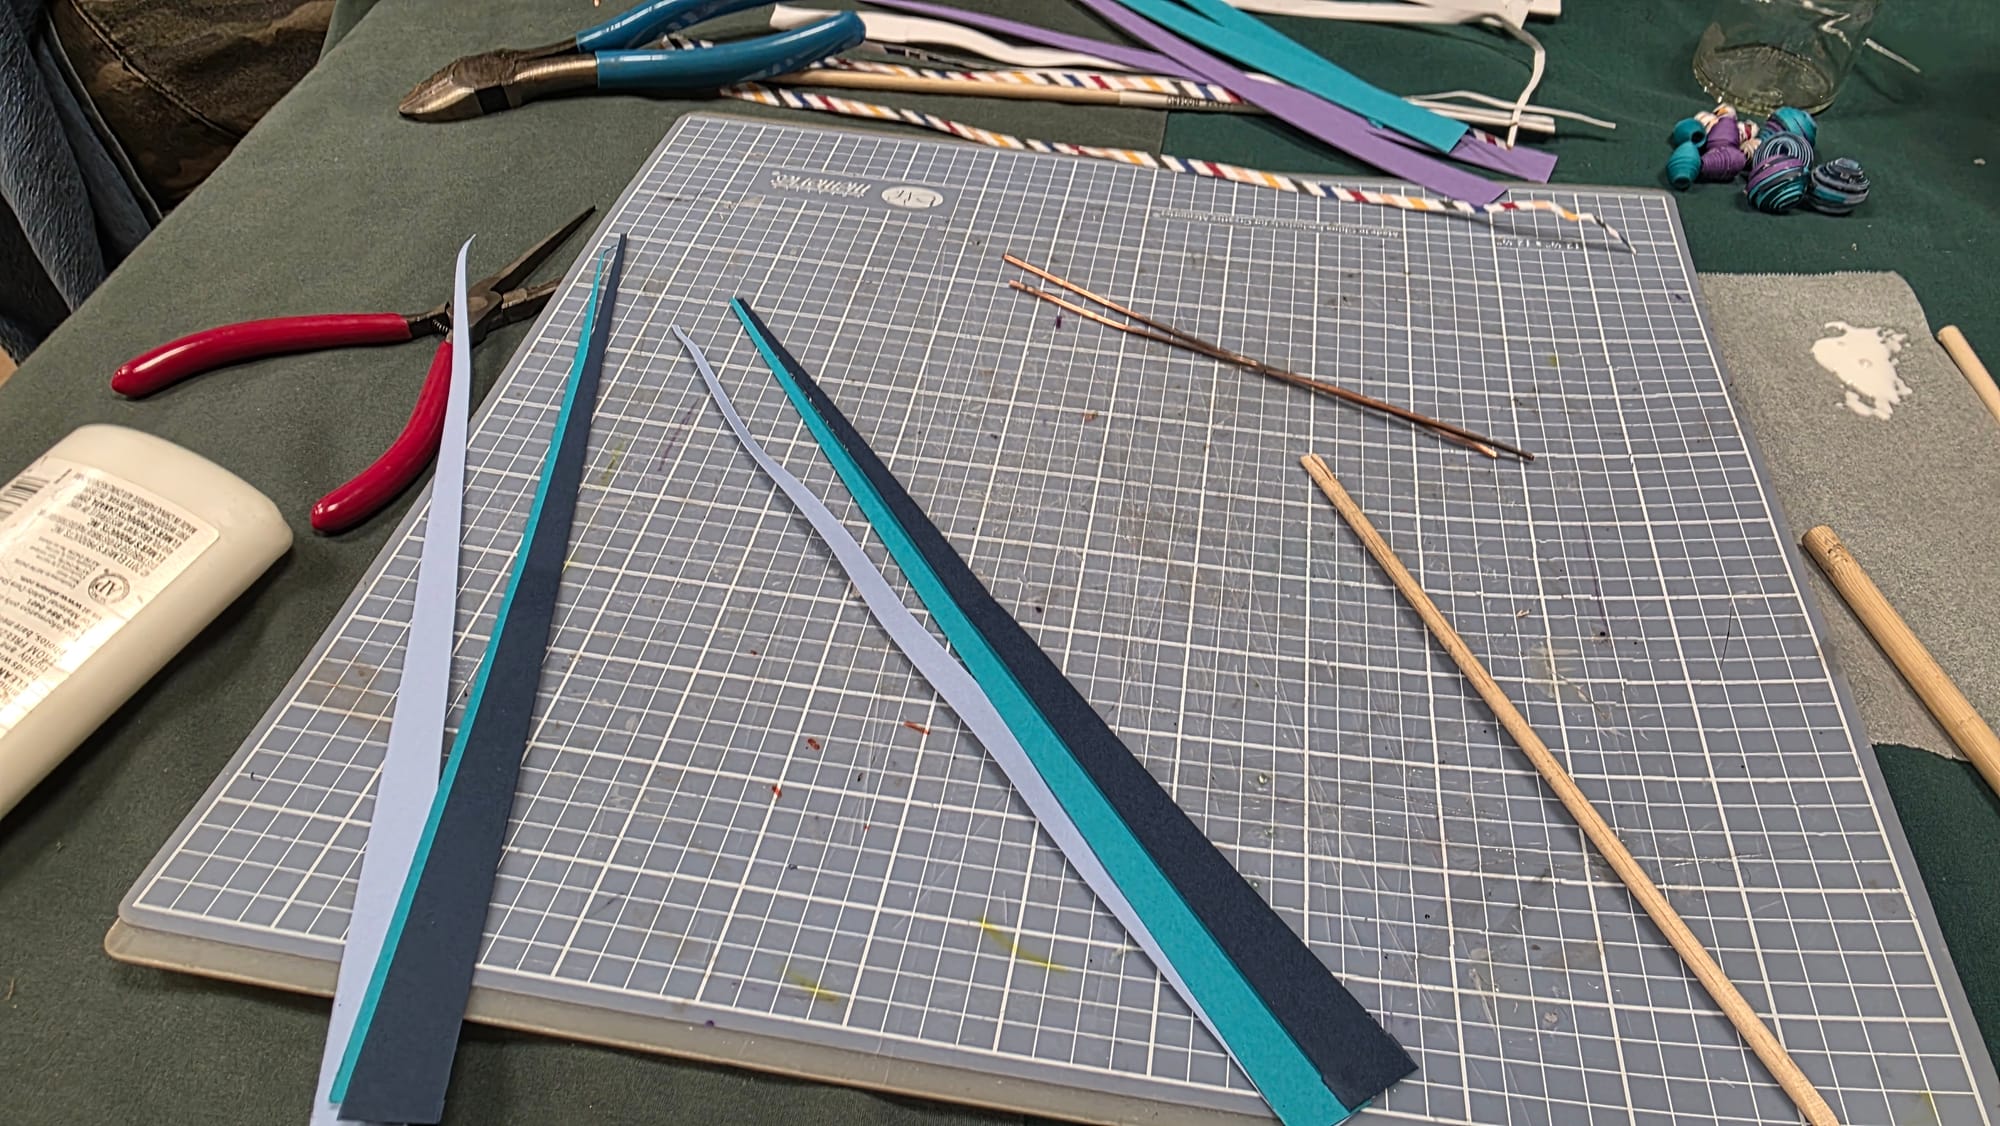
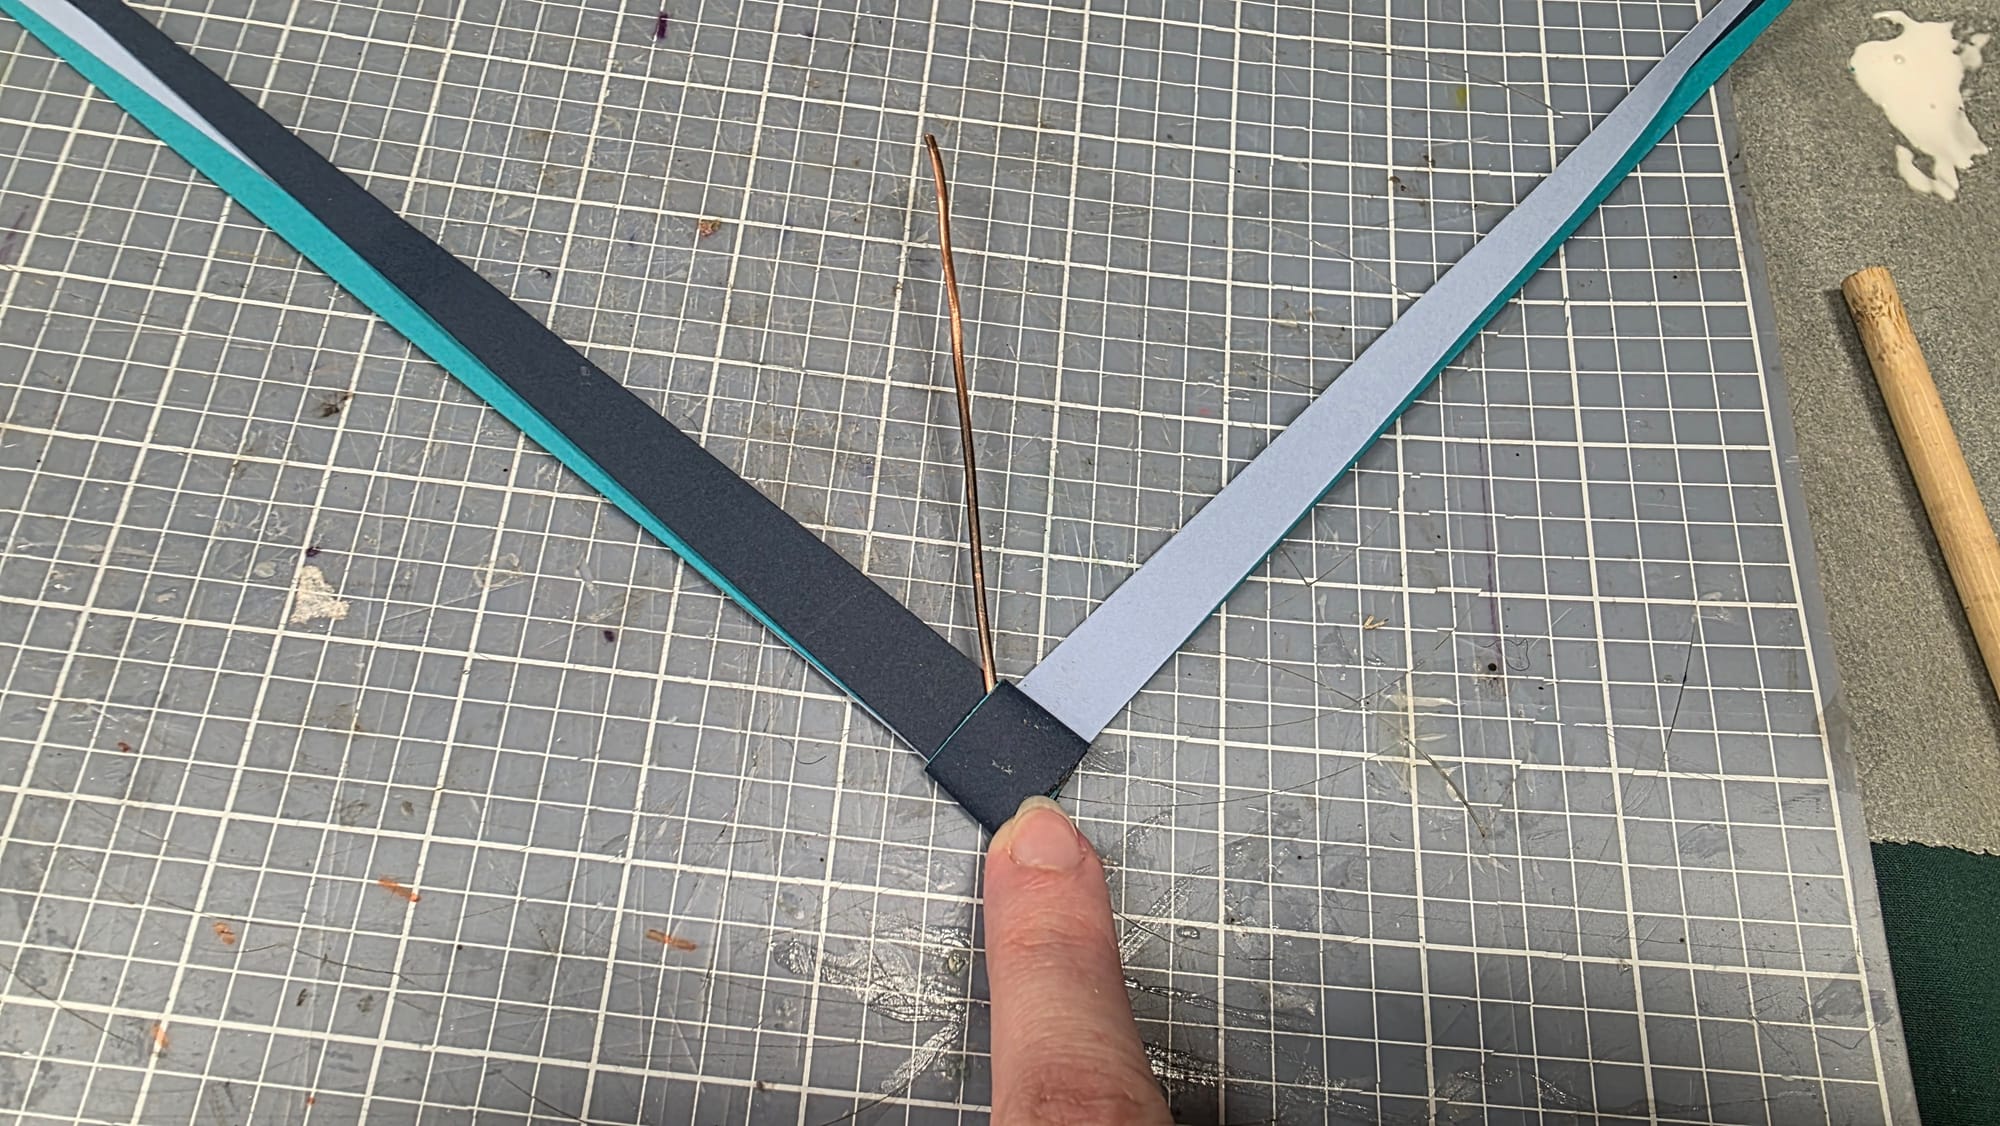
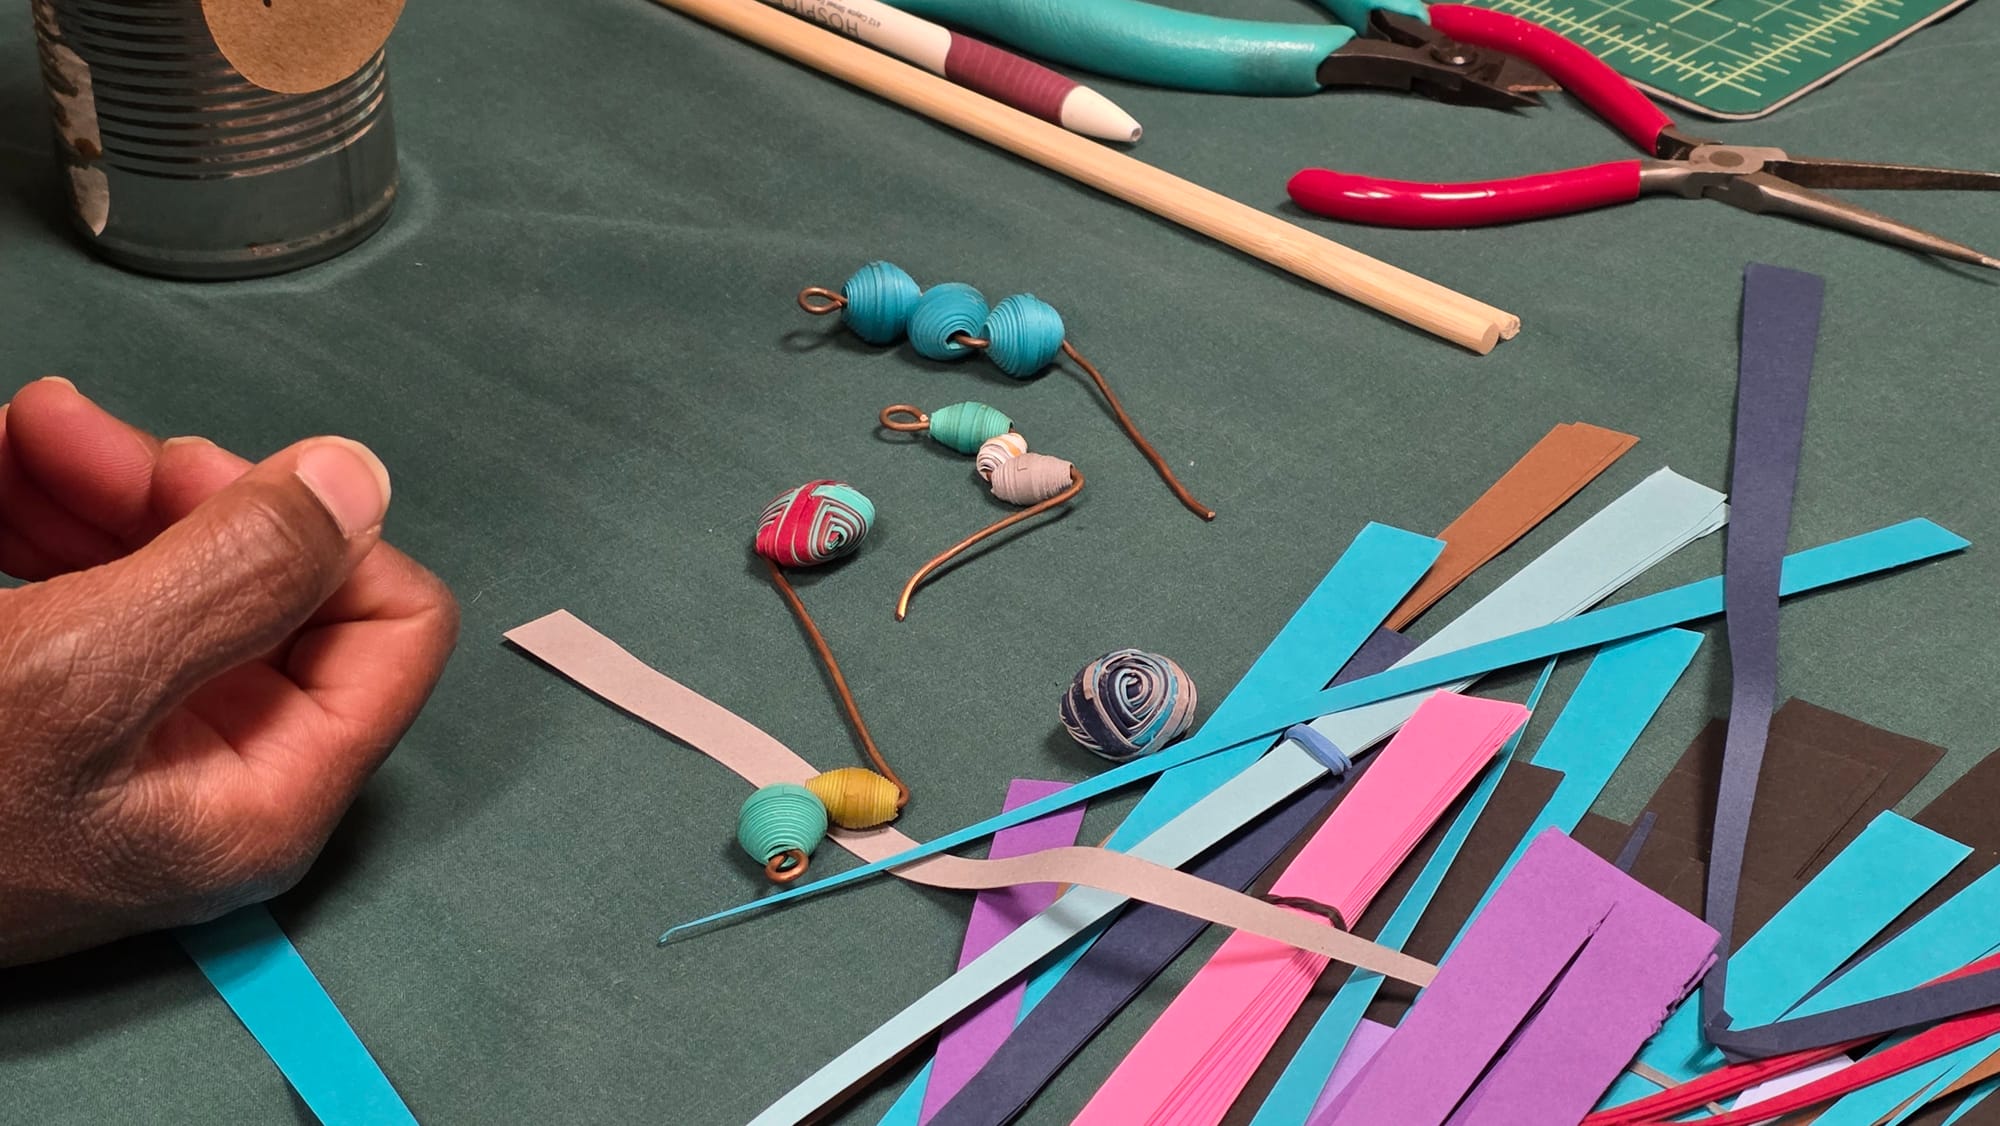
Instead of rolling a strip, a pillow bead begins with paper arranged in an L shape.
The sections are repeatedly folded over one another until the flat paper builds into a thicker, dimensional bead.
Same fundamental material.
Different manipulation.
Different result.
Suddenly, we're no longer asking only: what kinds of paper can we roll into beads?
We're asking: how many ways can paper become a bead in the first place?
And that's exactly the kind of question the Materials Lab is here for.
Can You Make the Material for Your Material?
So far, we've started with paper that already exists.
But there's another possibility: what if we make the paper specifically because we want to turn it into beads?
Years ago, when I returned to experimenting with paper beads on my own, I started playing with this idea.
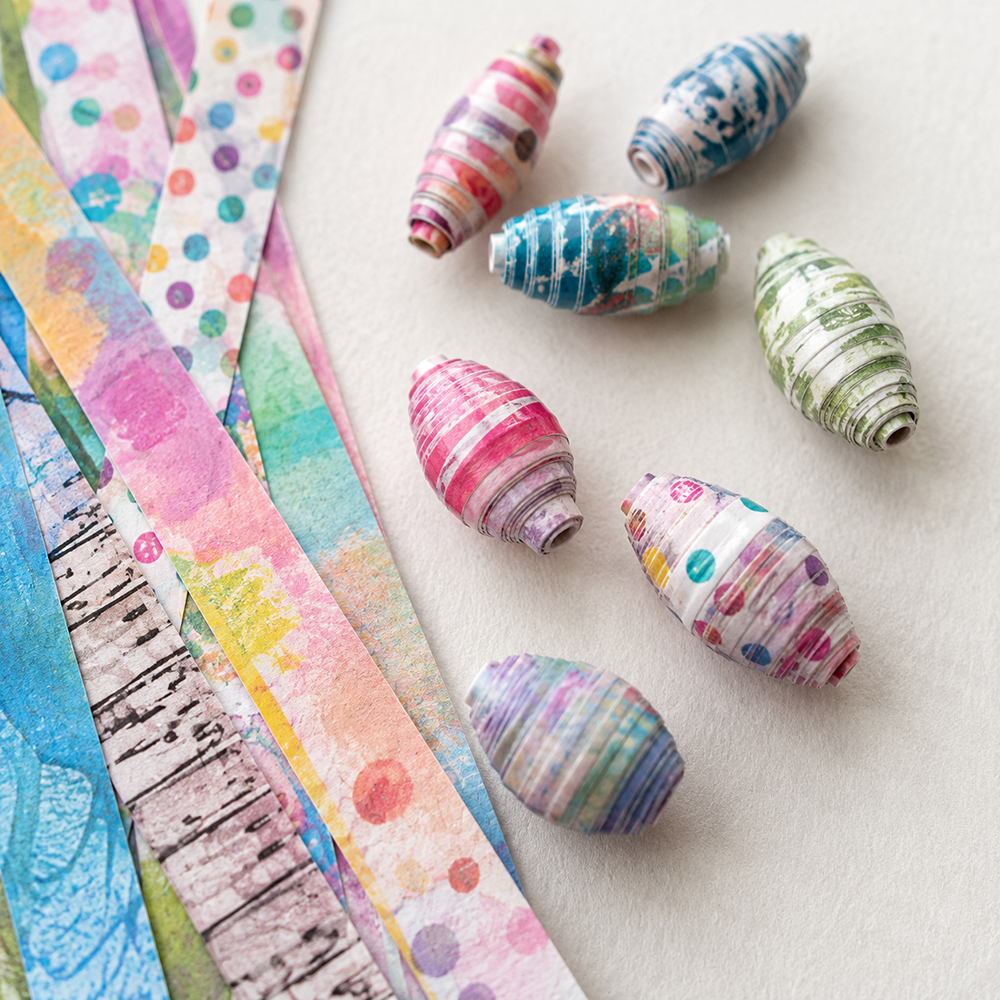
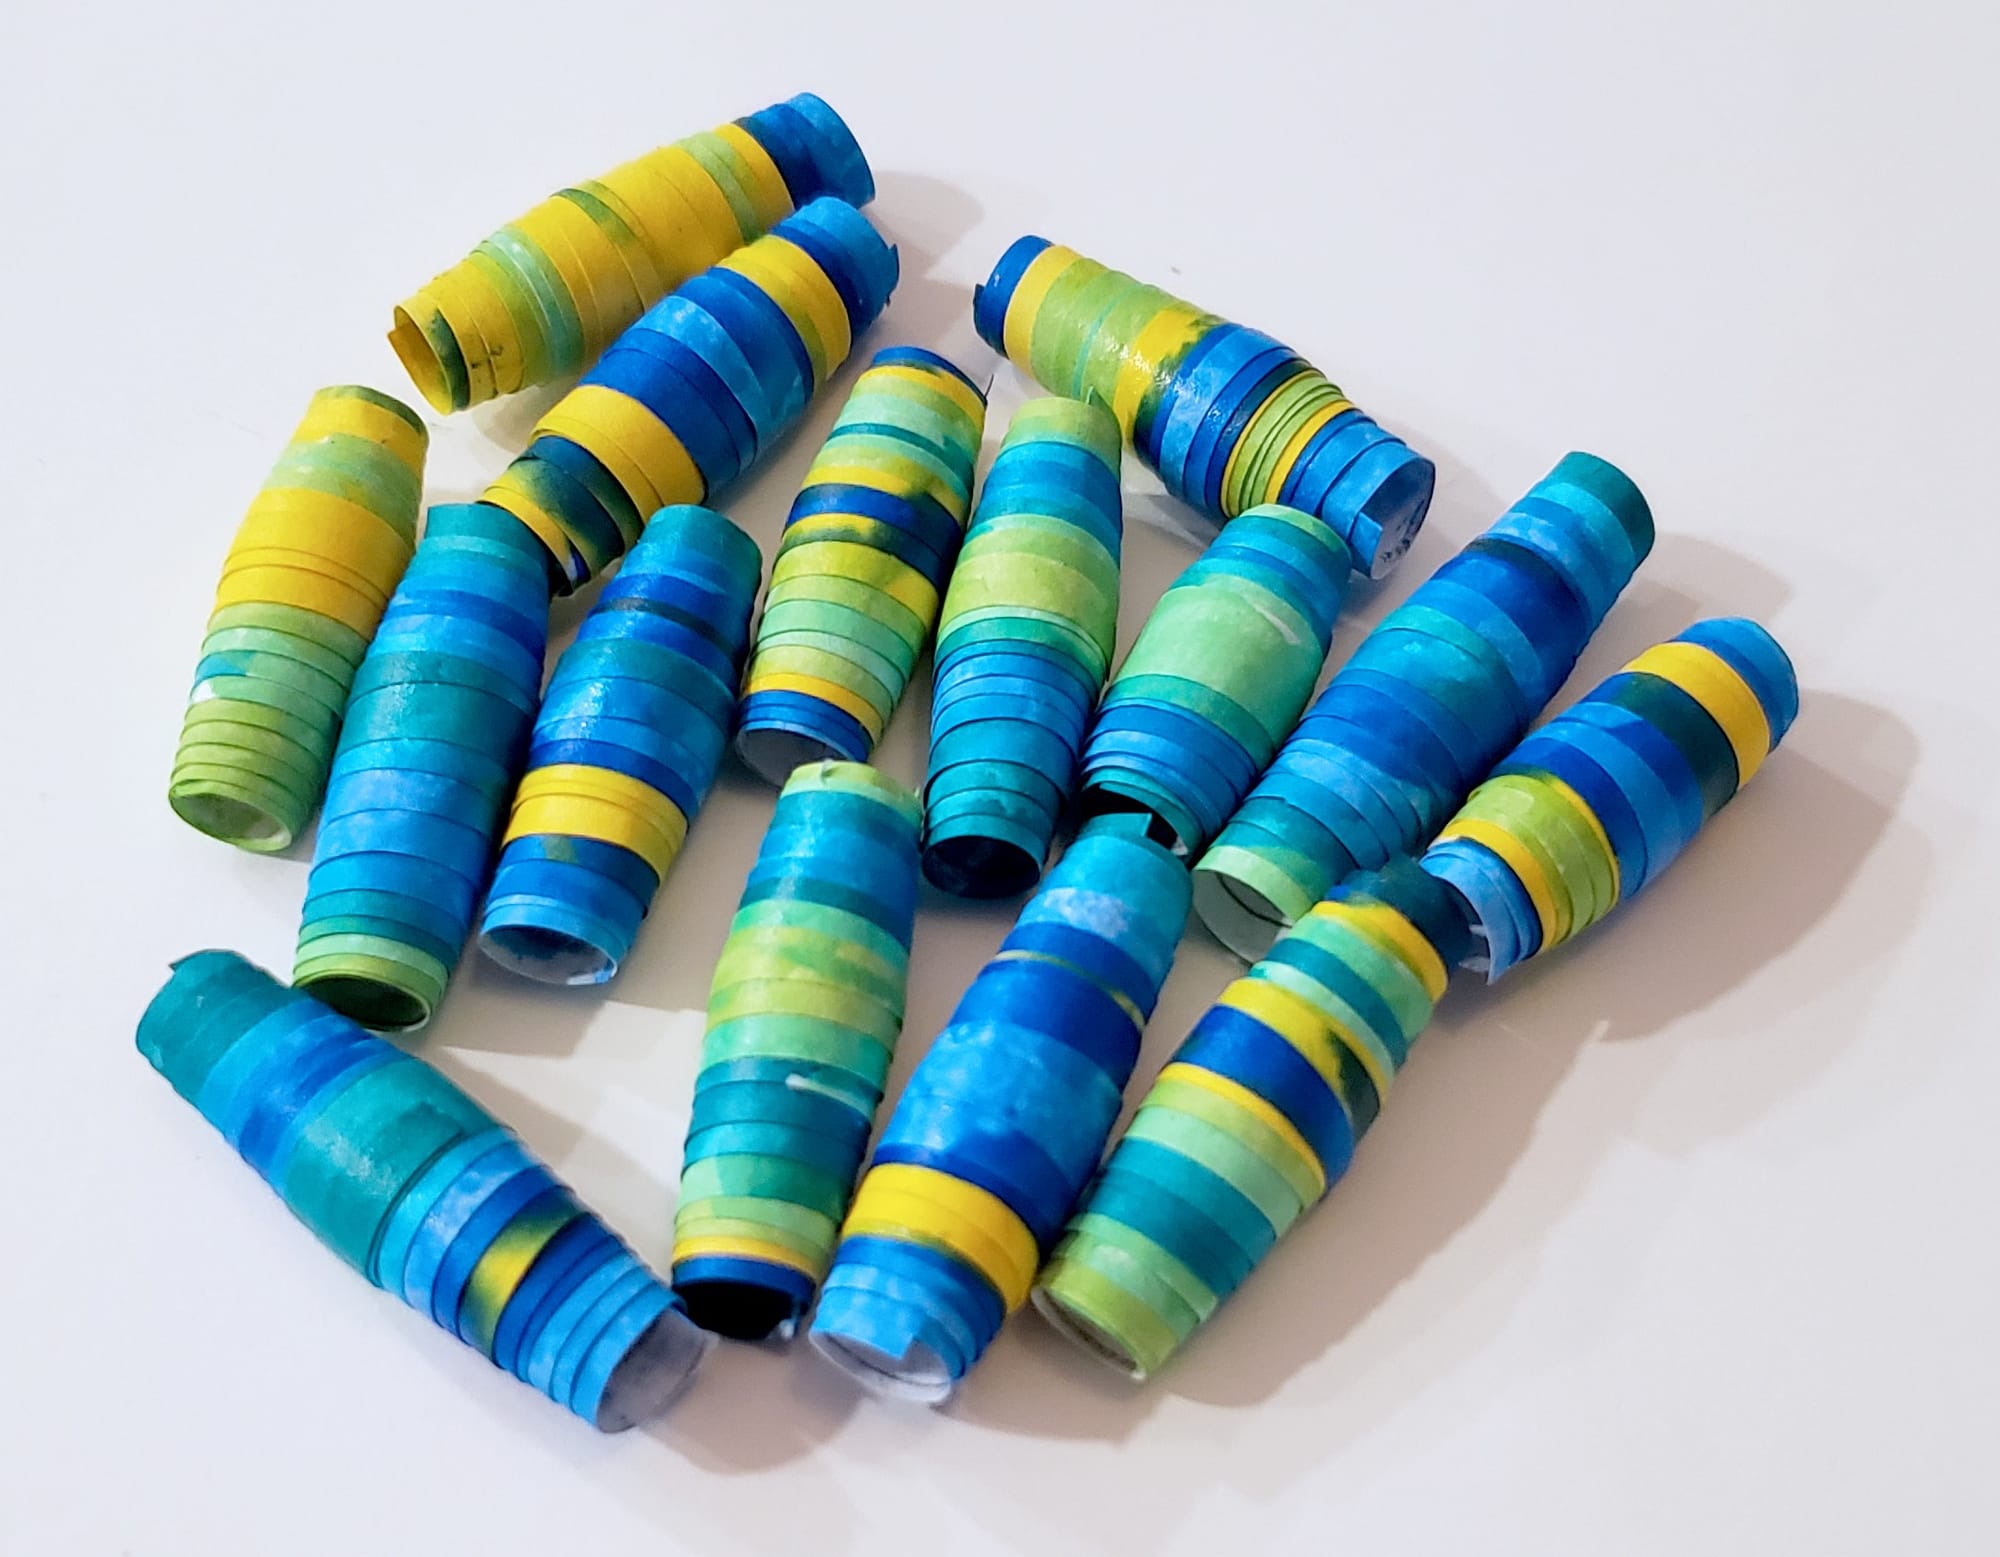
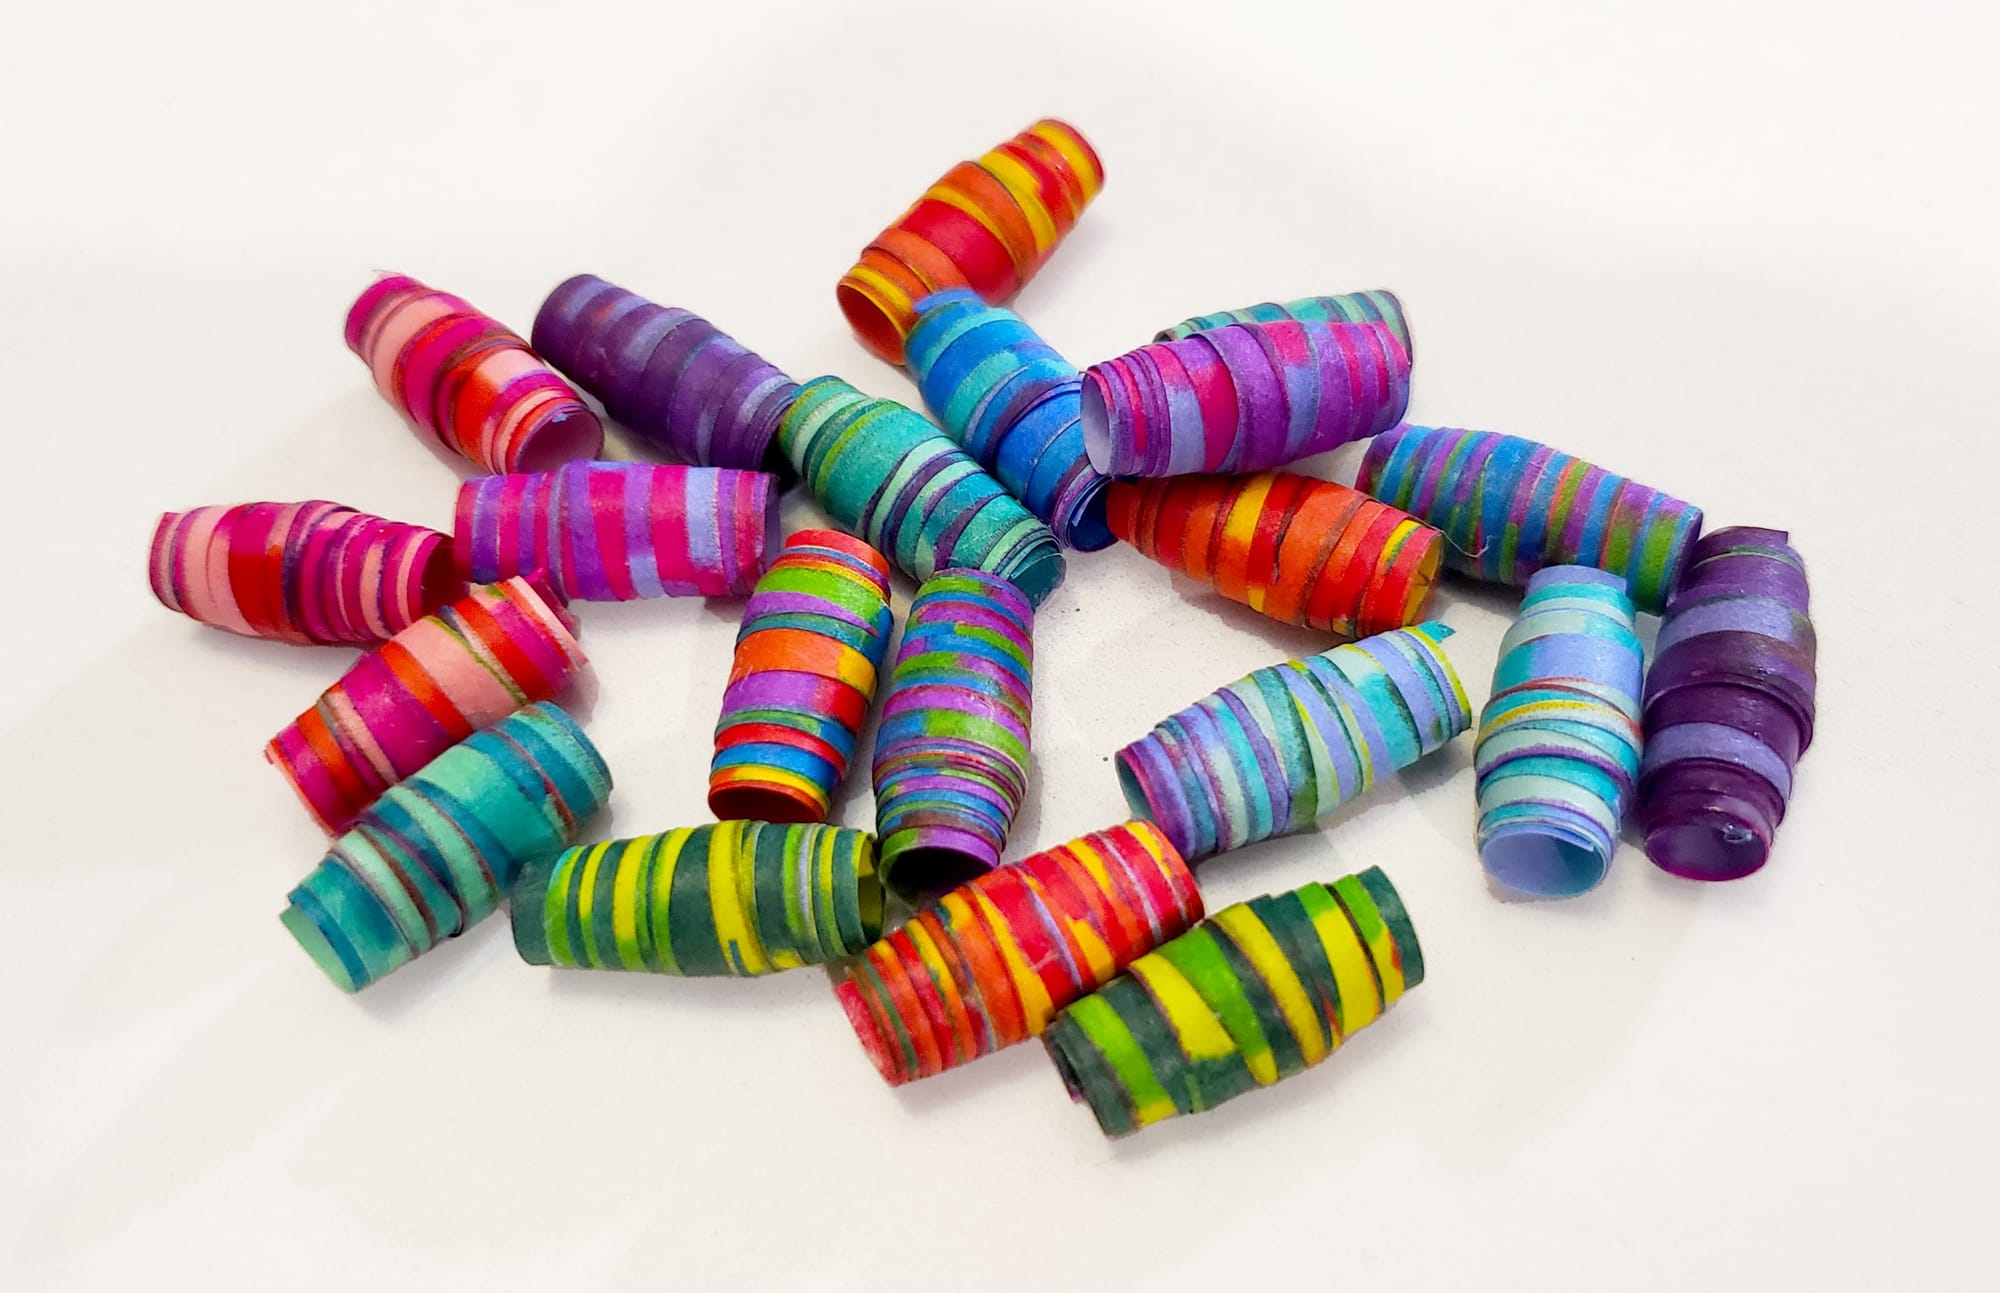
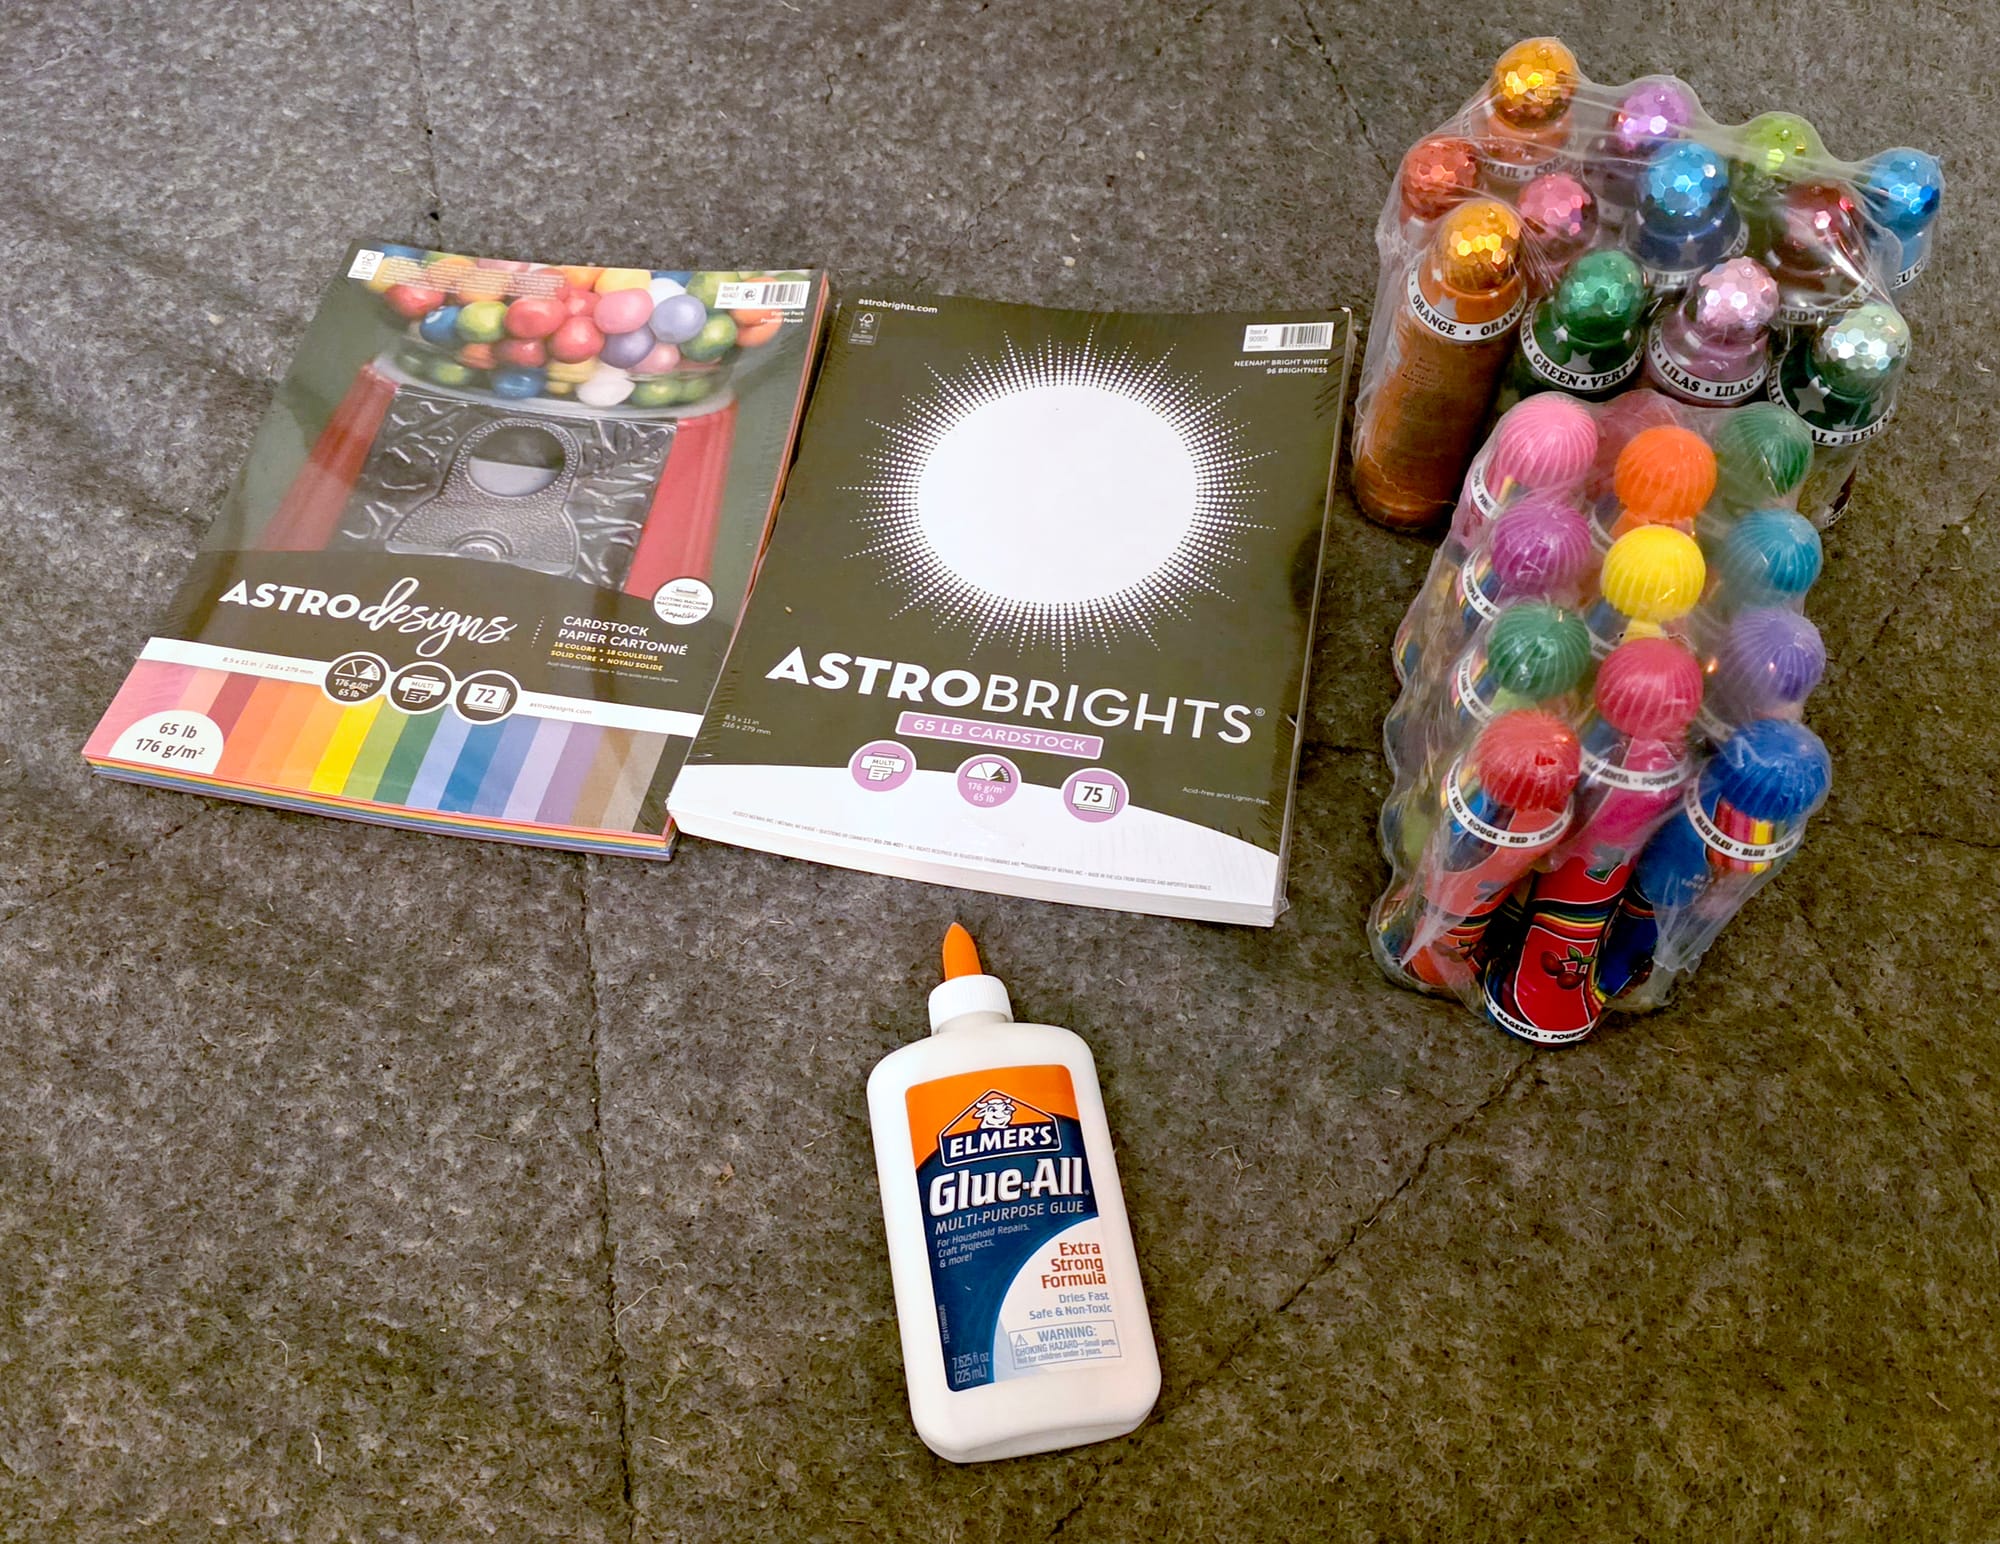
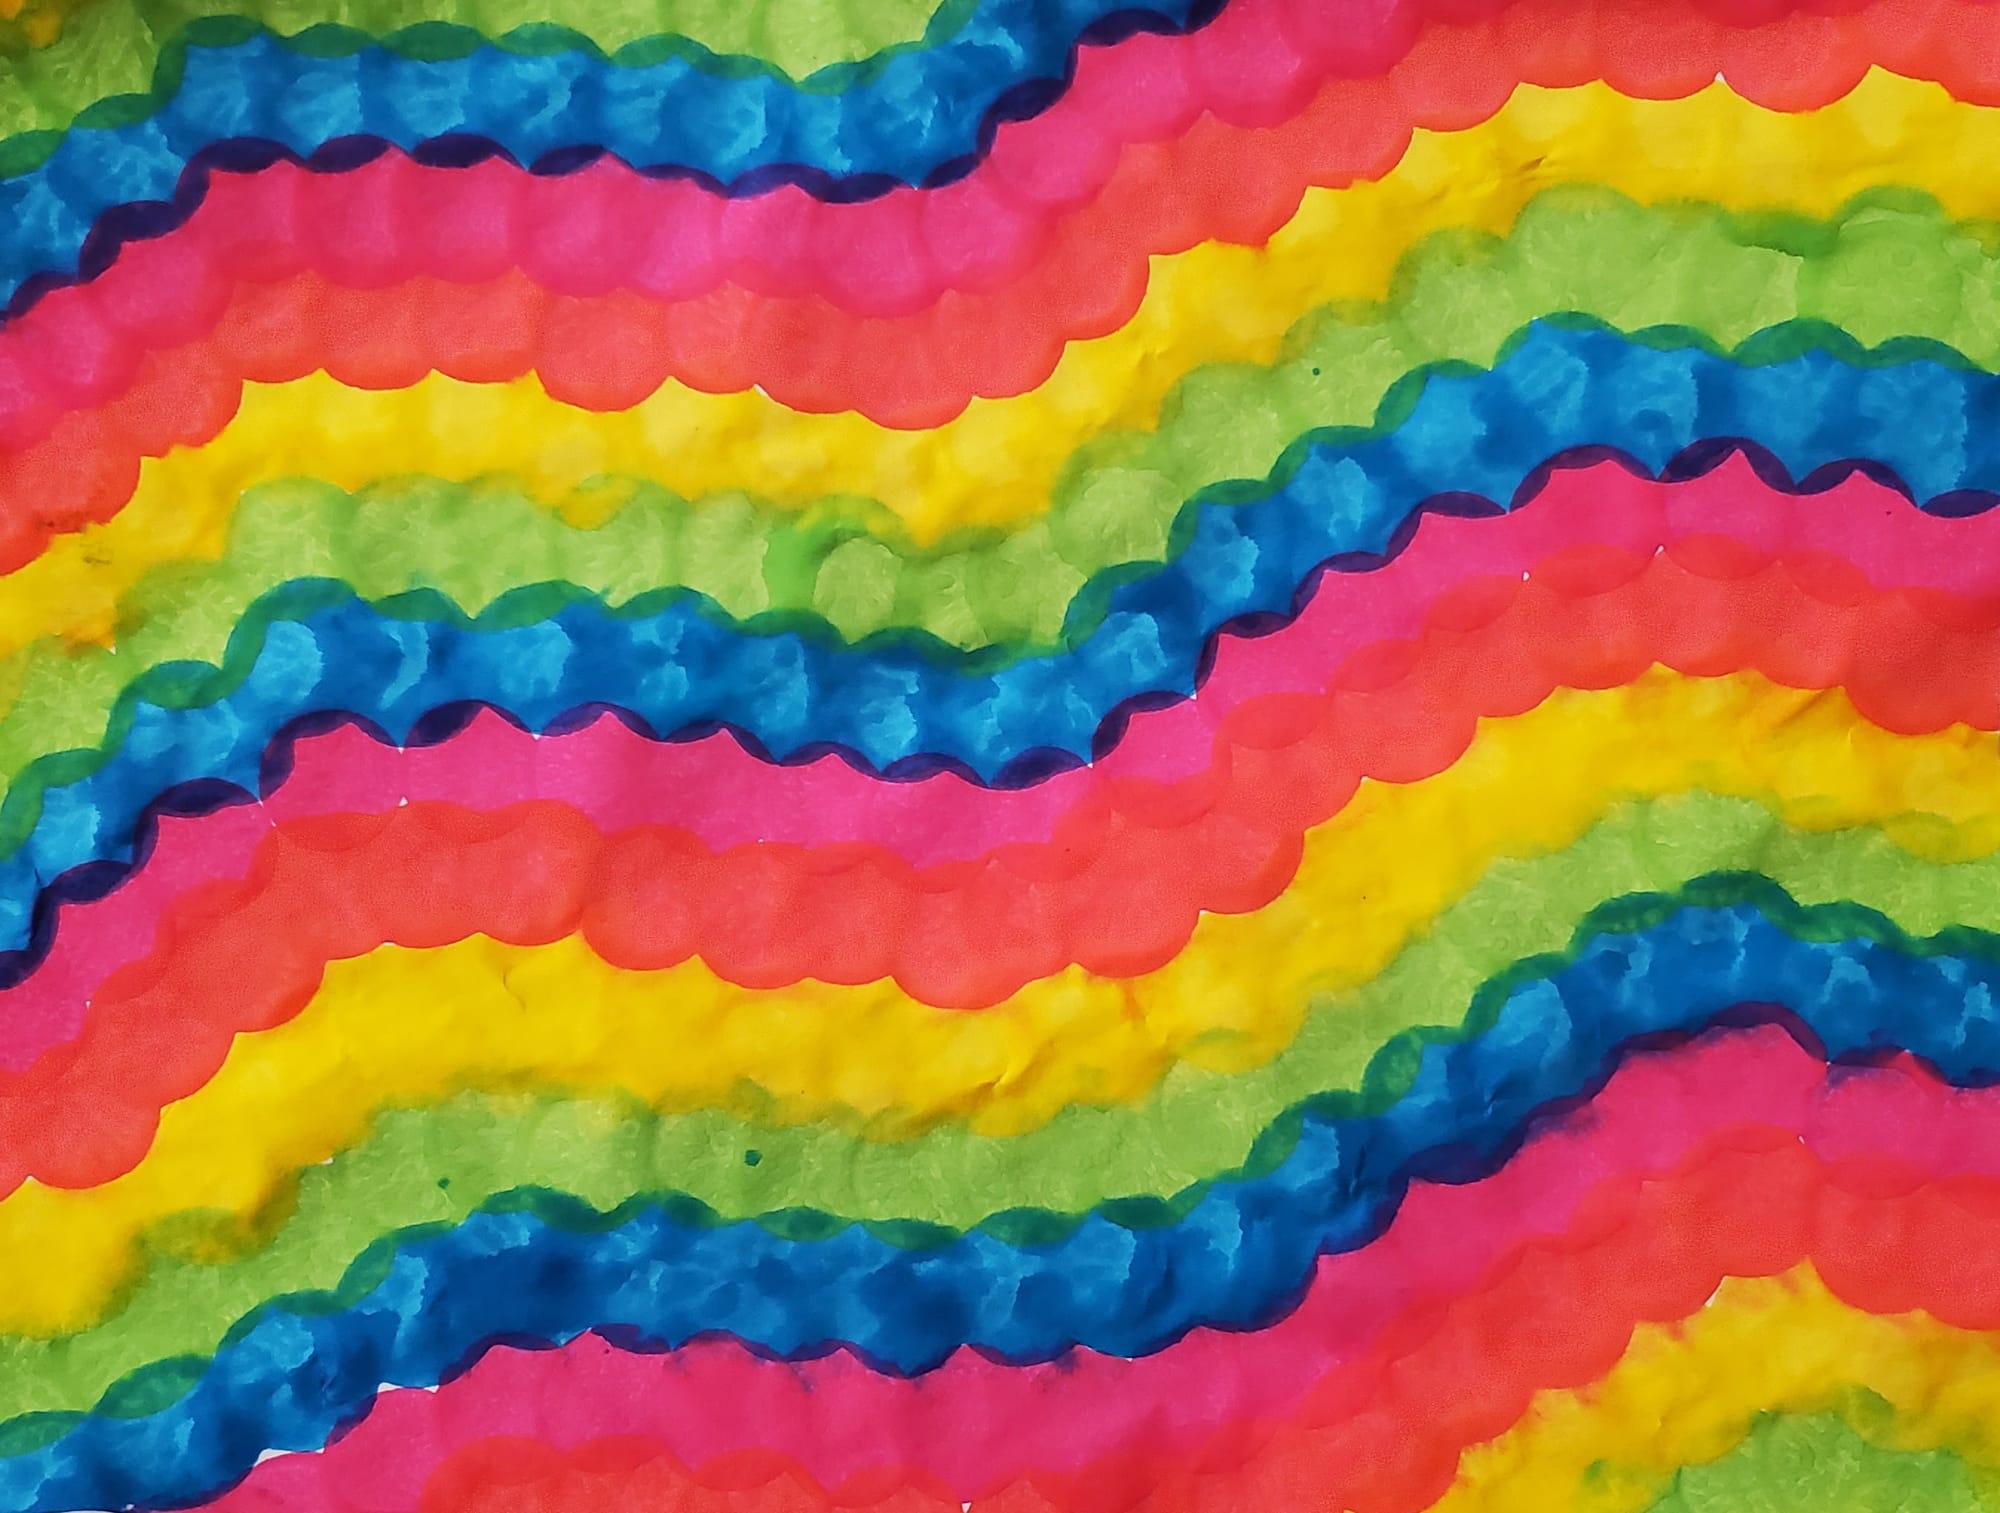
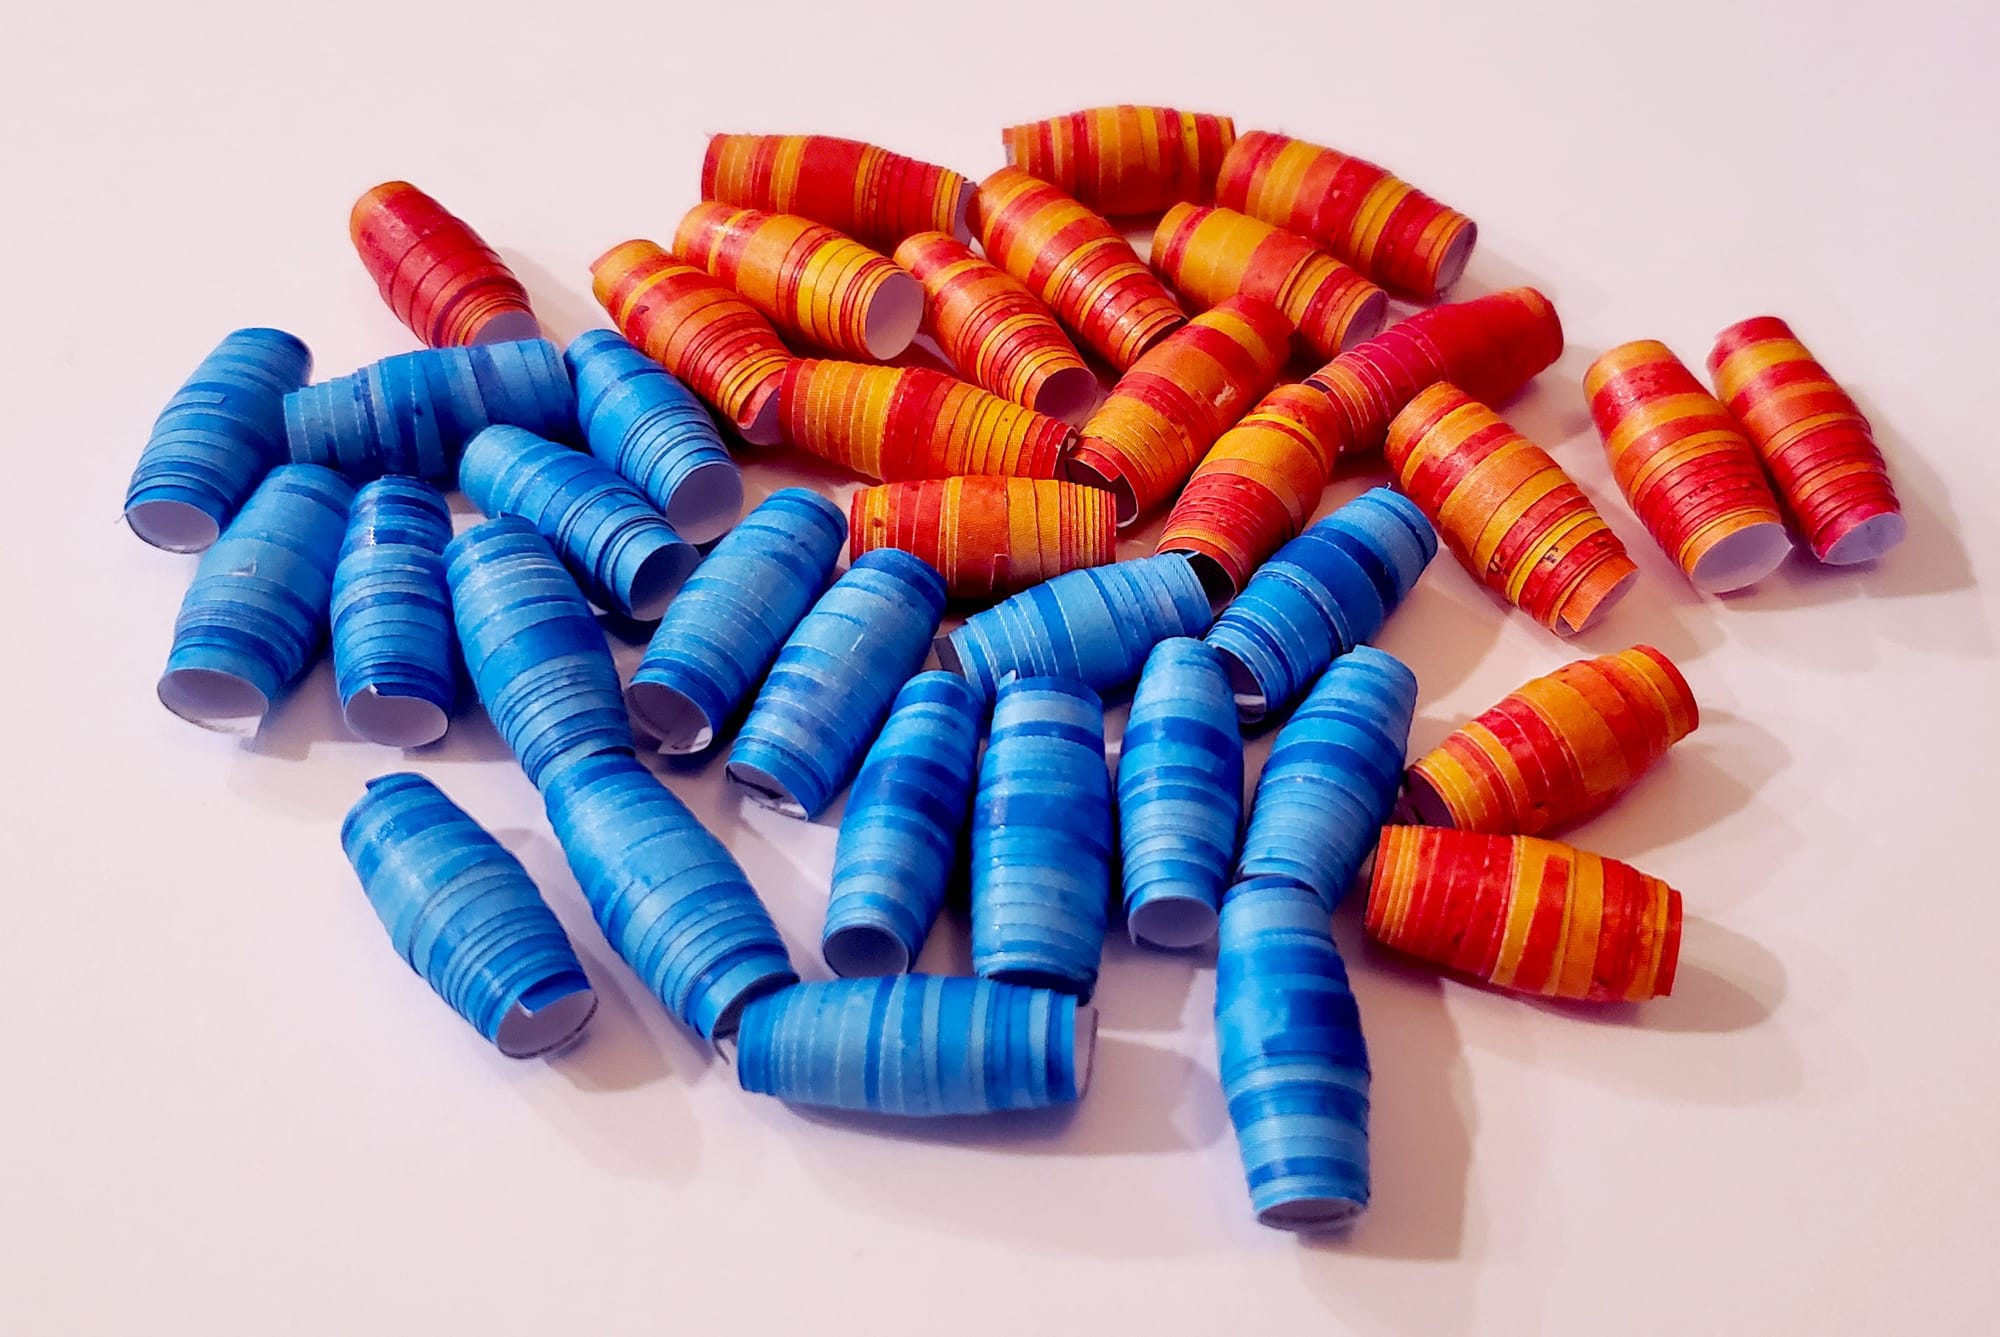
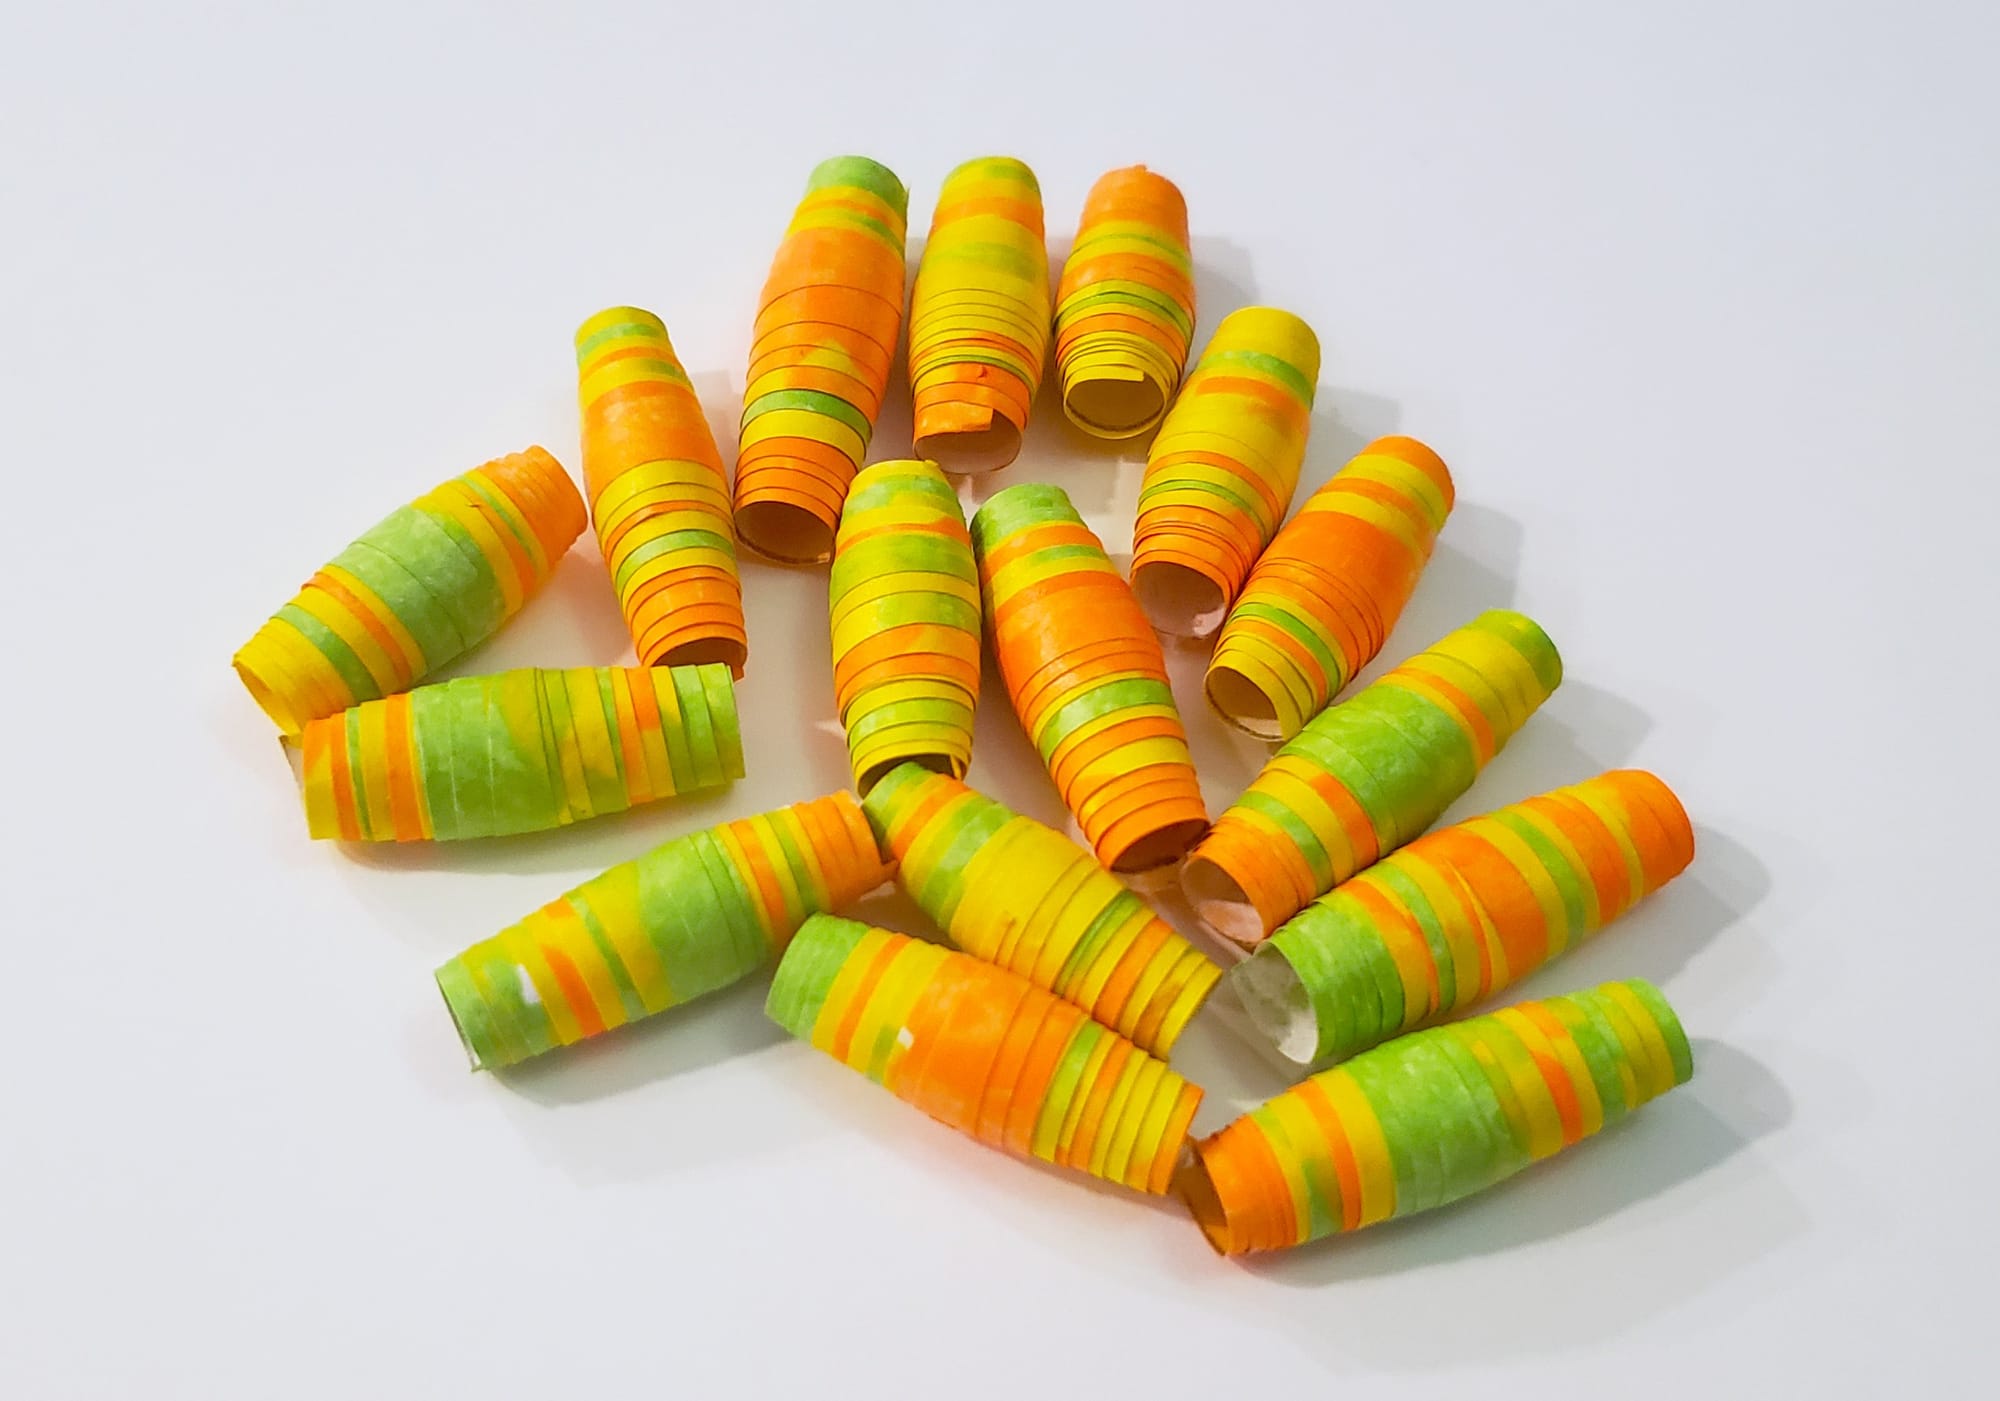
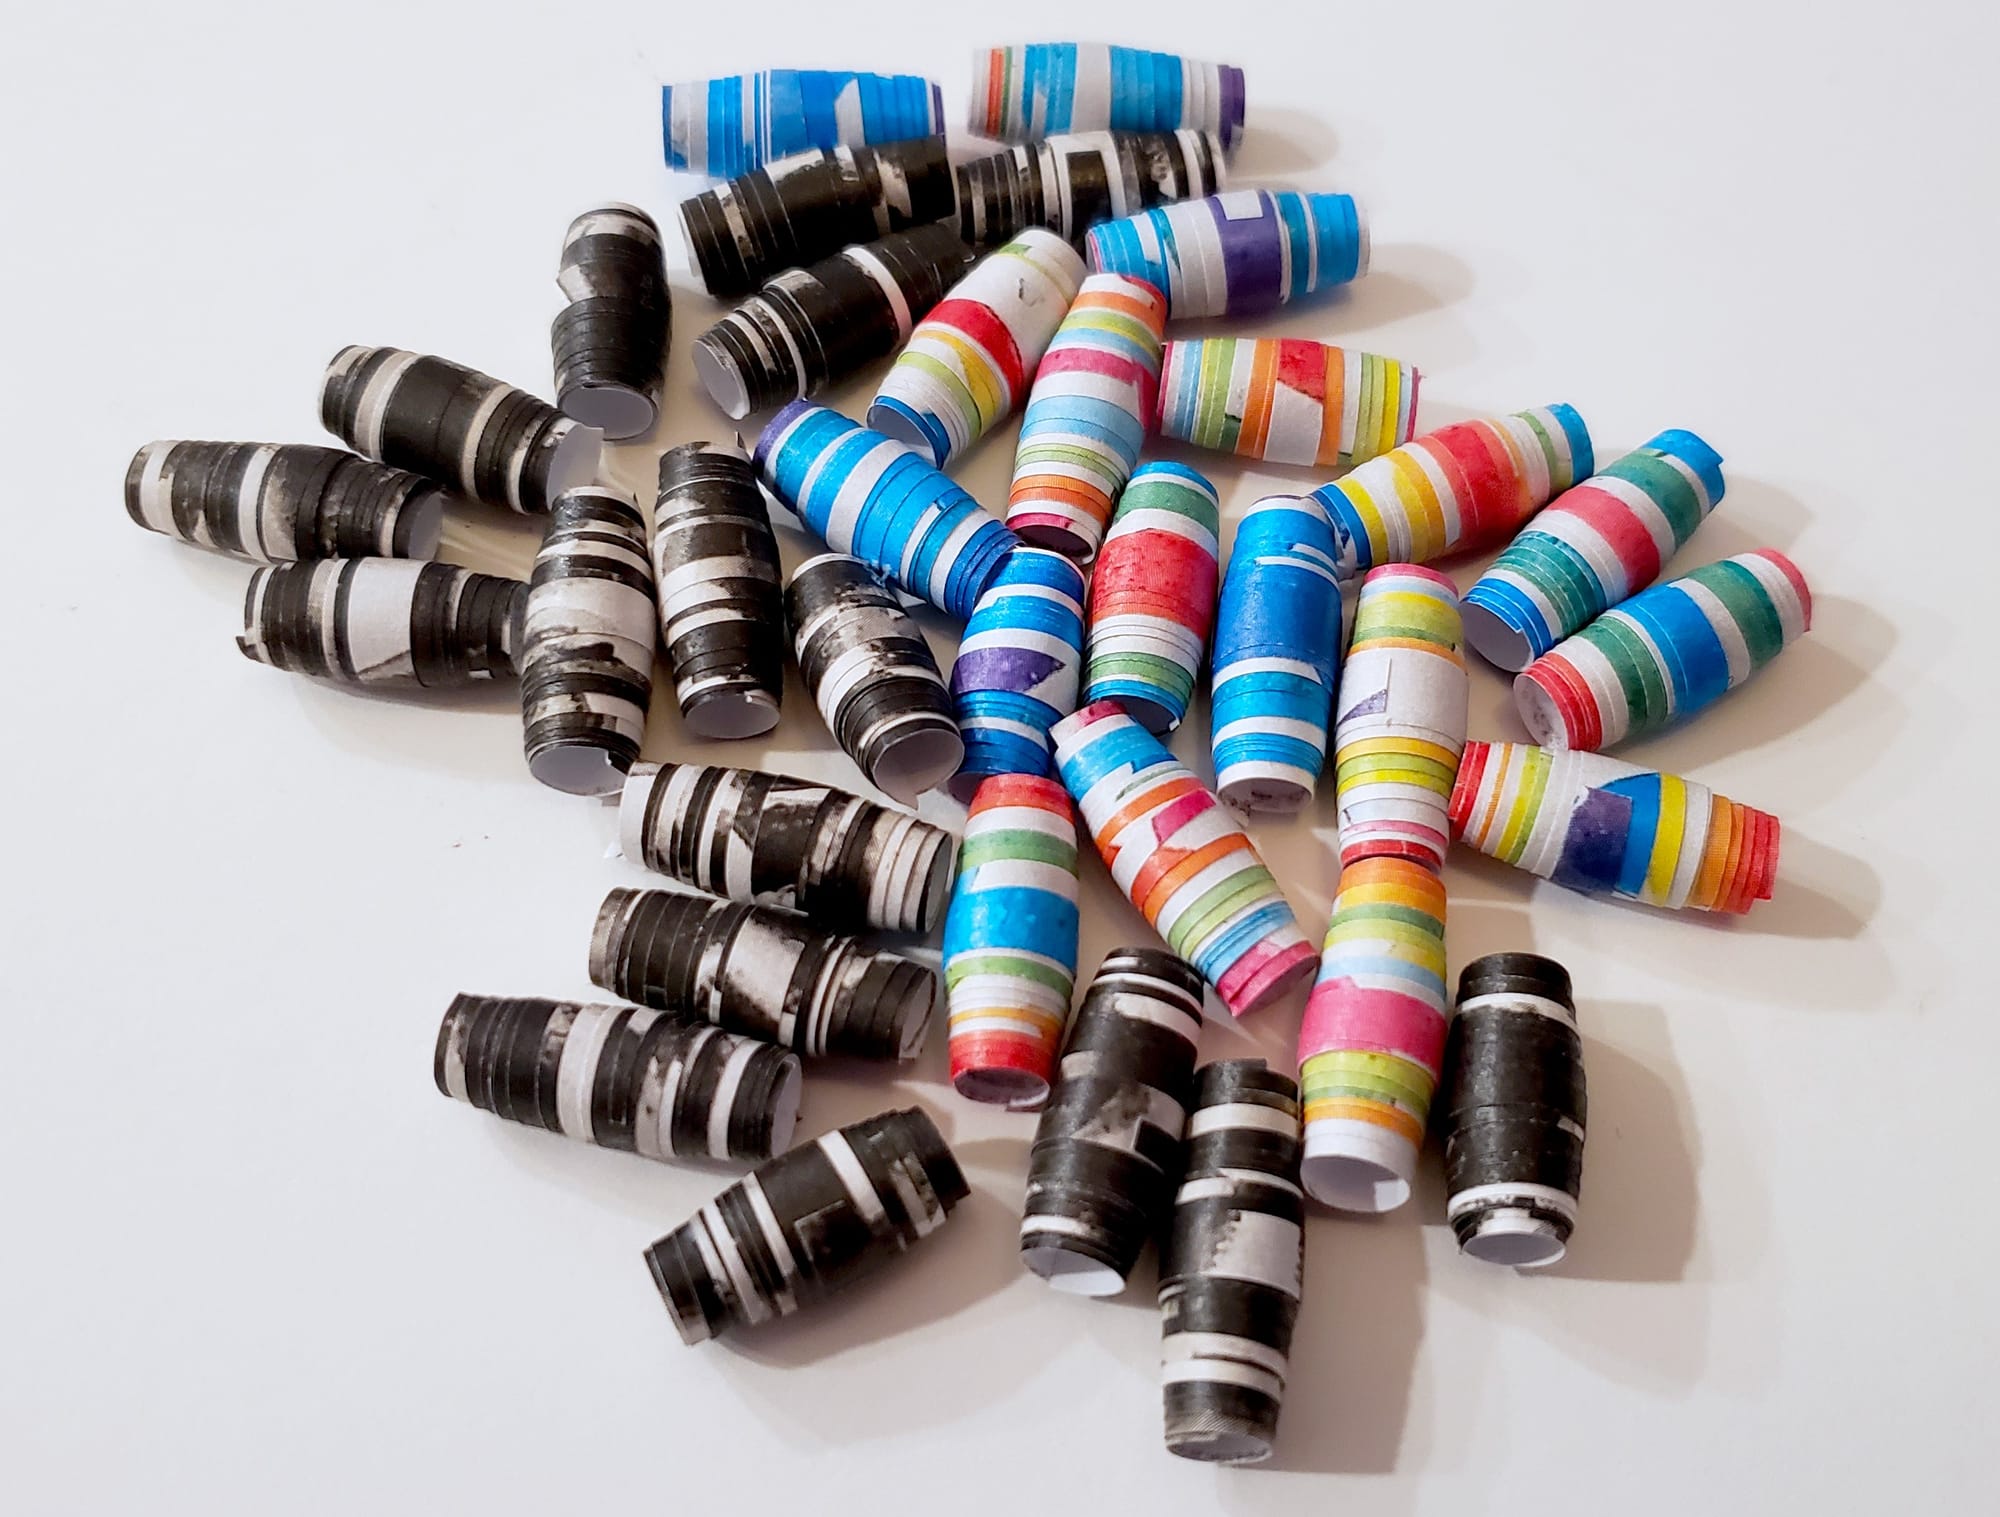
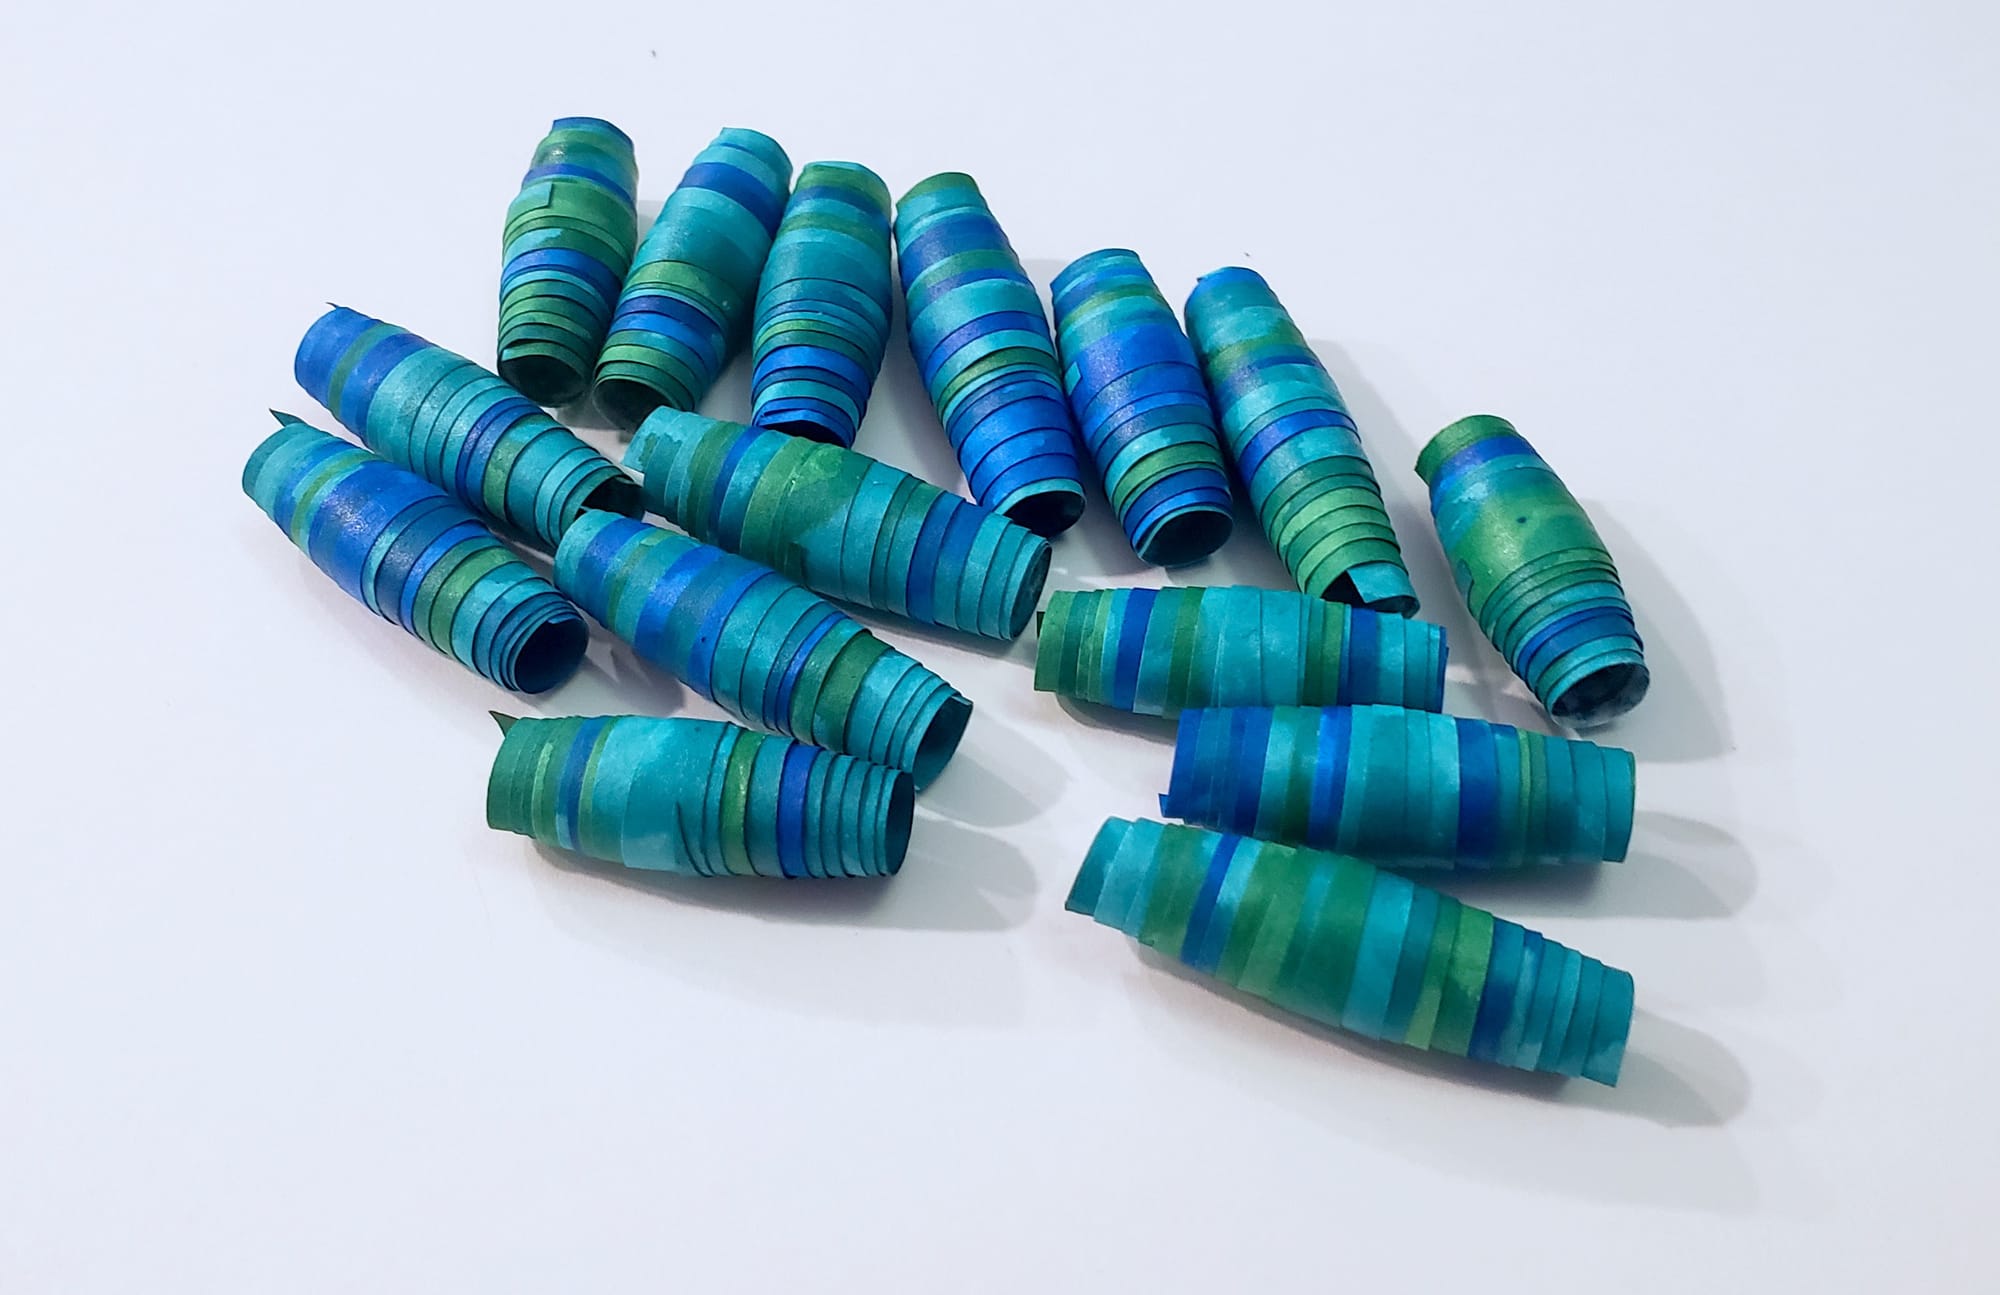
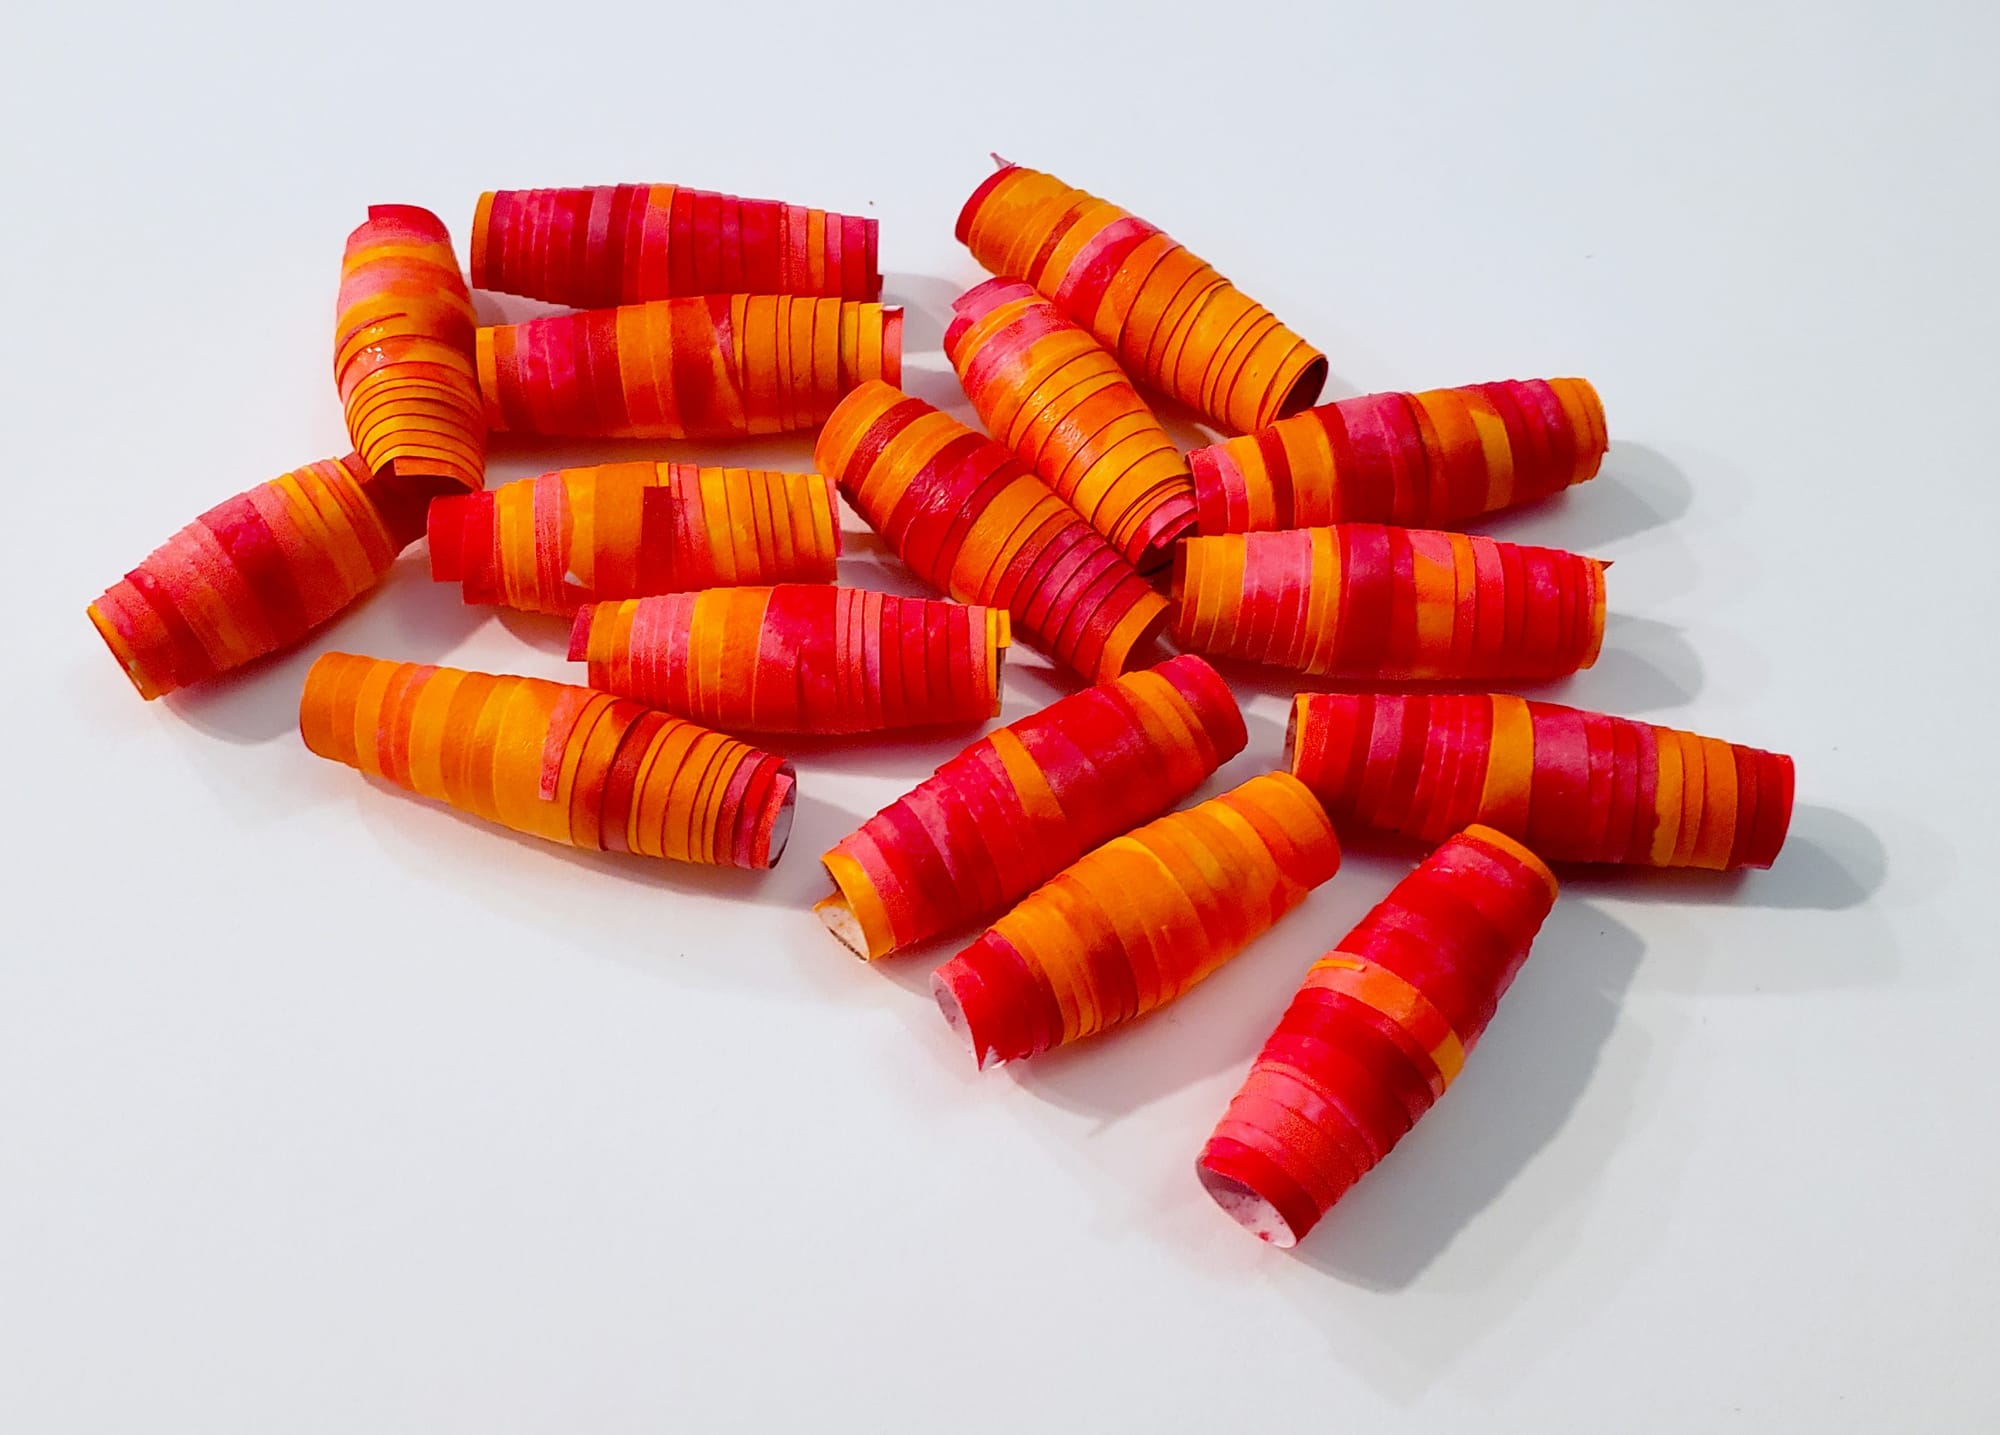
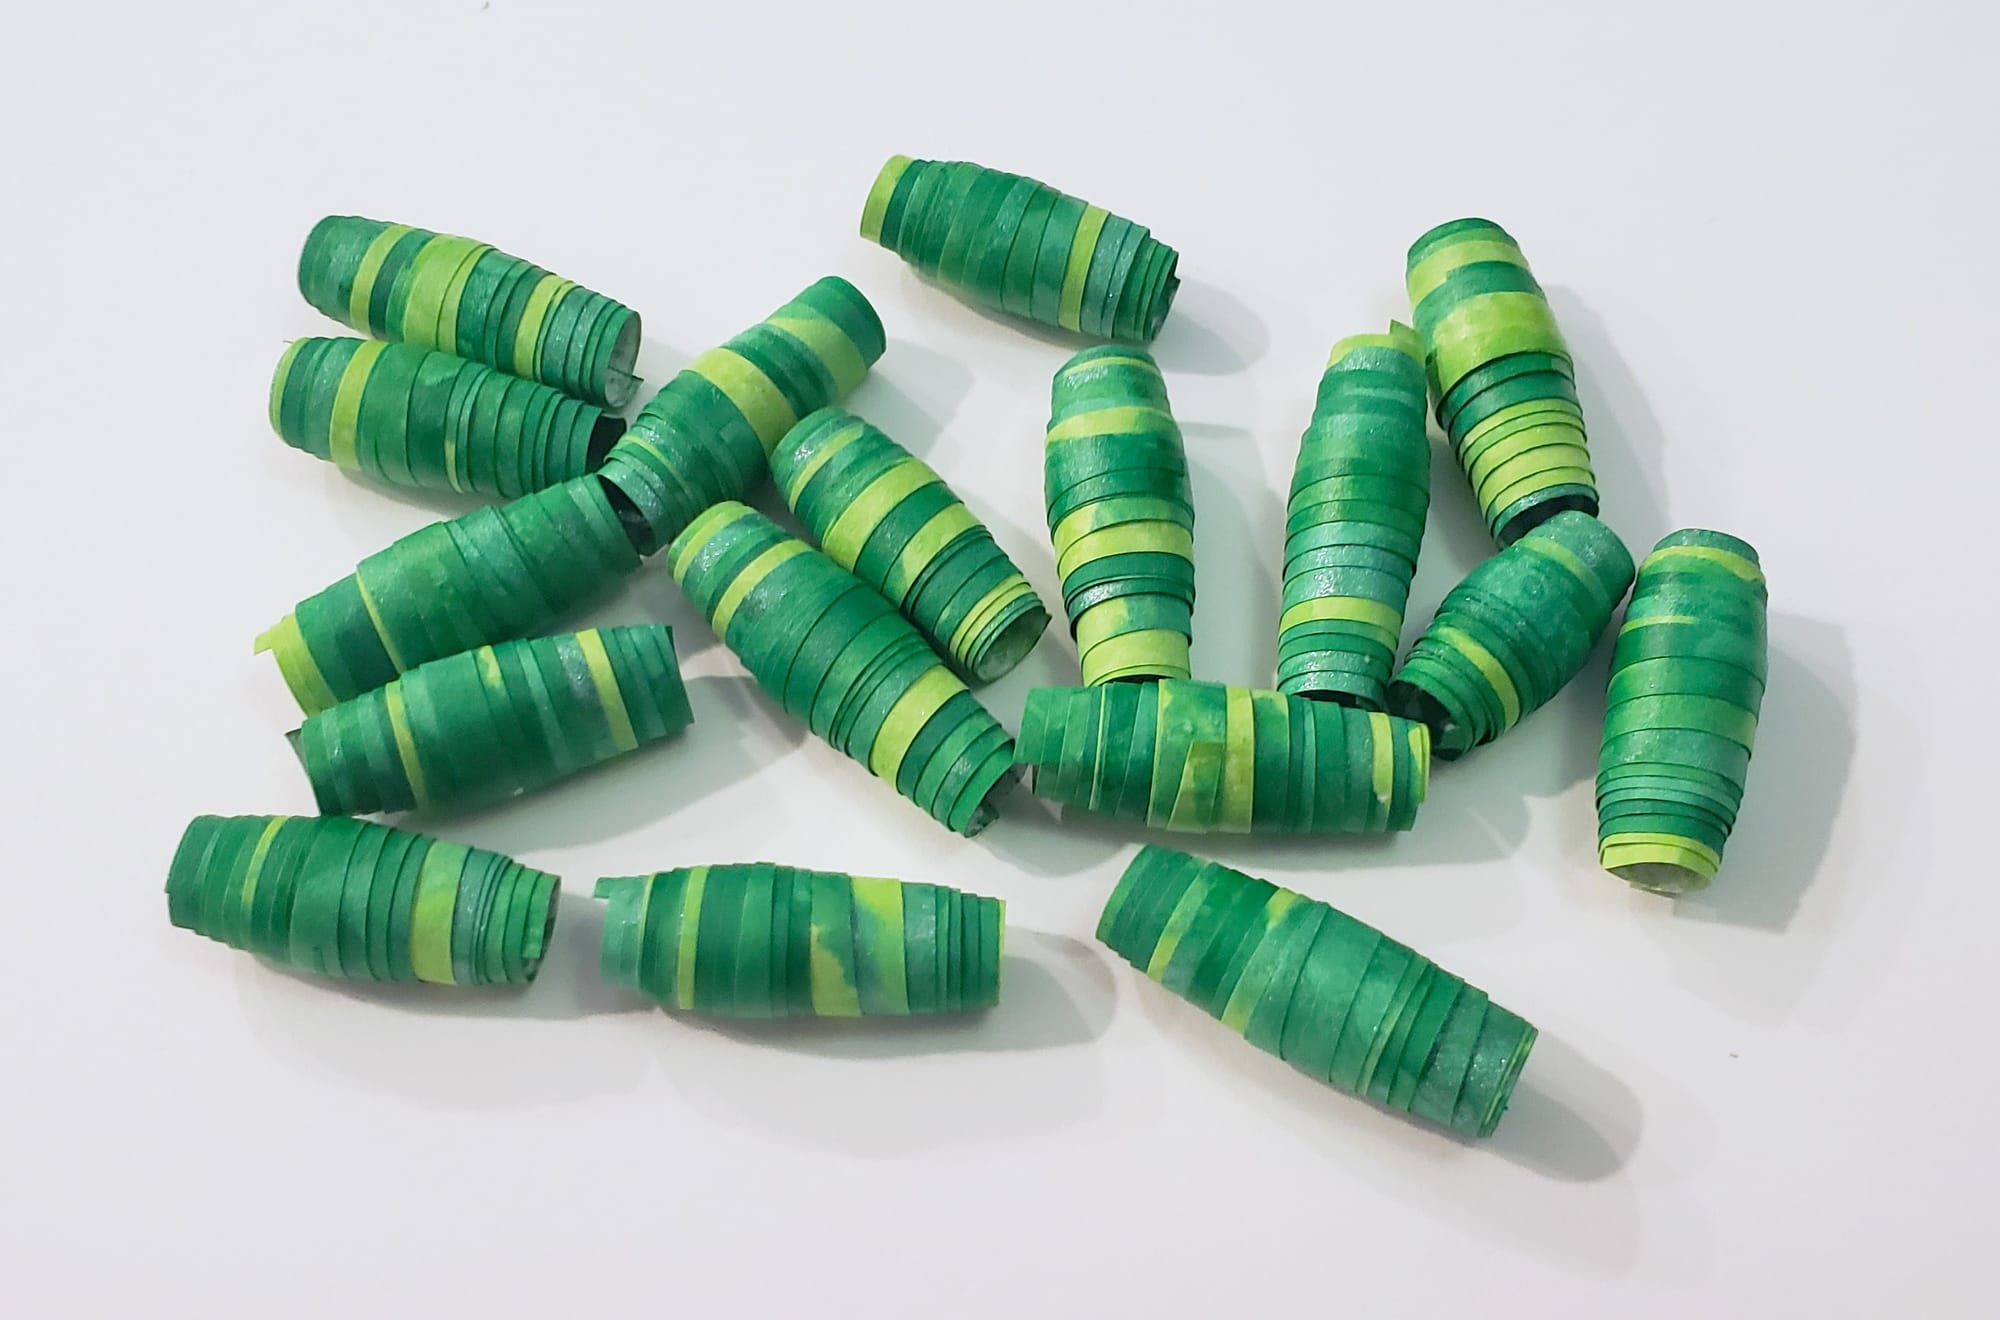
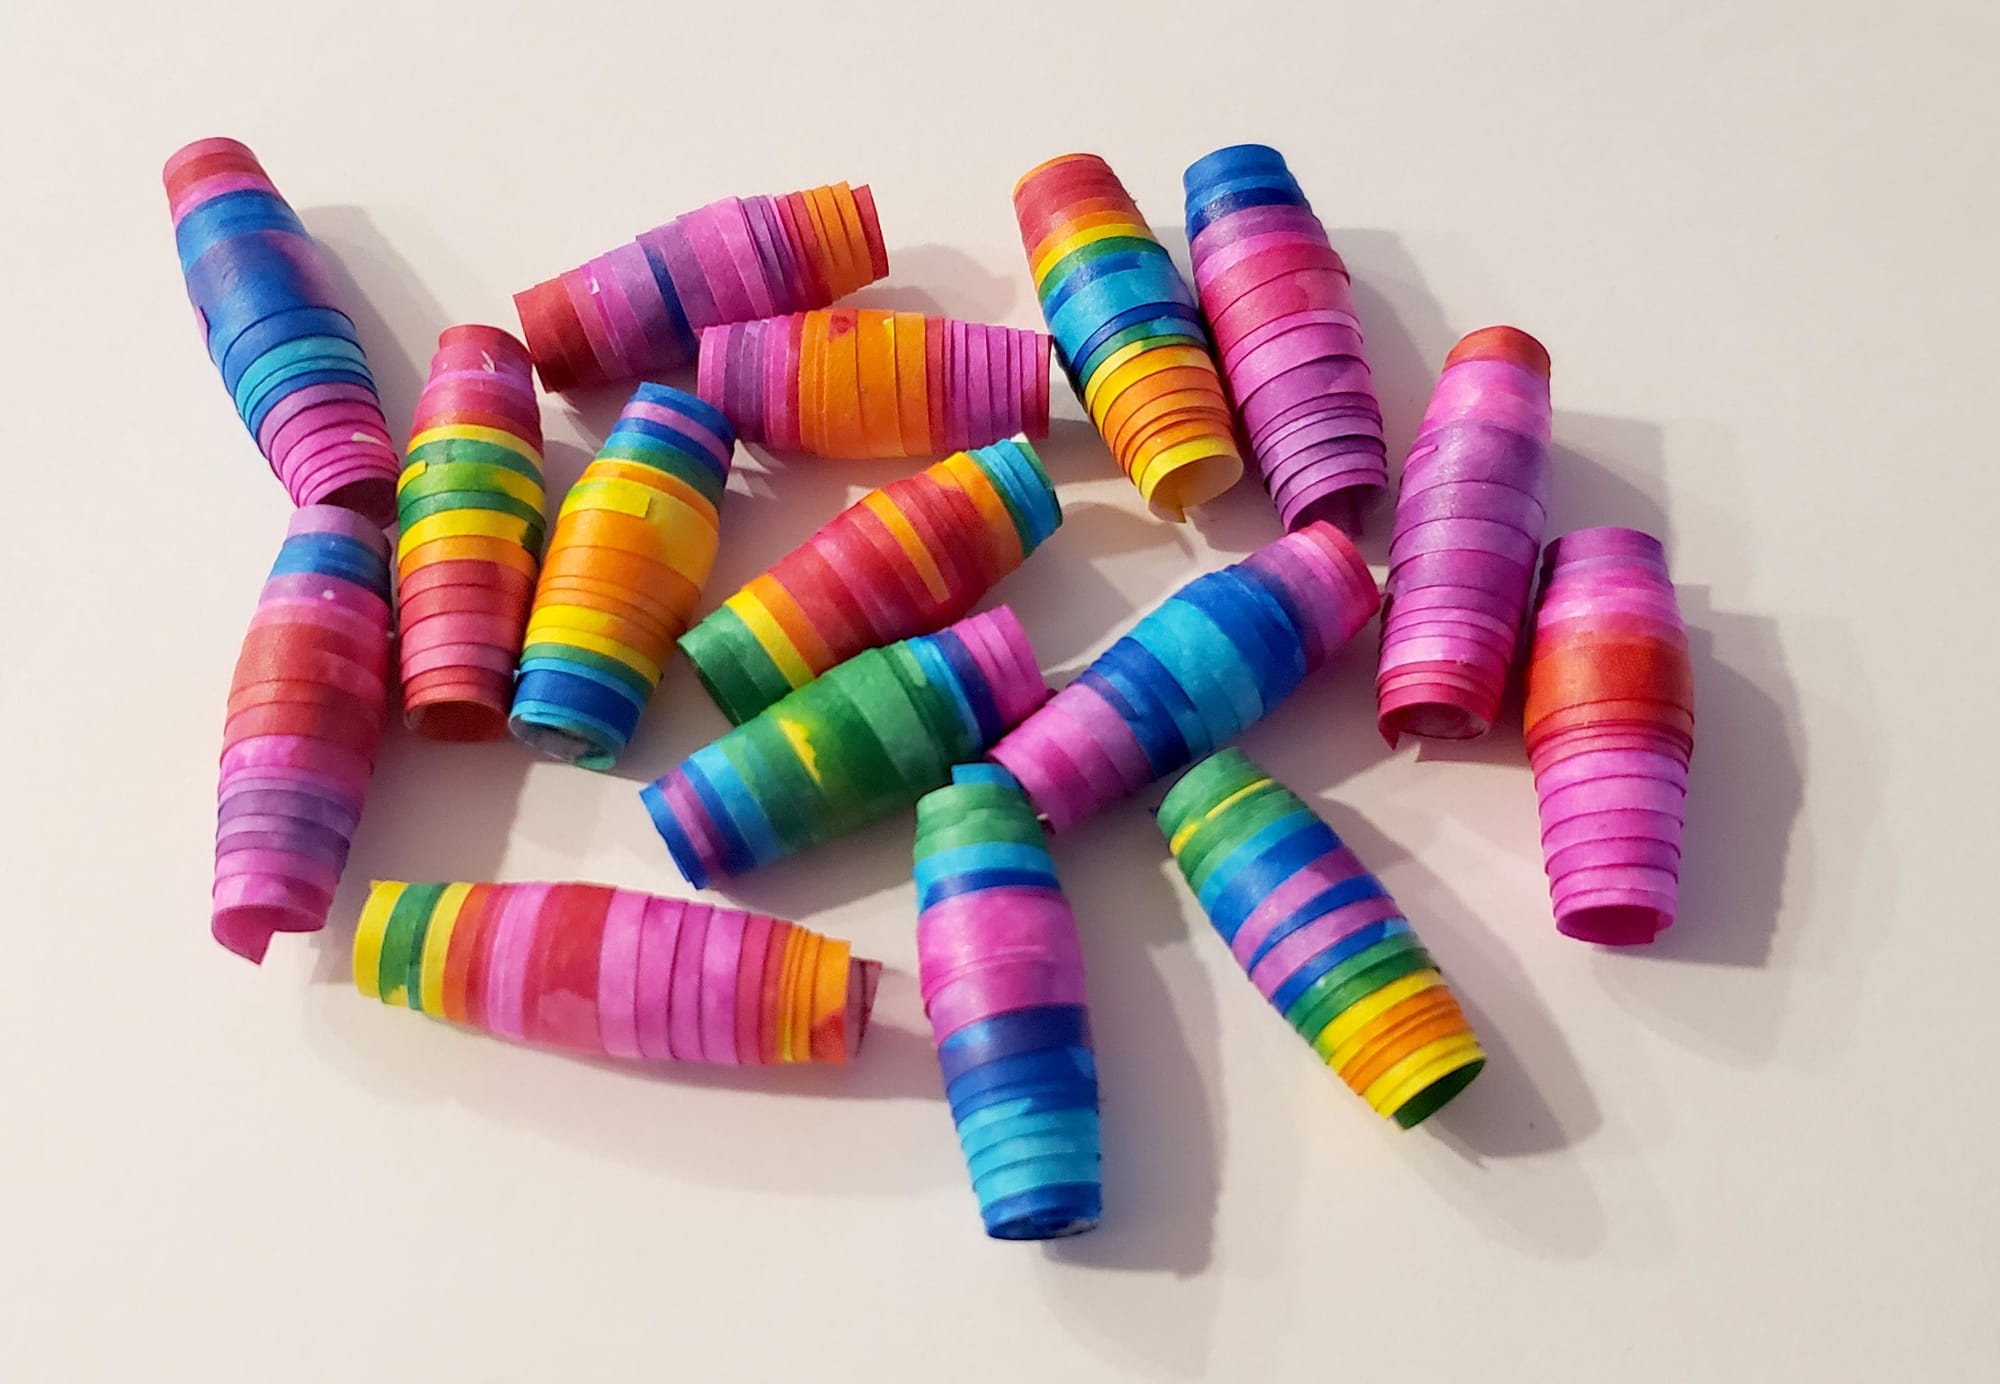
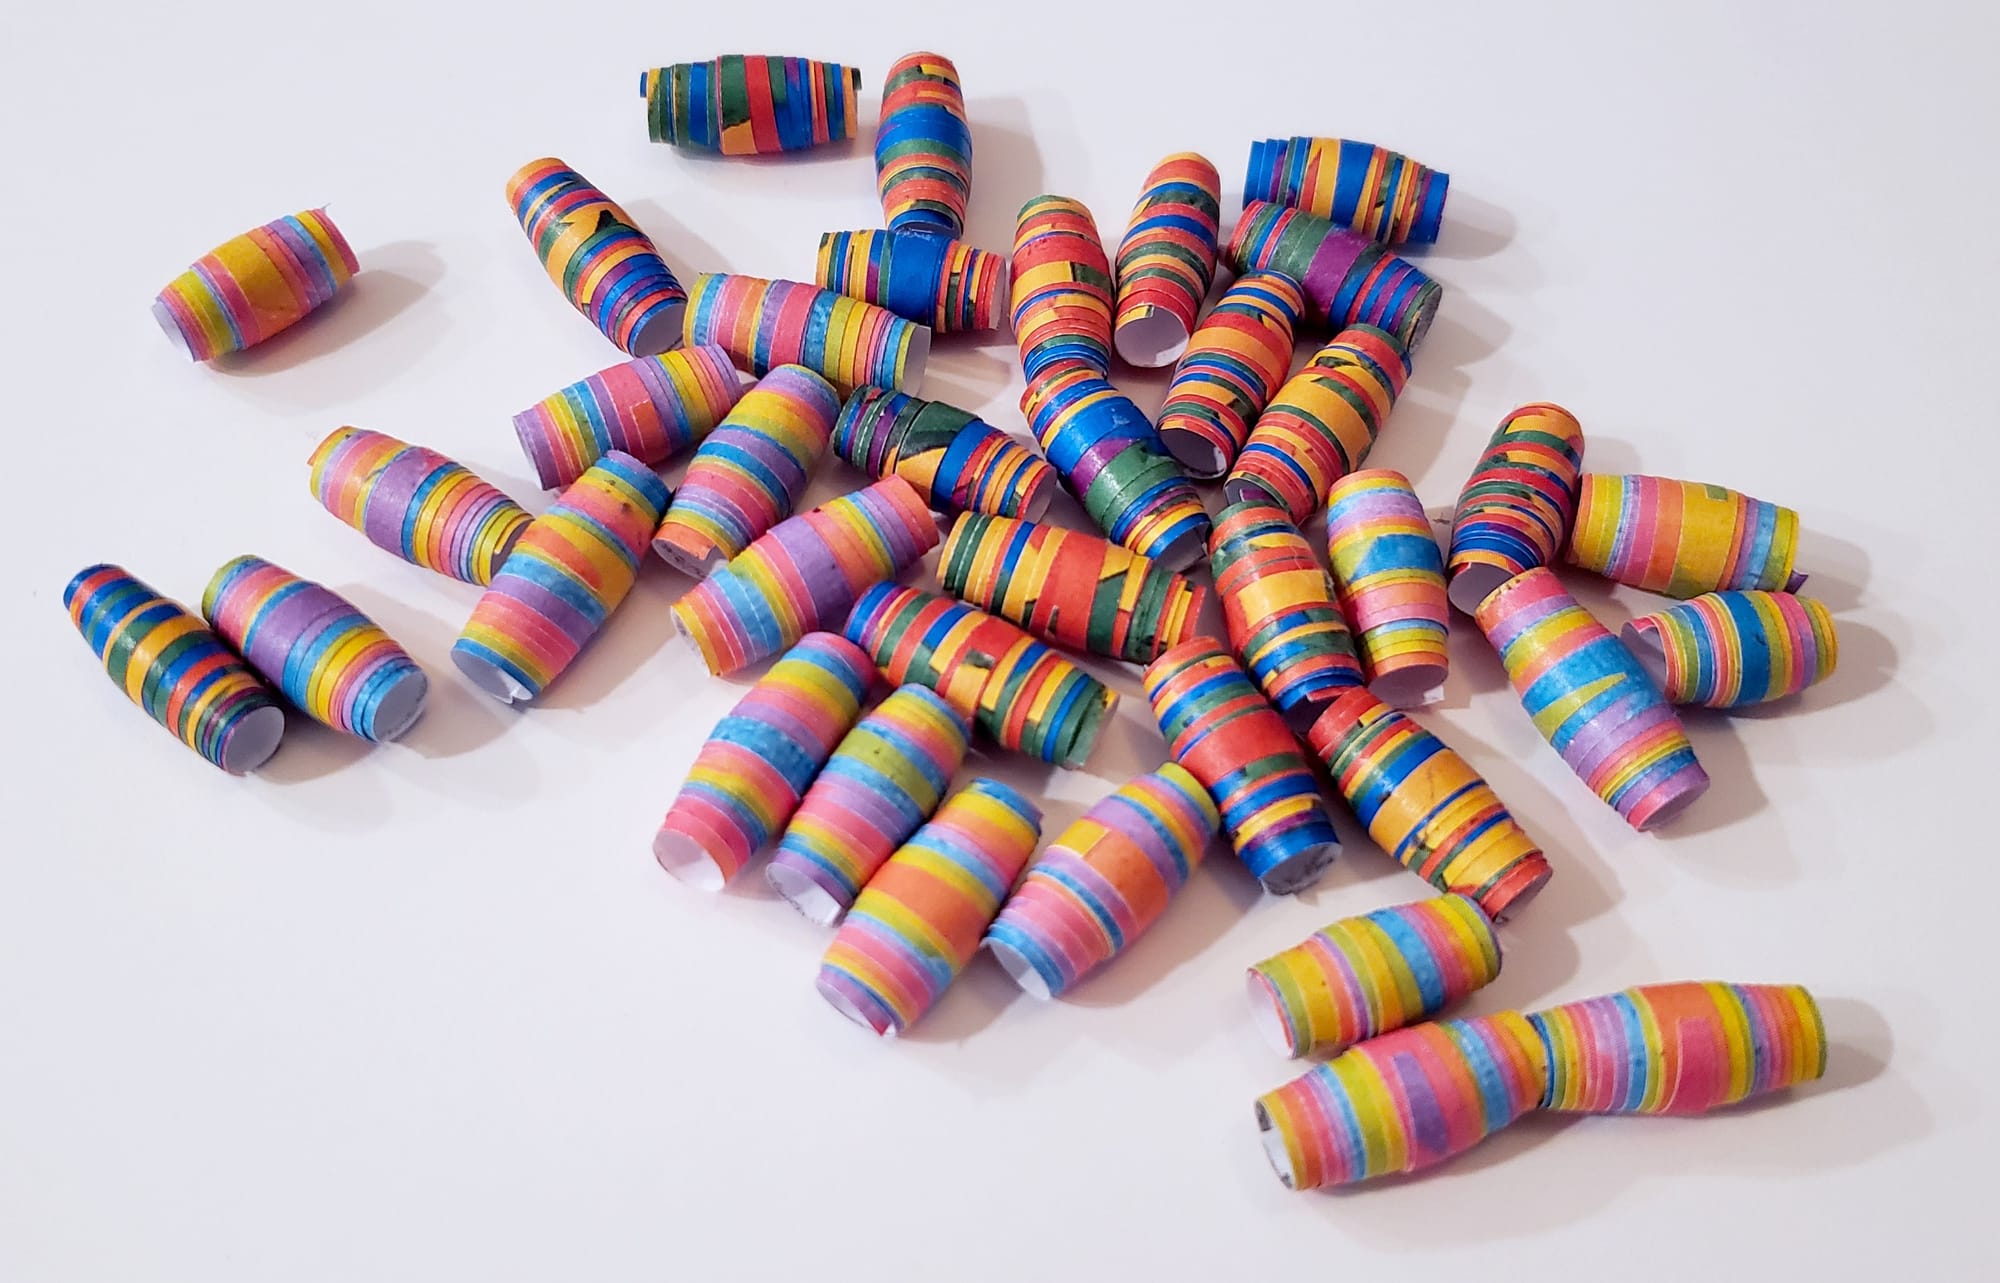
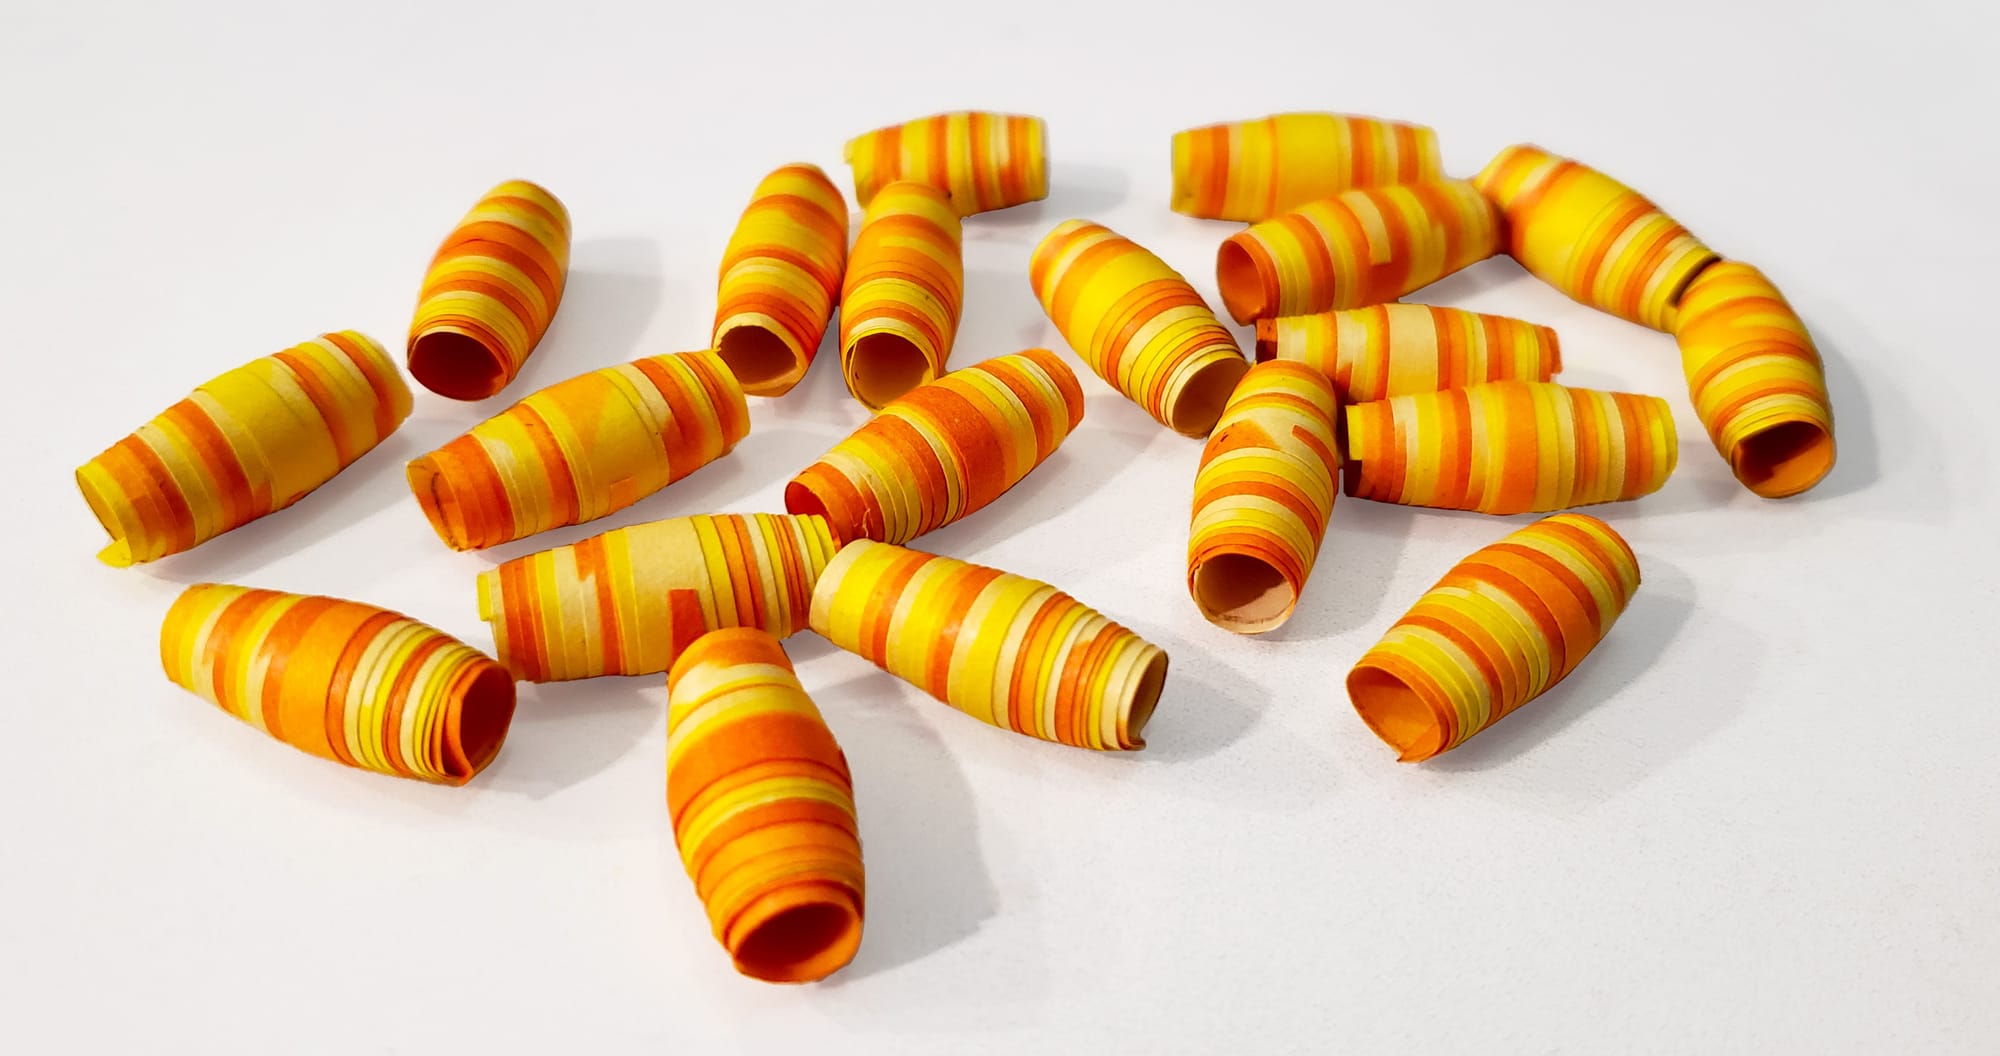
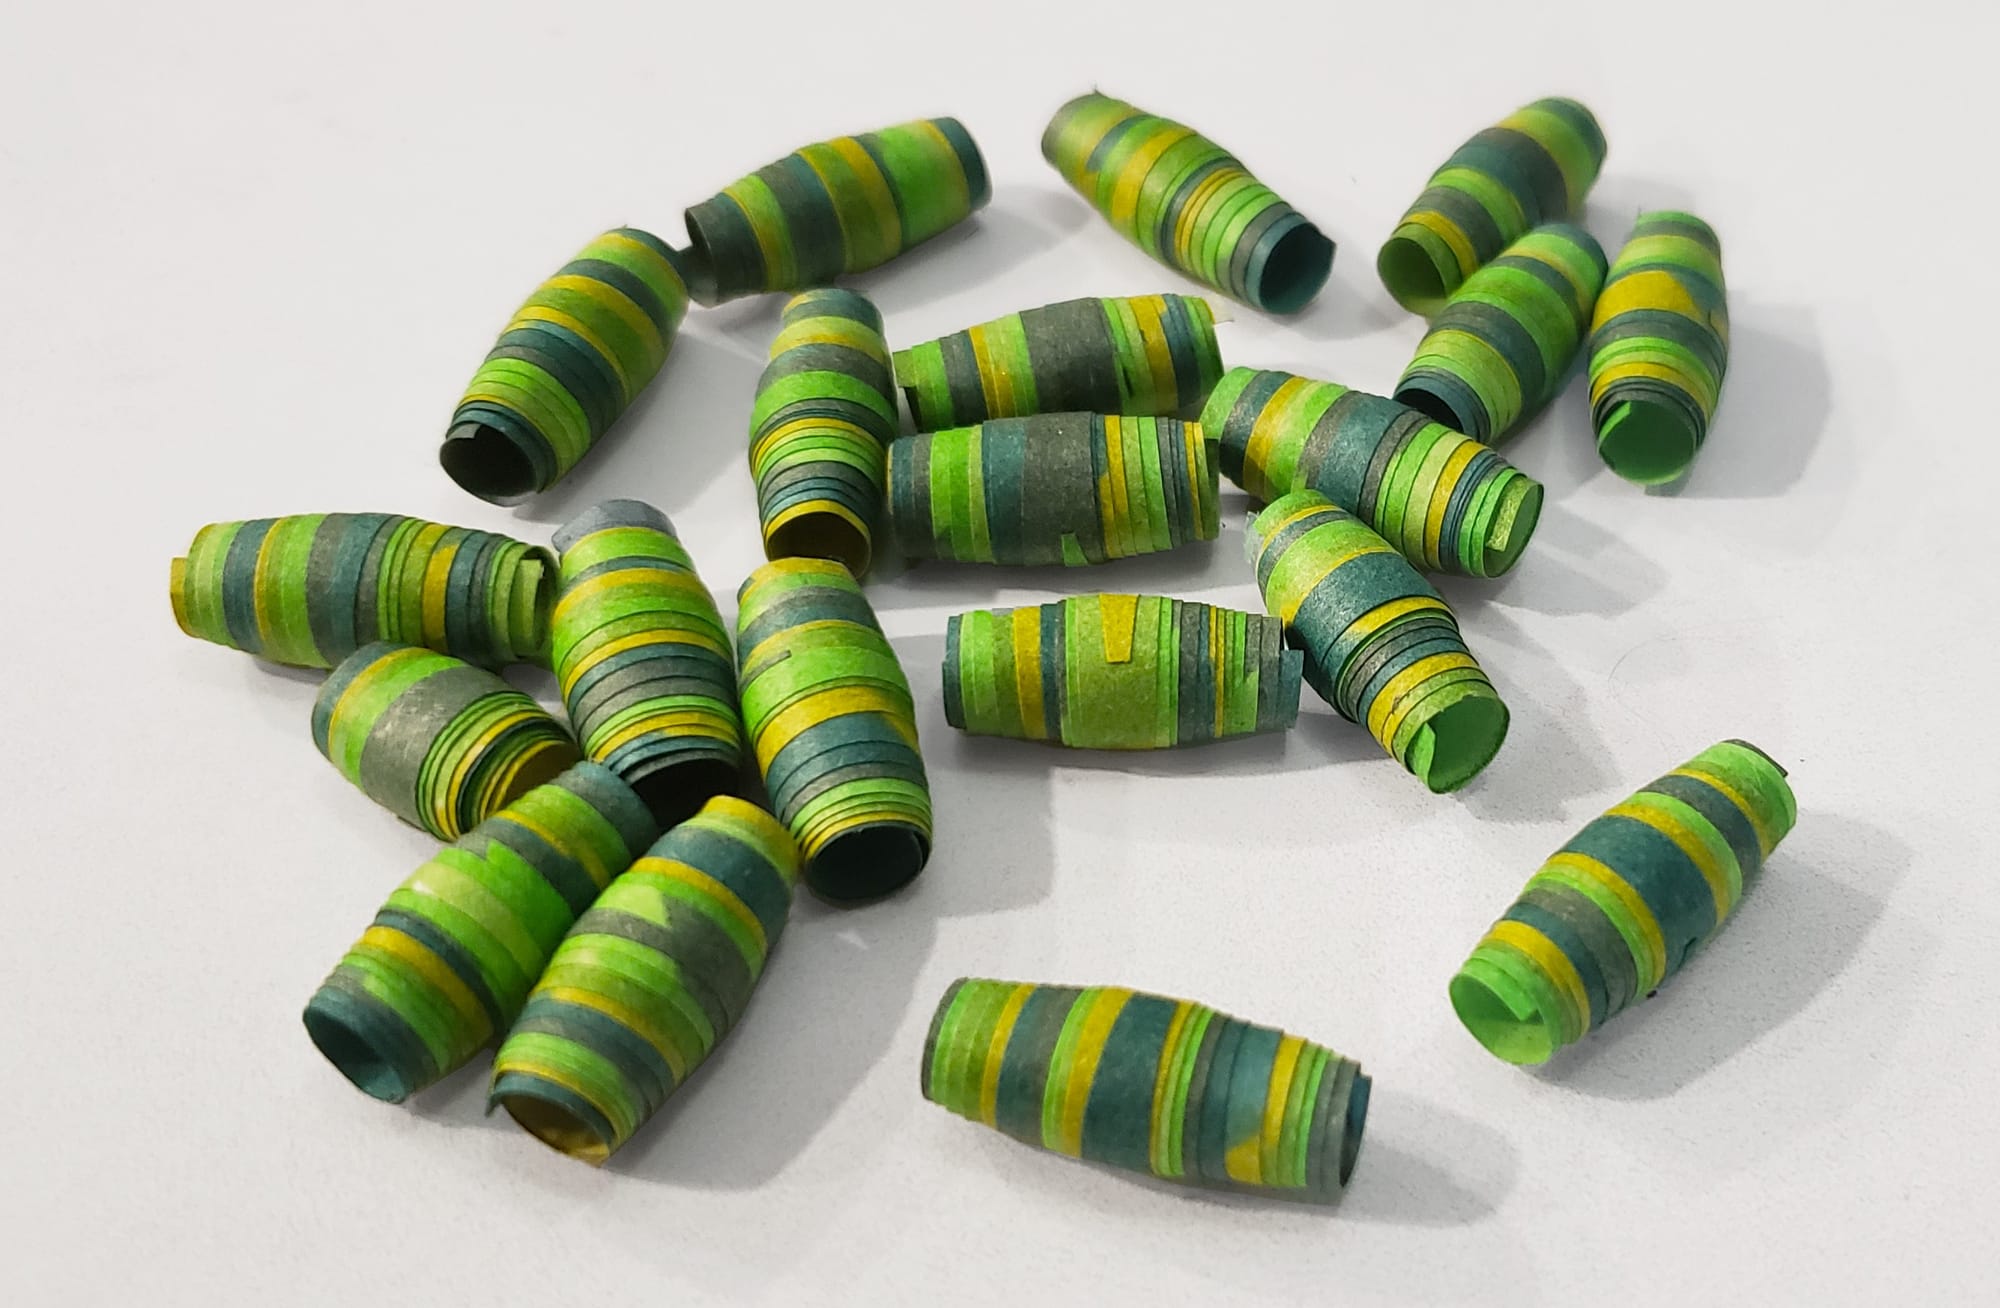
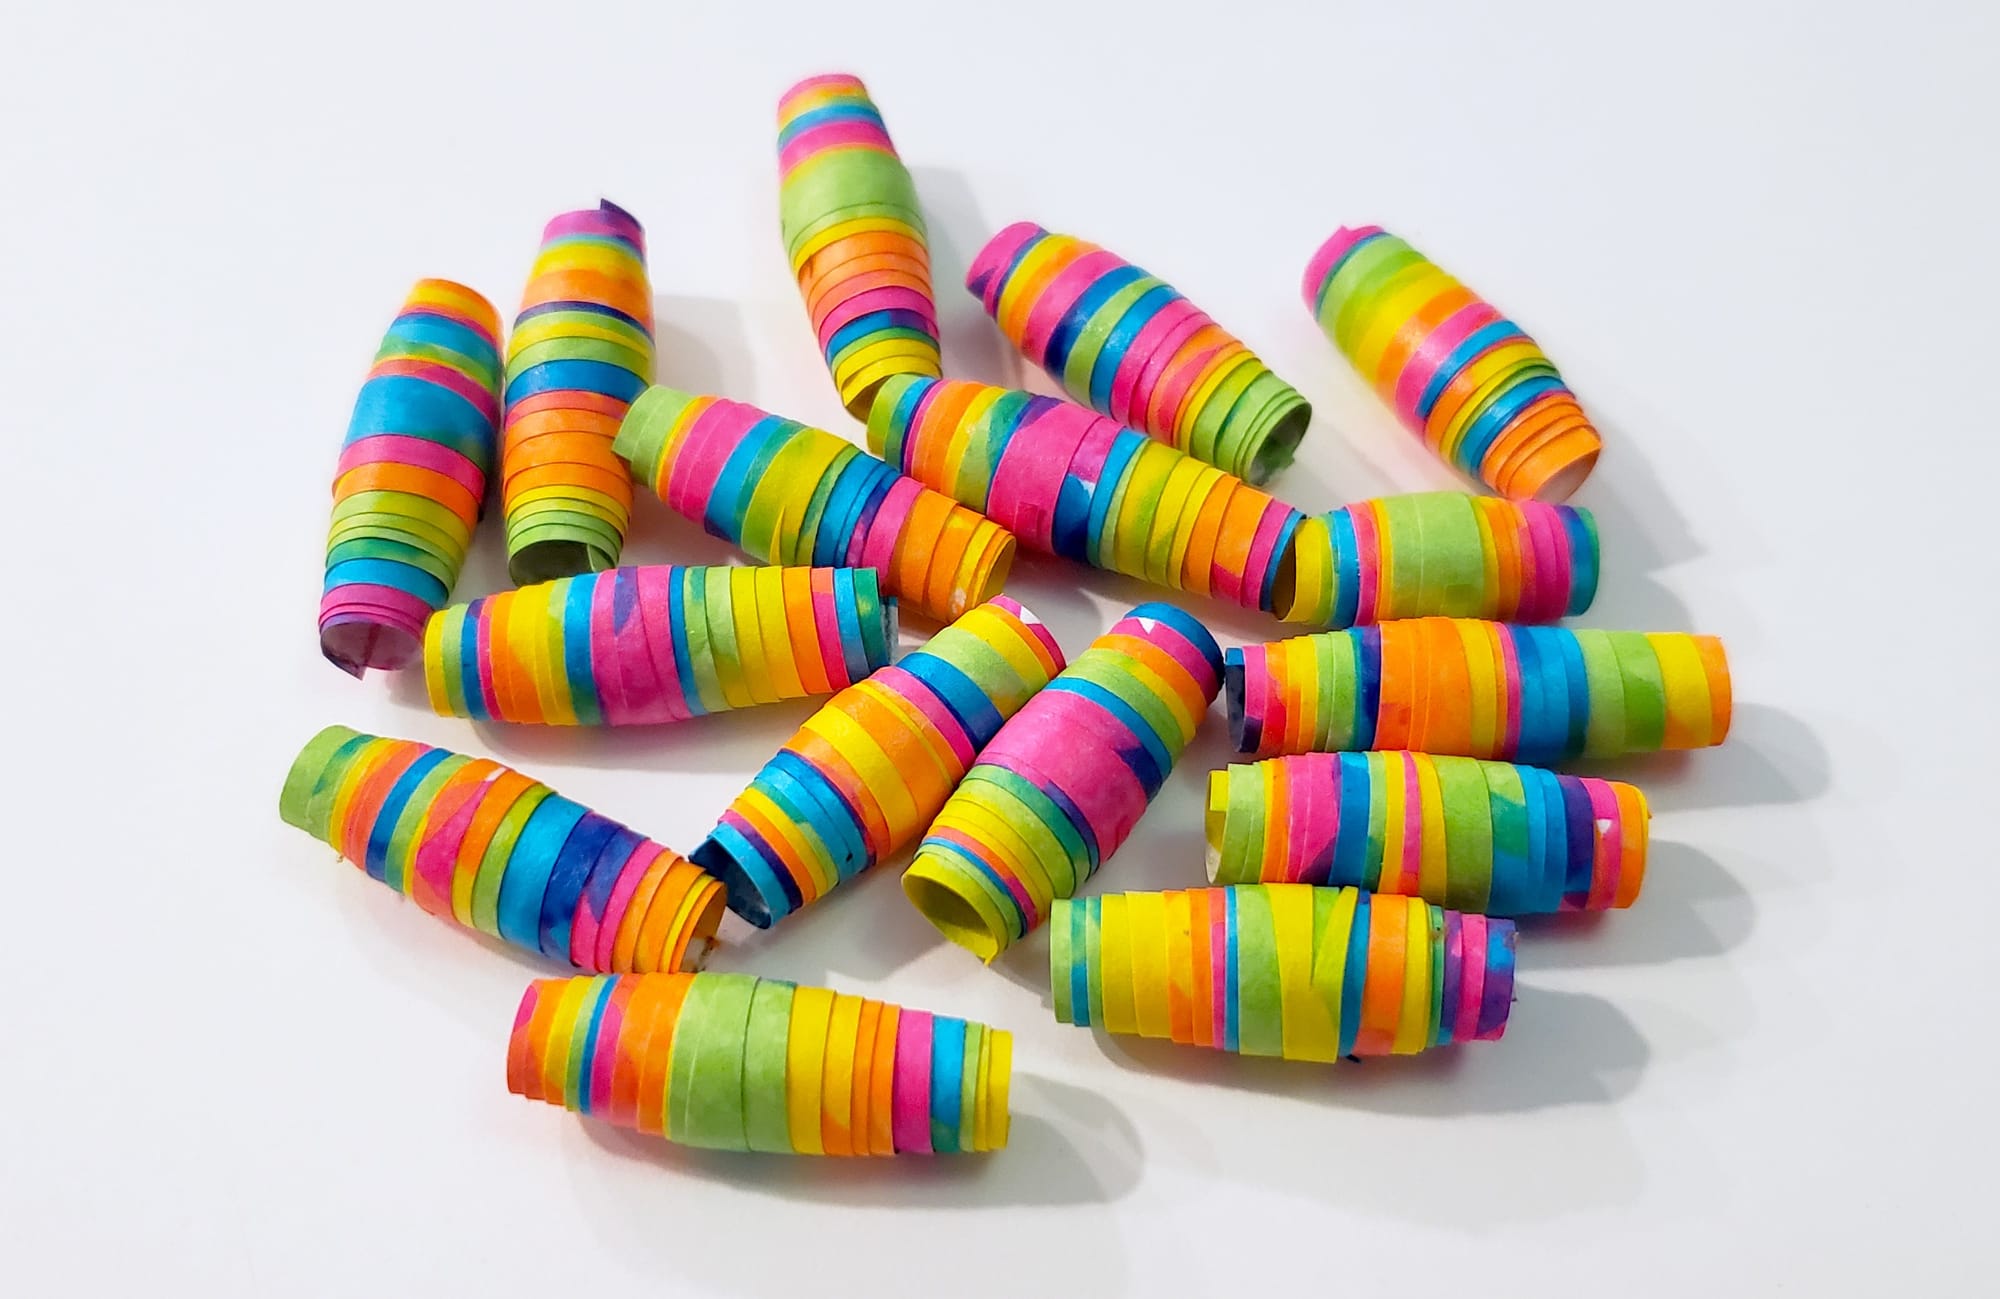
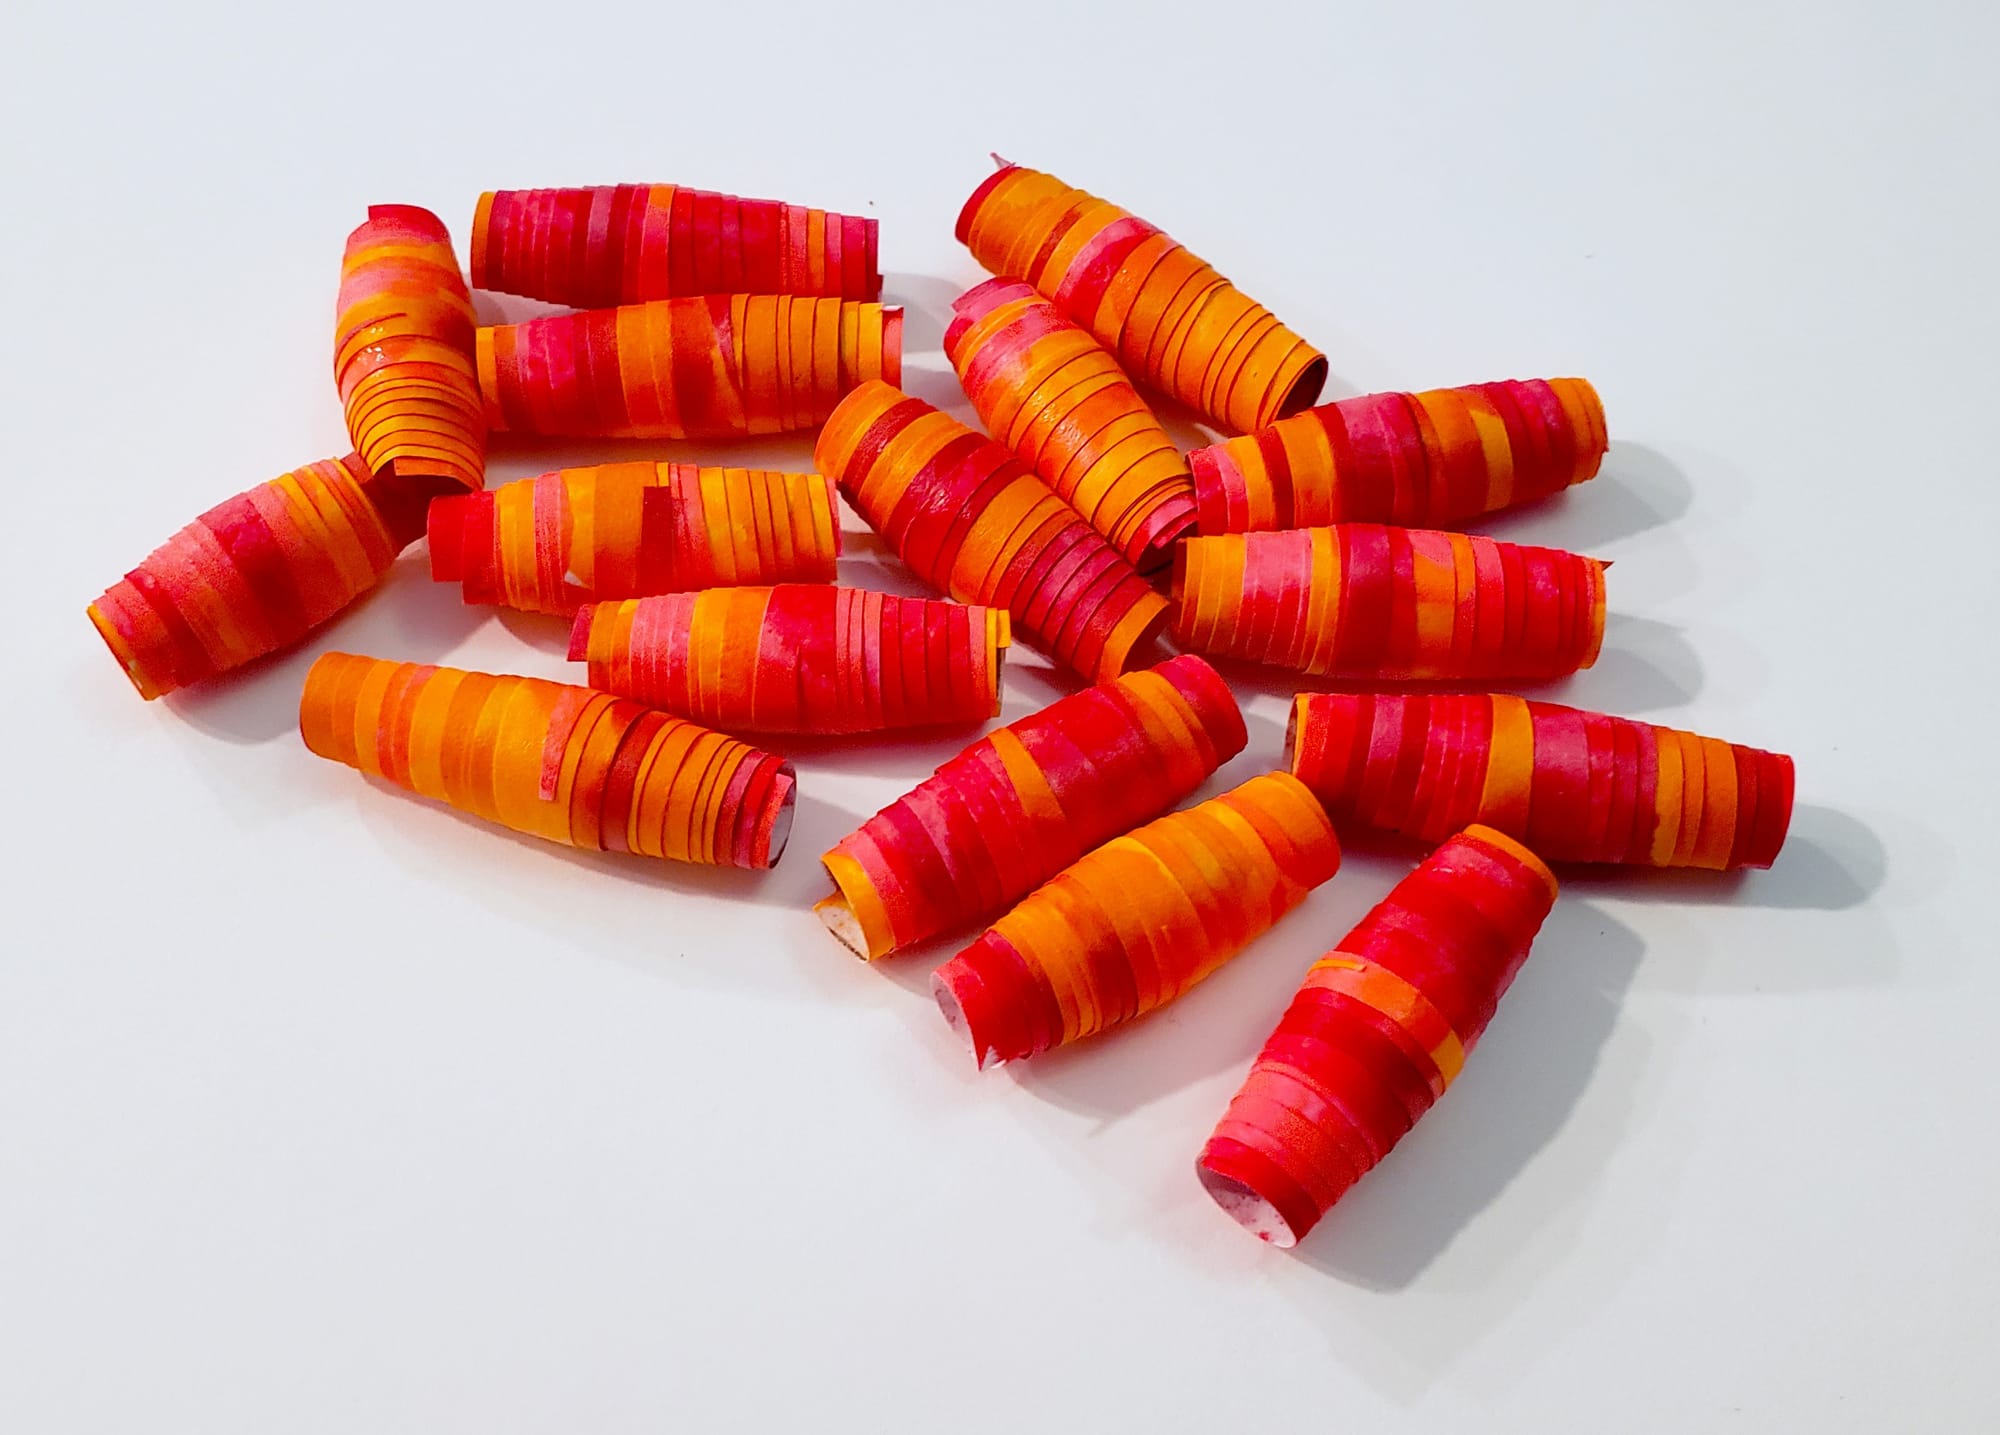
Instead of relying entirely on scrapbook paper, magazines, or other papers that already contained interesting colors and patterns, I pulled out dot markers and other art materials and began covering sheets of paper myself.
Dots.
Overlapping colors.
Different combinations and arrangements.
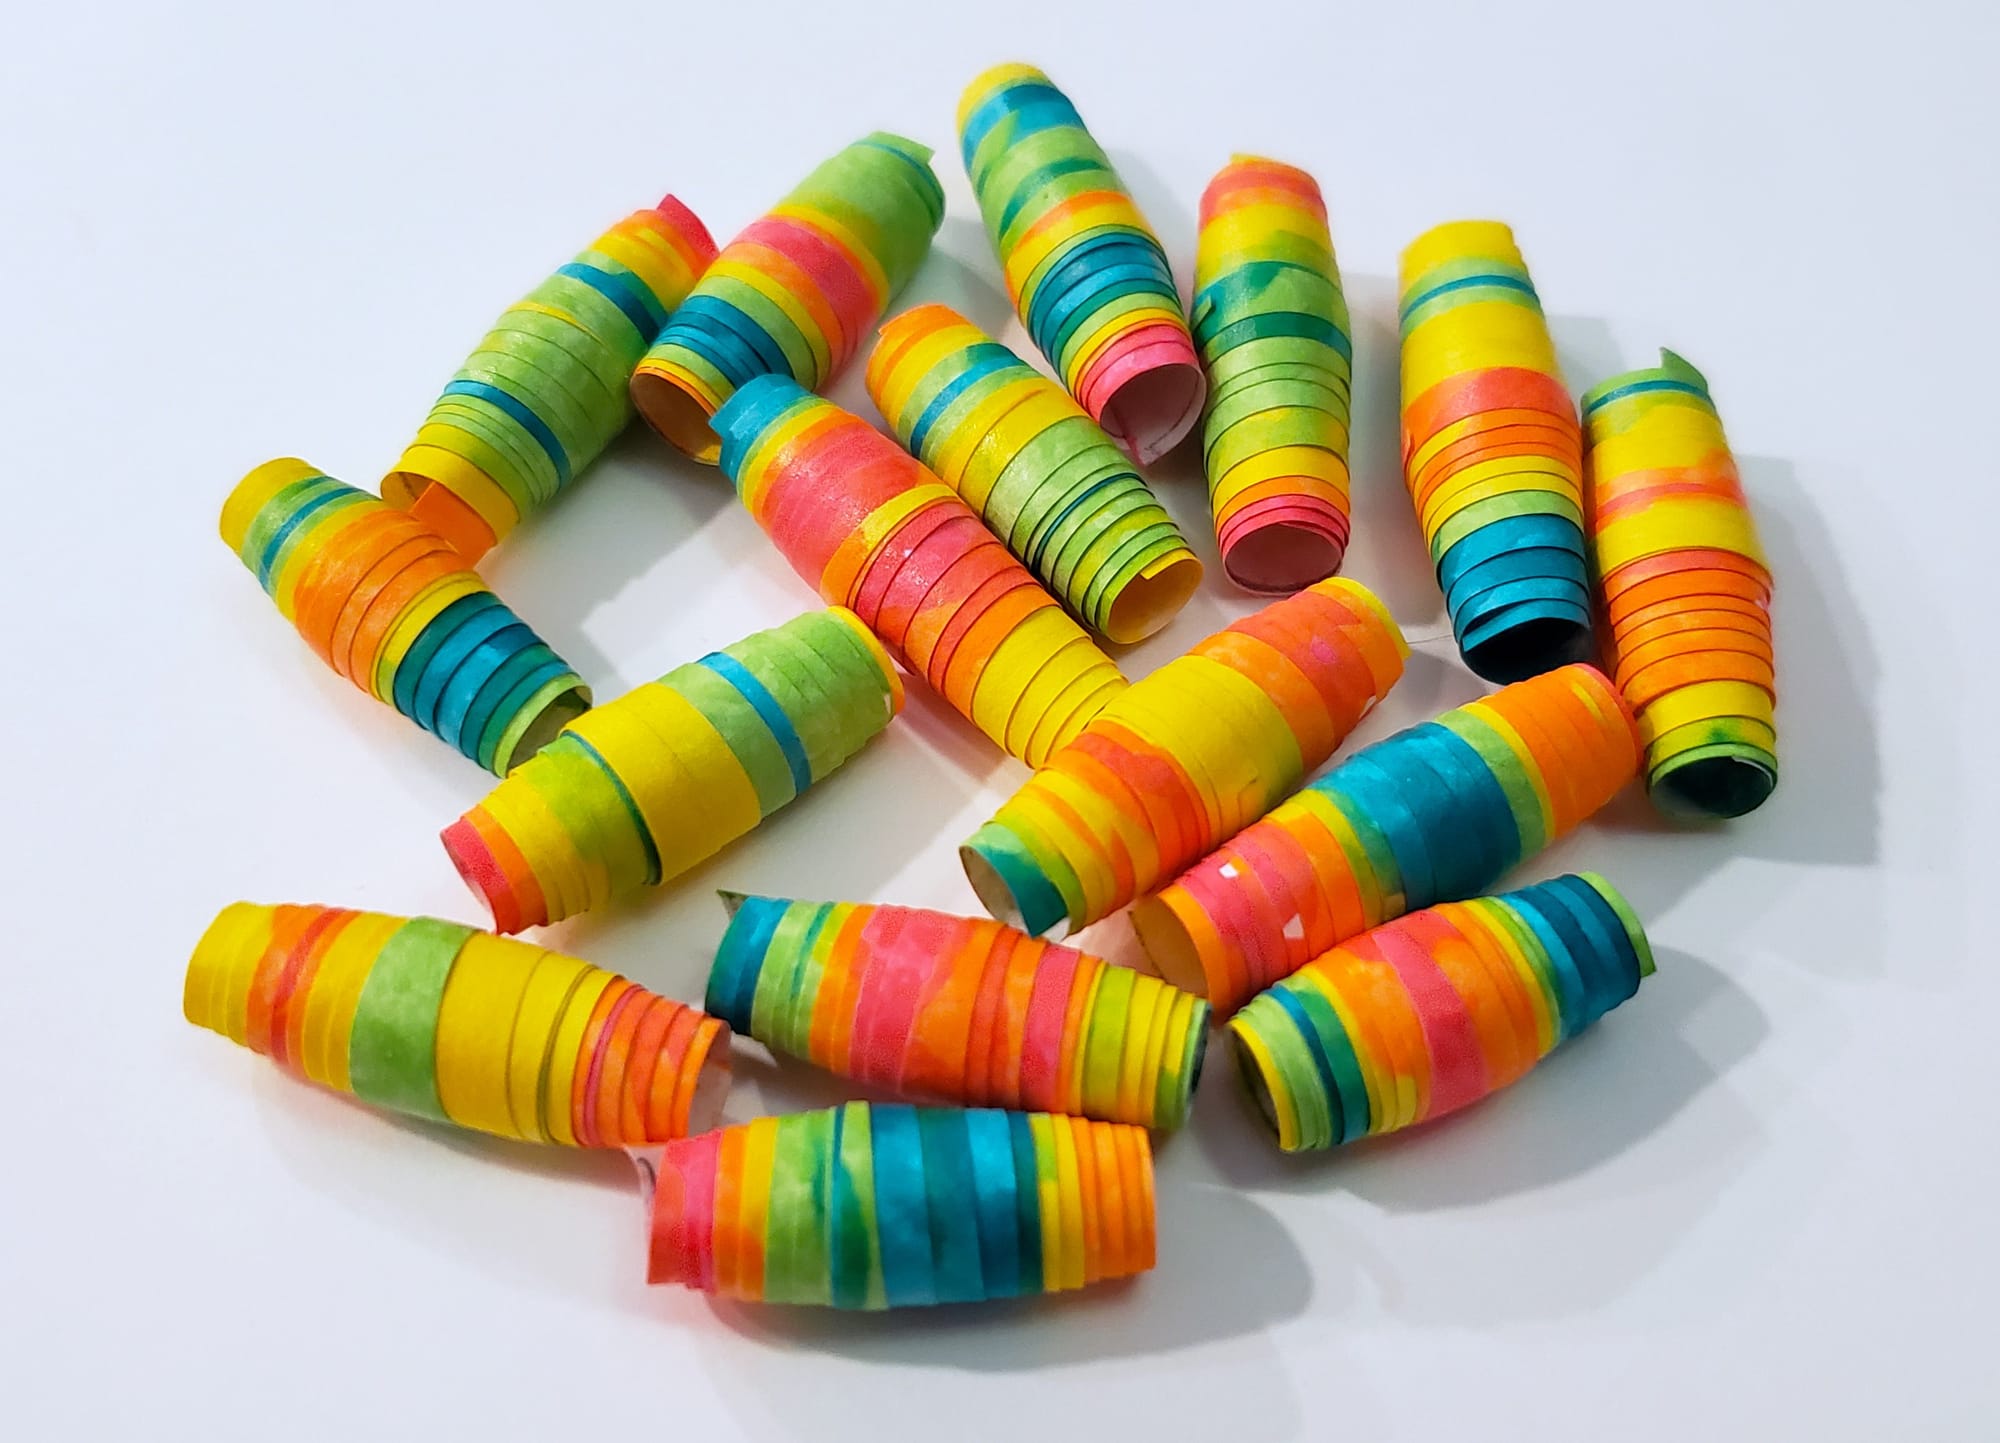
Some bright and rainbow-like.
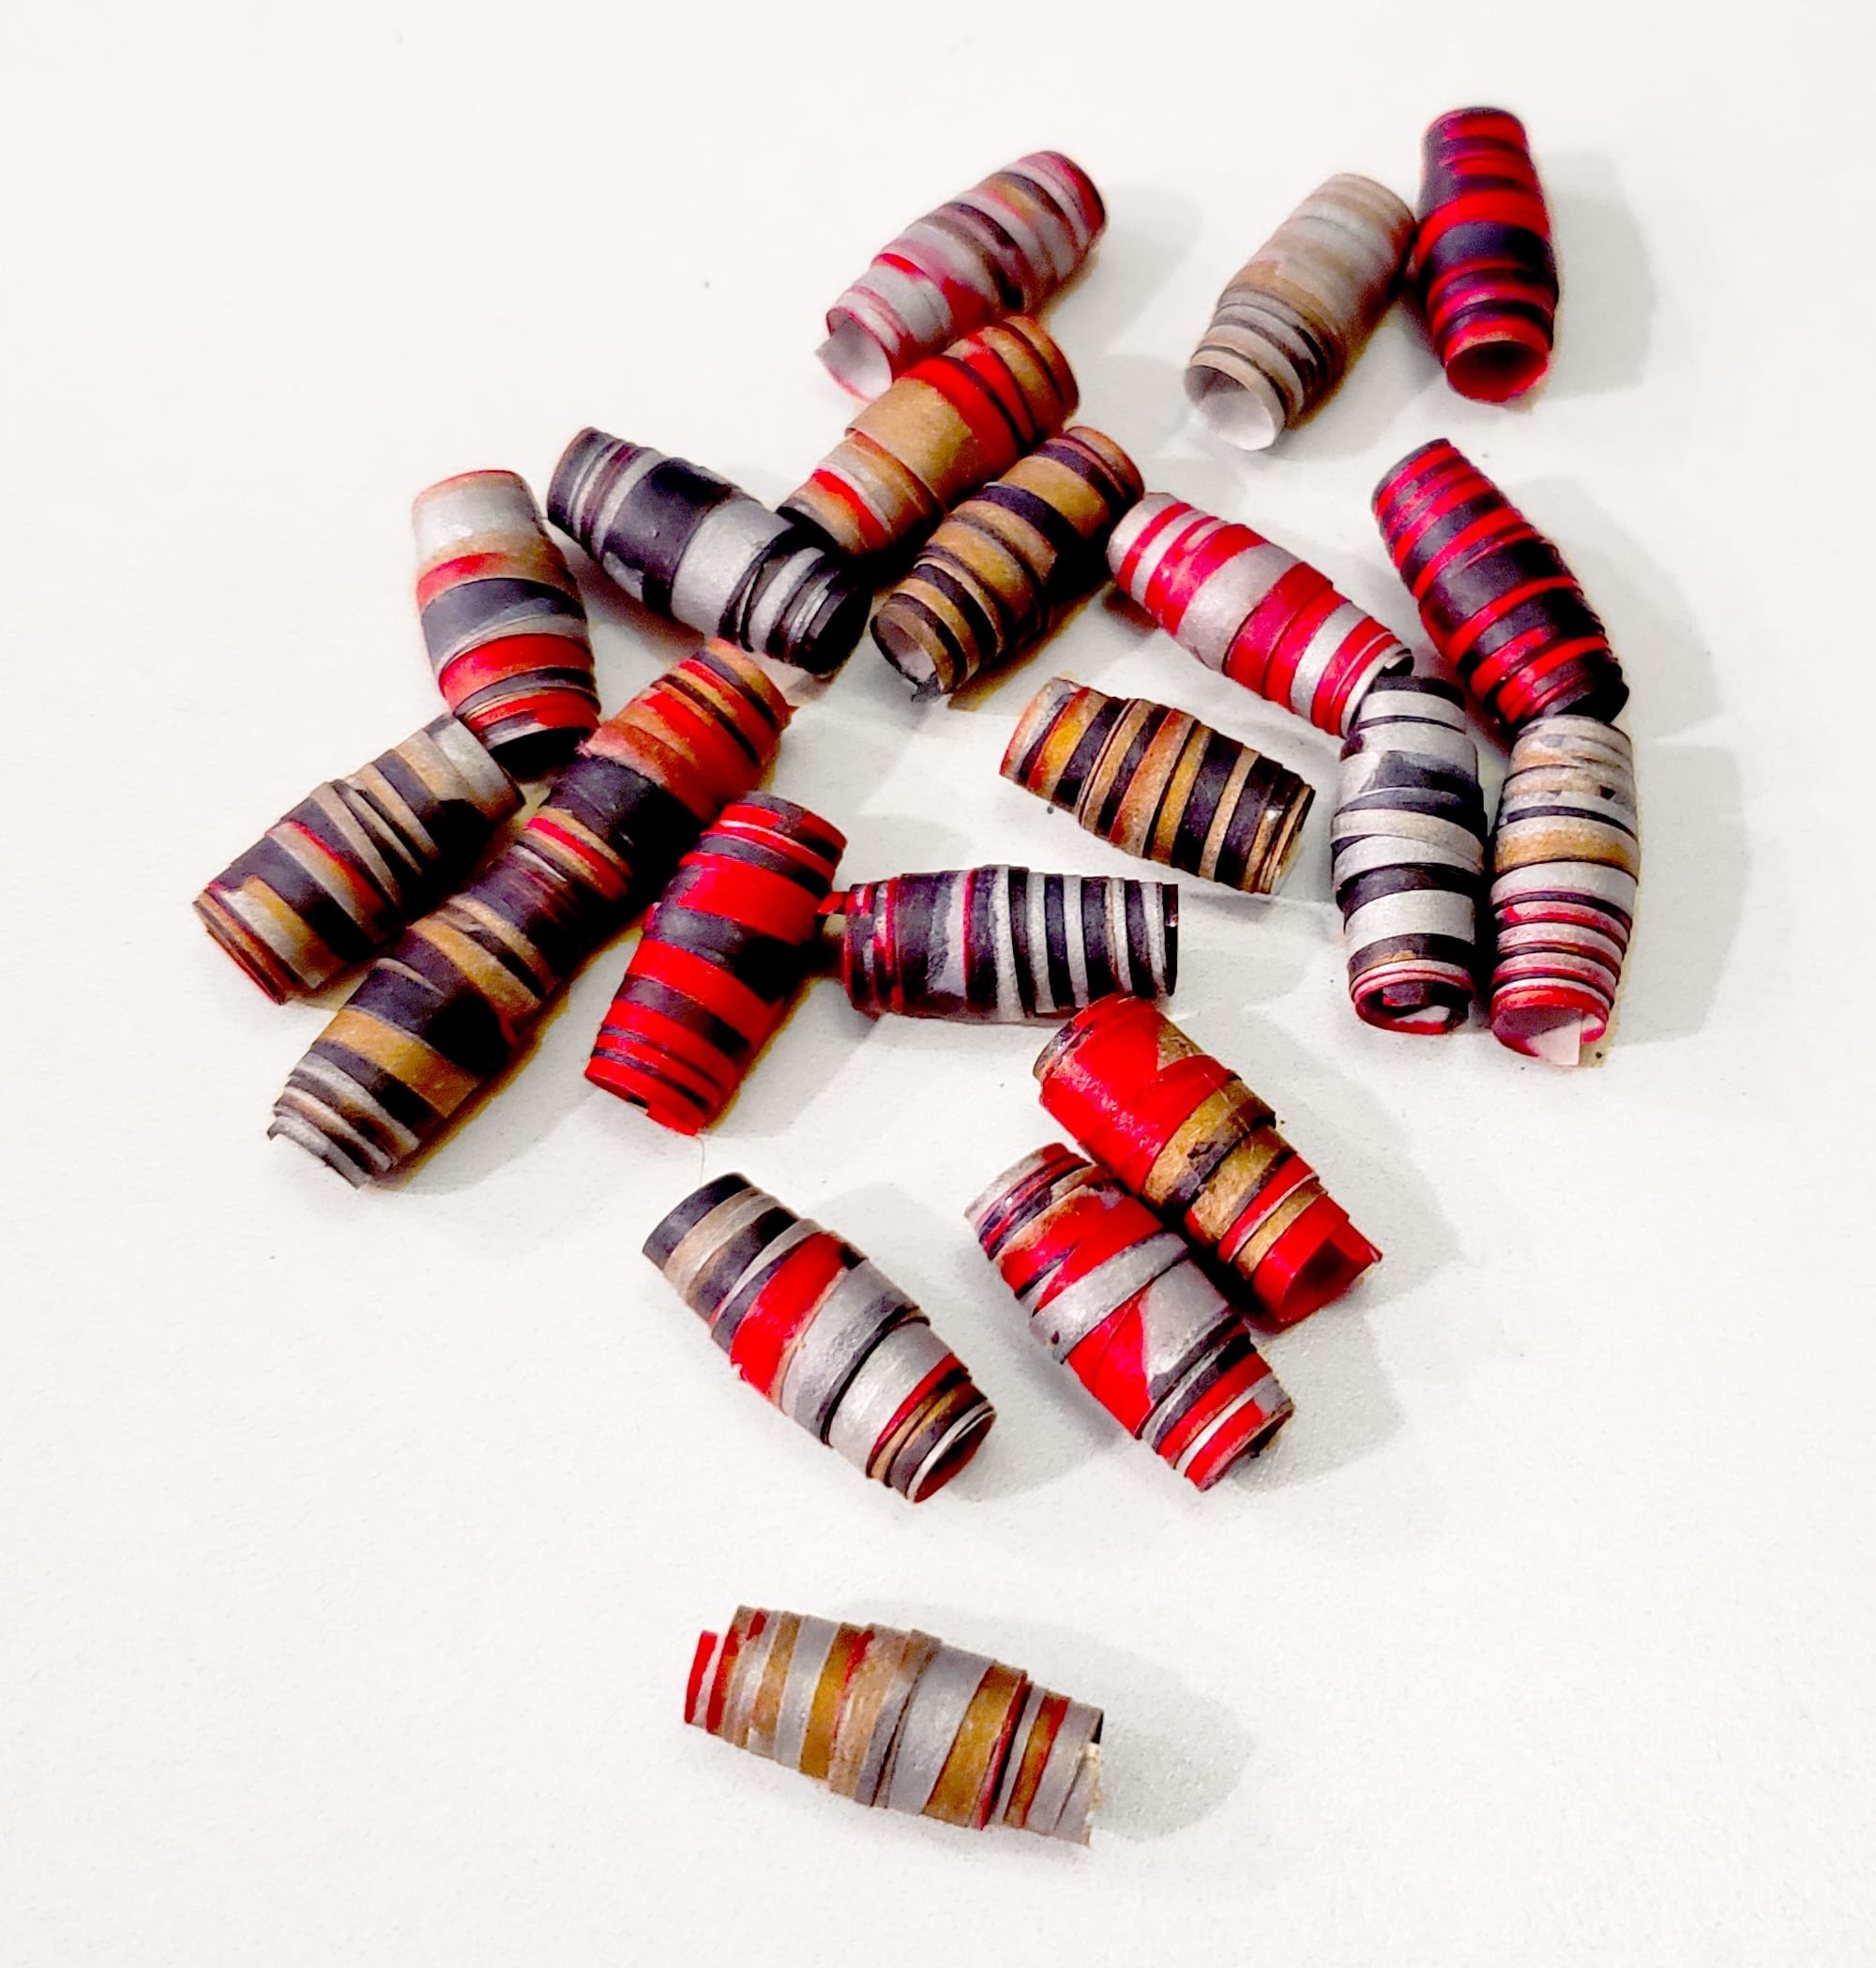
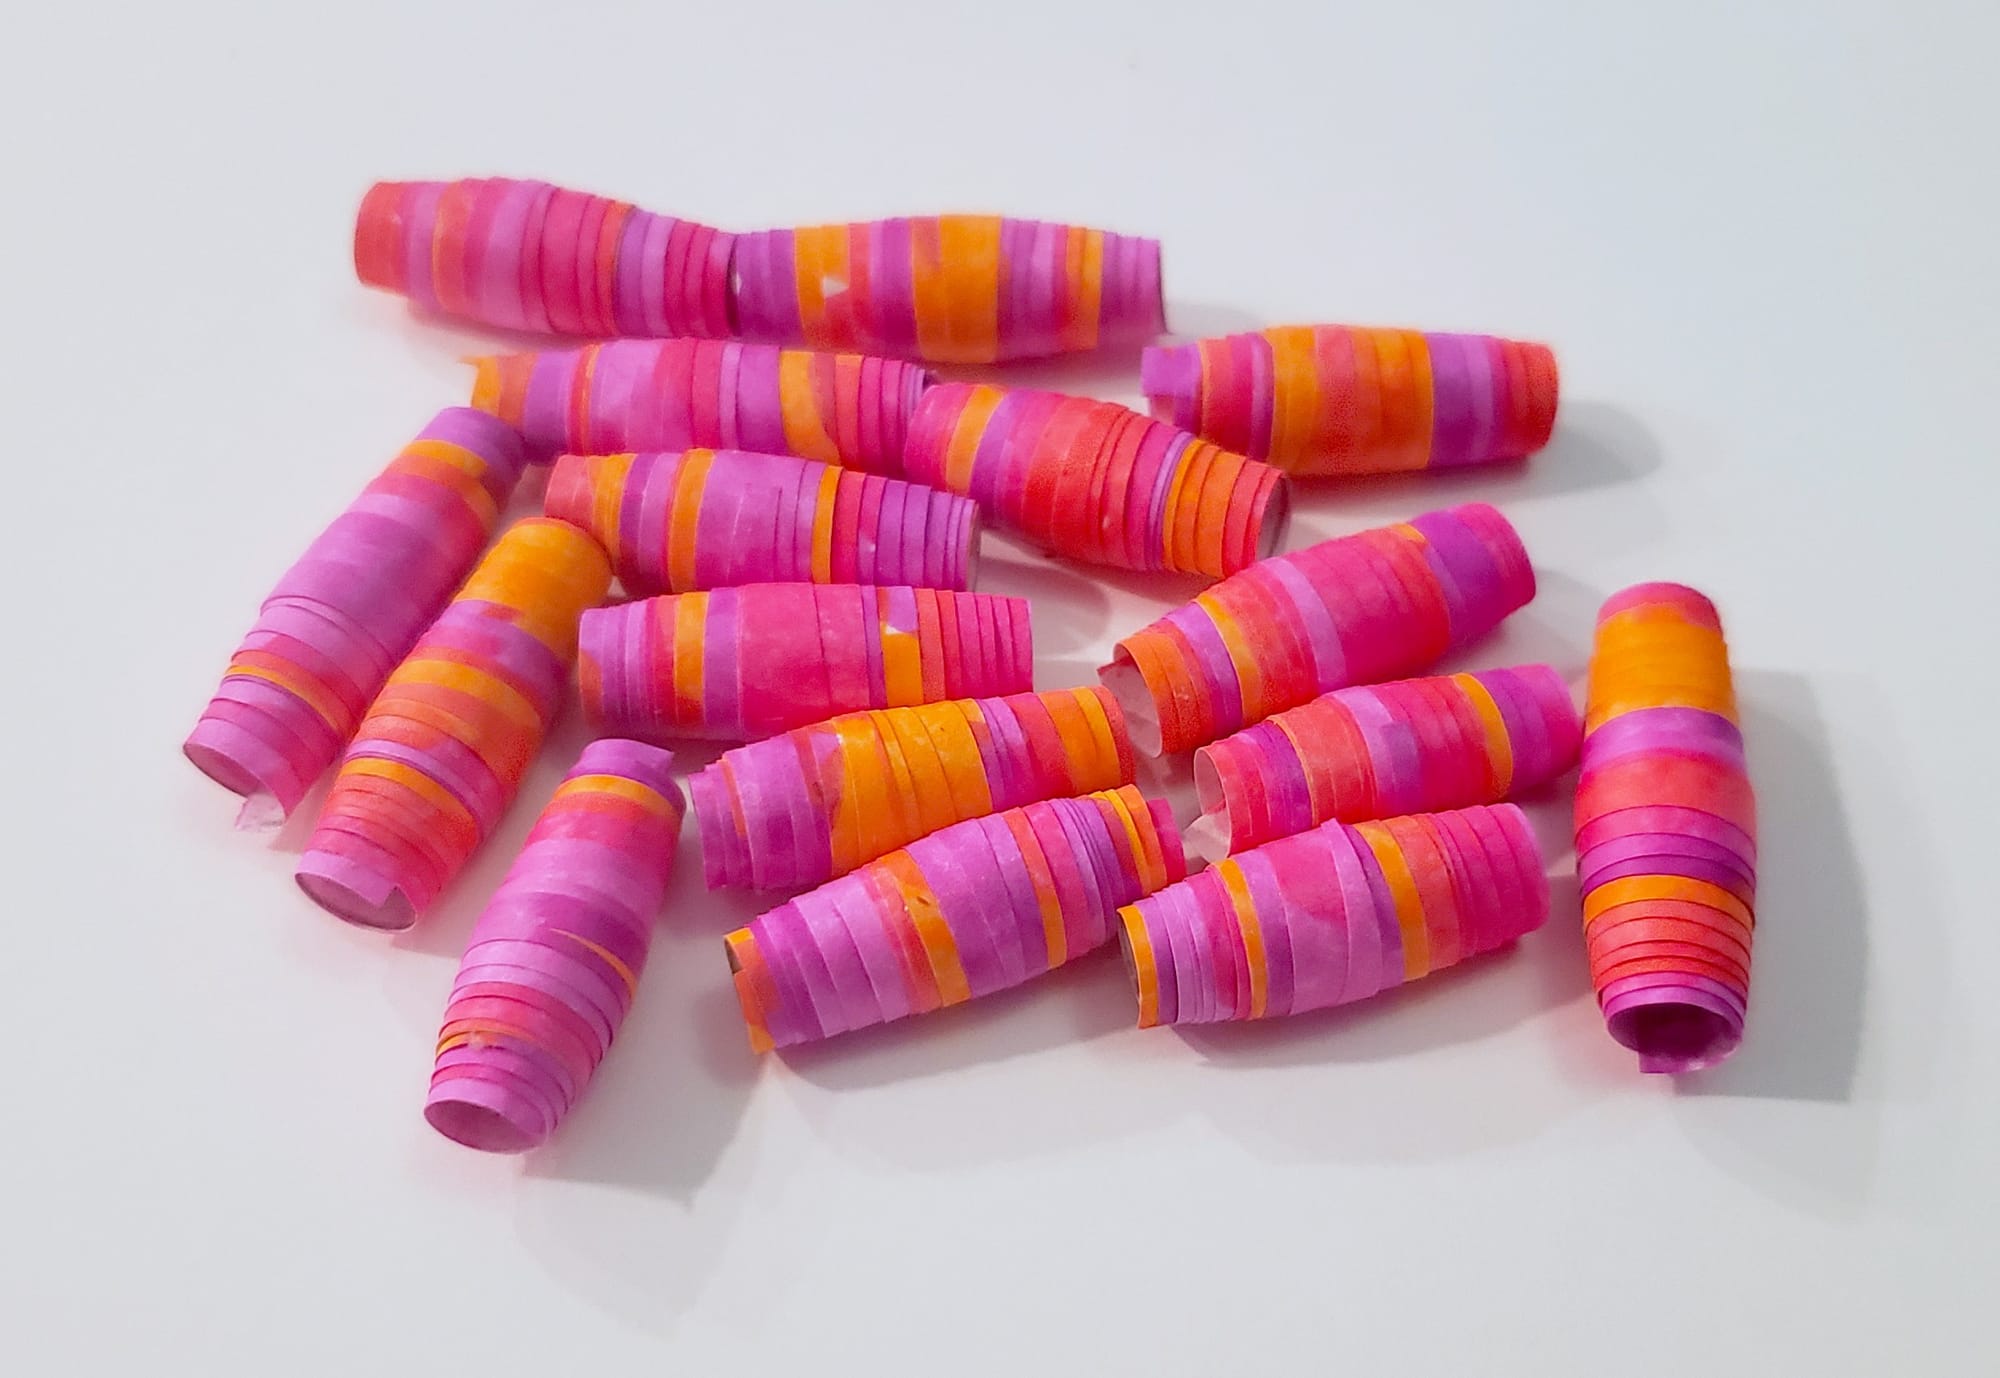
Others filled with fiery reds and oranges.
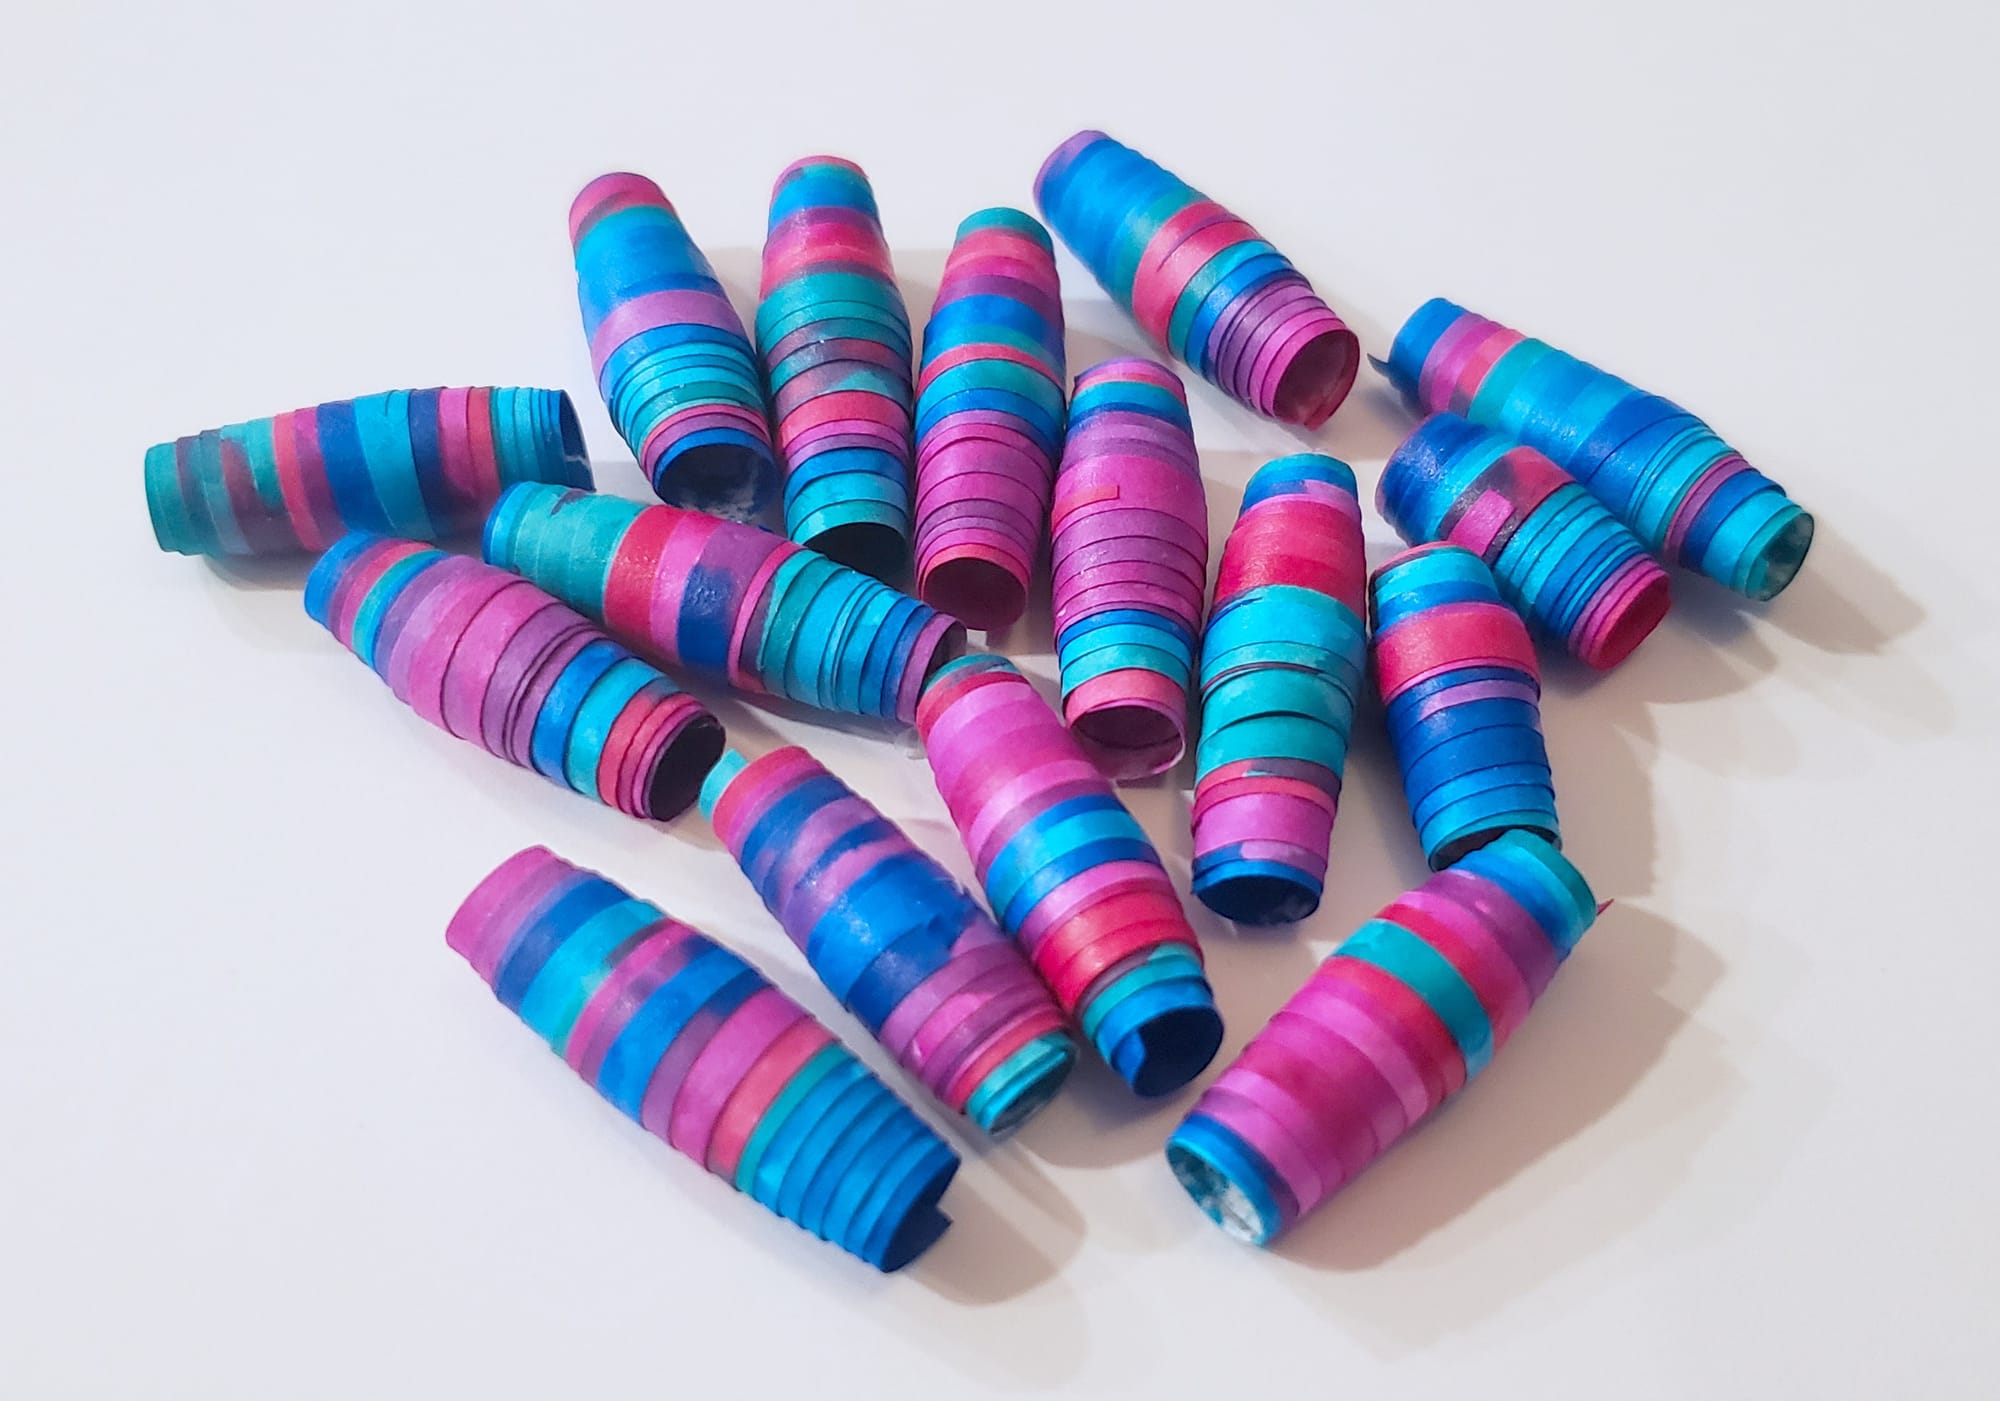
Others moved through cooler blues, greens, and yellows.
But the decorated sheets weren't intended to be the final artwork.
Eventually, I cut them into long strips and rolled them into beads.
And that's when something interesting happened.
The artwork changed.
Designing Something You Know You'll Cut Apart
Usually, when we create a drawing or painting, the finished surface is the destination.
We think about where colors and marks go because that's where we expect them to remain.
But what if you create an artwork knowing from the beginning that you're eventually going to cut it apart?
Suddenly, you're designing for something you can't completely see yet.
The marks become potential layers.
Colors that sit far apart on the original sheet may eventually wrap around one another.
A strange patch or imperfect mark may become one tiny piece of a completely different pattern.
In a sense, you're creating raw material for another artwork.
There's an unusual freedom in that.
The decorated paper doesn't need a perfect composition because you already know:
This isn't the end.
When Dots Become Stripes
My dot-marker experiments made that transformation particularly easy to see.
On the original paper, the marks were recognizable as dots. Some overlapped; others sat beside one another, with different colors occupying different areas of the page.
Then I cut the paper into strips.
Already, the original composition had changed.
Then I rolled those strips.
And the dots stopped behaving like dots.
As the paper wrapped repeatedly around the center of the bead, fragments of those circular marks appeared at different points across the surface.
Dots became stripes.
Colors that had been separated on the flat paper suddenly appeared beside—or on top of—one another.
Patterns disappeared.
Other patterns emerged.
The finished bead wasn't a miniature version of the artwork I'd started with.
It was something new.
That's one of my favorite things about the process.
There's intention involved. I can choose the colors, make the marks, decide where to cut, and change the width or shape of the strip.
But I can't completely see the finished result while I'm looking at the flat sheet.
At some point, I have to let the transformation happen.
And sometimes the material shows me something I hadn't planned.
Experiment #2: The Shape Changes the Bead
The design on the paper isn't the only thing being transformed.
The shape of the paper matters, too.
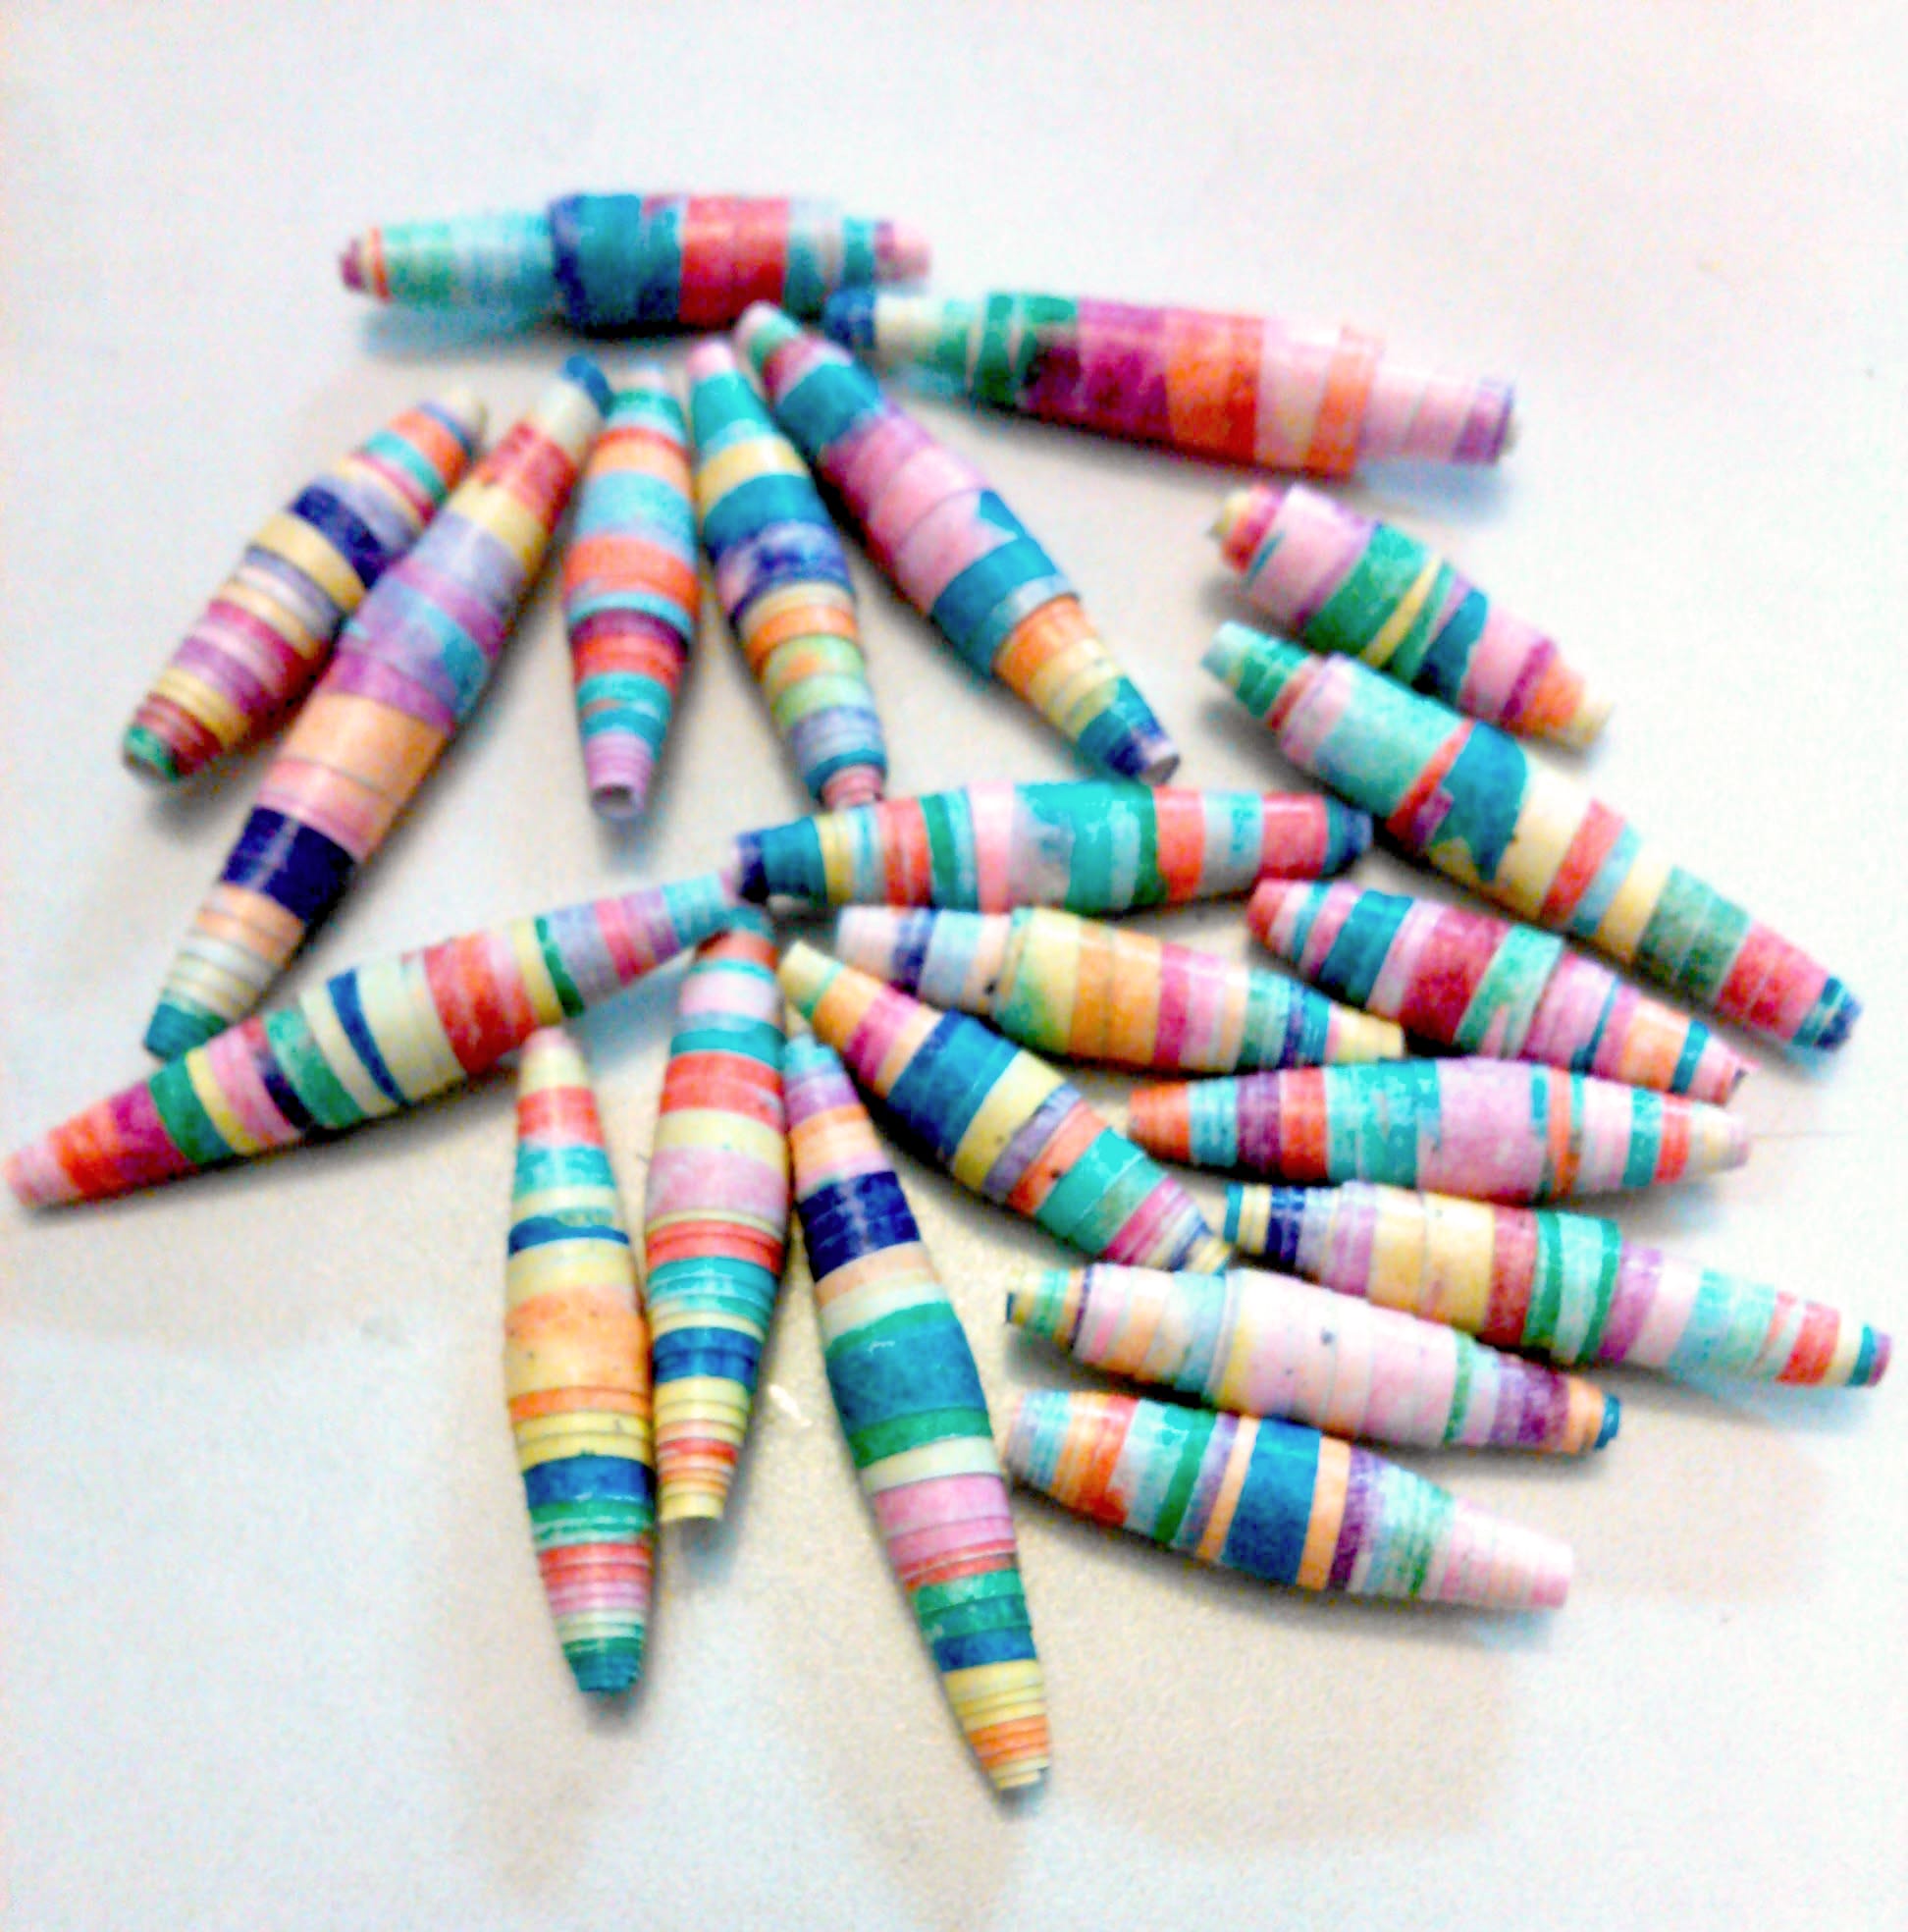
A paper bead may begin as something that looks almost absurdly unlike a bead: a long strip or triangle stretching across the table. But as that shape wraps repeatedly around a central point, its geometry determines where the layers accumulate.
A straight strip tends to build fairly evenly.
A tapered strip behaves differently because each new layer becomes slightly narrower than the one beneath it.
A long, narrow triangle can create a different silhouette from a shorter, wider one.
Change the width.
Change the length.
Change the taper.
And you change the bead.
That means two beads made from the exact same sheet of paper can turn out differently—not because the material changed, but because the cut did.
And that's an important Materials Lab observation: sometimes the technique changes what a material is capable of becoming.
Things Worth Changing on Purpose
If you're experimenting rather than trying to reproduce one exact bead, try changing one variable at a time:
- Make one strip wider than another.
- Compare a long taper with a shorter one.
- Try a straight strip.
- Shift the point of a triangle away from the center.
- Cut strips from different areas of the same artwork.
- Roll similar shapes made from different papers.
- Try deliberately irregular scraps rather than perfectly measured pieces.
Then put the resulting beads beside one another.
What changed?
- Did the silhouette become rounder, longer, flatter, thicker, or more asymmetrical?
- Did certain colors become more visible?
- Was one shape easier to keep centered while rolling?
- Did the “imperfect” strip produce a bead you actually liked better?
You don't necessarily need a winner.
Sometimes the useful result is simply: oh, so that's what that shape does.
How Much Can You Actually Control?
With so many variables involved, could you deliberately design exactly what the finished bead will look like?
Maybe—to a point.
With experience, you can become more intentional.
You can coordinate a palette, place particular colors along the edges of a strip, repeat similar cuts, or create a collection intended to work together.
But paper beads also contain an element of surprise.
A tiny area that barely registered on the flat page may end up prominently displayed.
A color you expected to dominate may become buried beneath later layers.
Something that looked unremarkable while flat may suddenly work beautifully.
That's part of what makes the process interesting.
You design the conditions, but you don't necessarily control every result.
Watch the Image Disappear—and Become Something Else
This becomes especially fascinating when the paper contains a recognizable image.
Imagine cutting through a magazine photograph of a flower.
Once the image becomes narrow strips, the flower begins to disappear.
Roll one of those strips, and it disappears even further.
You may no longer see a flower at all.
Instead, you see:
- Pink
- Green
- White
- Perhaps a dark line
- Maybe a tiny fragment of text from elsewhere on the page
The subject is gone, but its visual ingredients remain.
Something similar can happen with other papers.
Newspaper text can stop functioning primarily as language and become tiny lines, letters, and graphic shapes.
A drawing may lose the image it once depicted while retaining its colors and marks.
A painting can become fragments of brushstrokes.
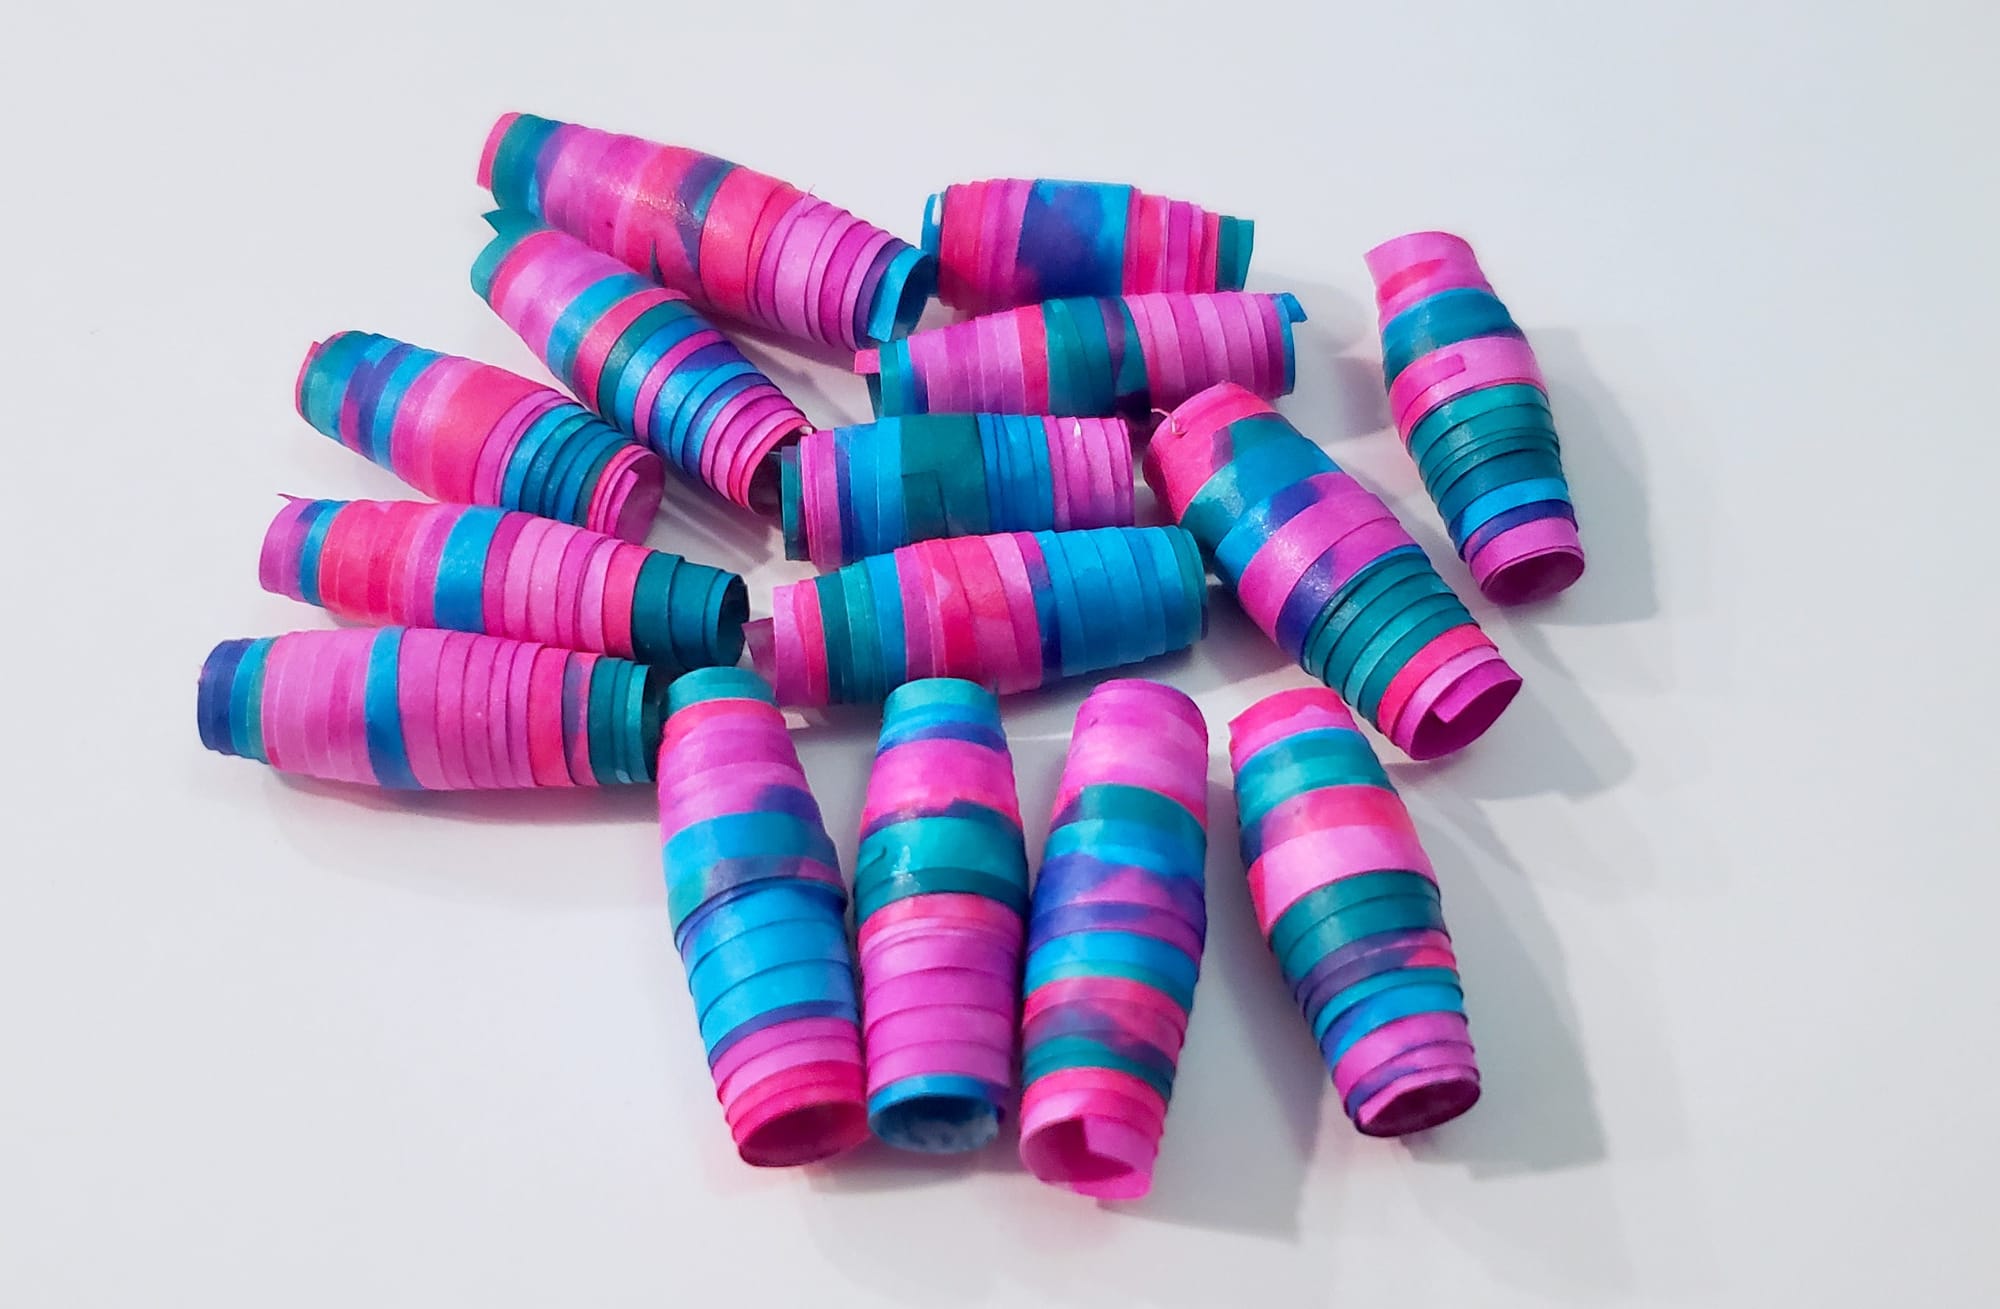
My dot-marker artwork became bands and streaks of color.
Something representational can become abstract simply because we've changed its physical form.
And that's one of the most fascinating possibilities in using old artwork for paper beads.
You're not merely recycling the paper the artwork was made from.
You're transforming the artwork itself.
Is the Original Artwork Gone?
Which raises a strange question.
If I make a sheet of colorful dot art, cut it apart, and turn it into paper beads... did I destroy the artwork?
The original sheet certainly no longer exists in its original form. I can't simply unroll the finished beads and recover exactly what was there before.
But the artwork hasn't disappeared completely, either.
Its colors remain.
Its marks remain.
The choices that went into creating it remain.
They've simply been rearranged.
Maybe the more interesting question is: did the artwork have to remain flat in order to still be the artwork?
A decorated sheet becomes strips.
The strips become beads.
The beads might become jewelry.
And the jewelry might eventually be taken apart, recombined, or transformed again.
At what point did one artwork end and another begin?
I'm not sure there needs to be a definitive answer.
But I love that something as simple as rolling scraps of paper can make us ask the question.
Sometimes creating isn't about preserving something exactly as it was.
Sometimes it's about discovering what else it can become.
From Flat Paper to a Three-Dimensional Bead
After all this talk about transformation, there's something almost amusing about how simple the basic process can be.
At its heart, a traditional rolled paper bead needs only a few things:
- paper
- scissors or another way to cut it
- glue
- something narrow to roll the paper around
That's enough to begin.
You don't need to start with jewelry tools or specialty beads. You don't even necessarily need decorative paper.
You can begin with a scrap.
And perhaps that's part of what makes paper beads such a good material experiment: the barrier between “I wonder if this will work” and actually trying it can be remarkably small.
Want to Experiment With Paper Beads?
You don't need to buy a collection of specialized supplies to begin—scrap paper, scissors, glue, and something narrow to roll around may be enough.
But if you're building a paper-crafting toolkit or want to experiment further, here are some of the materials and tools that can be useful:
Cutting & shaping: cutting mat • craft knife • metal ruler • scissors
Adhesive: Elmer's Glue-All • wood glue
Paper: scrapbook paper • cardstock • iridescent paper
Decorating your own paper: acrylic paint • POSCA markers • dot markers • paintbrushes
Turning beads into jewelry: earring wires • copper wire • beading cord • jewelry chain • jump rings • jewelry-making wire • jewelry tools
Optional shortcut: paper bead kit
Use what you already have first. These aren't requirements—they're simply options for taking the experiment in different directions.
Affiliate disclosure: This article contains affiliate links. If you purchase something through one of these links, I may earn a small commission at no additional cost to you. These links don't change what I recommend or the results of the experiment.
The Basic Rolled Bead
The most familiar paper bead begins with a strip of paper.
Depending on the shape you want, that strip might be rectangular, triangular, tapered, narrow, wide, long, short, symmetrical, or deliberately a little strange.
Starting at one end, wrap the paper snugly around a thin form.
A skewer, toothpick, specialized paper-bead roller, or another appropriately sized object can provide the center.
Keep rolling.
Layer after layer begins accumulating around the center. A piece of paper that was moments ago completely flat starts gaining thickness.
Add adhesive as appropriate to secure the layers, especially near the final edge. Then remove the bead from whatever you used to roll it and allow the adhesive to dry as needed.
Suddenly, the strip is gone.
In your hand is a tiny three-dimensional object with a hole running through its center.
Paper has become a bead.
Don't Rush Toward Perfect
When you're experimenting, there's no particular reason every bead needs to look identical.
Actually, making them differently can teach you more.
Change the width.
Try another paper.
Cut the taper differently.
Roll a strip you think will look beautiful—and another you're convinced won't.
Then compare them.
A lopsided bead isn't necessarily wasted; look at what happened.
- Did the strip wander off-center?
- Was the cut asymmetrical?
- Did the paper behave differently than expected?
And perhaps more importantly: do you actually dislike the result?
Sometimes “imperfect” and “interesting” aren't opposites.
The goal isn't necessarily: I'm trying to make the correct paper bead.
It can be: I'm trying to find out what happens.
The Hole Matters, Too
There's another variable that's easy to overlook because most of our attention naturally goes toward the outside of the bead: the center.
Whatever you roll the paper around helps determine the opening that remains afterward.
And that matters if the bead is eventually going to become something else.
A bead intended for thin jewelry wire may have different needs from one intended for cord, thread, ribbon, or another material.
Even the humble object you're rolling around is therefore part of the experiment.
We're already thinking ahead: what will need to pass through this later?
Rolling Isn't the Only Option
As Korey's pillow-bead technique showed us earlier, paper doesn't necessarily need to be rolled around a form to become a bead.
It can also be folded.
That gives us another small experiment hiding inside the larger one: what happens if you take similar papers and manipulate them differently?
- How does rolling change the pattern compared with folding?
- How does the resulting shape differ?
- Does one technique work particularly well with a certain thickness of paper?
- Does one preserve more of the original pattern?
- Does one surprise you more?
We don't necessarily need to decide which method is “better.”
The interesting discovery is that changing the technique changes what the same material can become.
Make One and See What Happens
It's easy for a new creative technique to turn into a shopping list.
You discover something interesting and suddenly it seems as though you need the perfect paper, specialized roller, cutting mat, precision knife, adhesive, sealant, jewelry tools, findings, wire, and everything else before you're allowed to begin.
But if what interests you is the transformation itself, start with the simplest version you can reasonably make.
Find a suitable piece of paper.
Cut a strip.
Roll it.
Glue it.
Make one bead.
Then make another.
You can always explore specialized tools, finishes, jewelry components, and more complicated techniques later if you decide you want to continue.
For now, you're simply finding out: what happens?
And one of the materials involved turns out to deserve much more attention than its humble place on the supply list might suggest: the glue.
The Glue Matters More Than You Might Think
We've spent a lot of time considering the paper—its thickness, pattern, shape, and how we manipulate it.
But during my Paper Bead Earrings class at Perennial, Korey pointed out another variable that's remarkably easy to overlook: the glue.
At first, adhesive seems to have one very simple job:
Keep the paper from unrolling.
But when paper is being transformed into something intended to be handled, worn, carried around, or incorporated into another object, glue can become part of the structure itself.
Depending on what you use and how you apply it, adhesive can affect the bead's strength, surface, appearance, and resistance to moisture.
Which raises another Materials Lab question: how much of a paper bead is actually paper by the time we're finished with it?
Not Just Any School Glue
During class, Korey specifically recommended Elmer's Glue-All rather than ordinary school glue.
That distinction might seem tiny.
They're both white glue; they may even look remarkably similar sitting beside one another.
But Korey's point was that Glue-All wasn't simply helping us stick down the final flap of paper.
It could help hold the layers together while strengthening and sealing the bead as we worked.
And suddenly the glue stopped feeling like an incidental supply.
It became another material worth paying attention to.
That's especially important if the finished bead isn't going to spend its life sitting safely in a box.
We were making jewelry.
Earrings move.
They get handled.
They may get dropped.
They encounter humidity, skin, clothing, bags, countertops, and all the ordinary hazards that come with actually using something.
If paper is going to make that transition from craft material to wearable object, durability starts to matter.
And apparently, paper can become considerably tougher than it looks.
Paper Beads vs. Rain...and a Car
Korey had a story that provided a much more dramatic durability test than anything we were planning to conduct in class.
Some of her own paper-bead earrings had once been lost outside.
In the rain.
Already, that sounds like fairly bad news for jewelry made from paper.
But their adventure wasn't finished.
Korey later accidentally ran over them with her car.
And the beads survived.
There was something wonderfully absurd about hearing this while sitting at a table surrounded by little pieces of paper.
These weren't metal beads.
They weren't glass.
They hadn't begun as some famously durable industrial material.
They had begun as paper.
Yet rolling, layering, gluing, and sealing that paper had changed its physical character enough that the finished beads could withstand far more than the original sheet ever could.
I wouldn't recommend reproducing Korey's accidental experiment.
Please don't put your paper beads in the driveway and run over them for science.
But the story does challenge an assumption that's easy to make: paper = fragile.
Sometimes it is.
But material properties aren't always fixed.
What we do to a material can change how that material behaves.
And that's a very Materials Lab kind of discovery.
What About Wood Glue?
Korey also talked about wood glue as an option for making paper beads extremely durable.
She described beads treated this way as essentially “indestructible” and waterproof based on her experience with them.
There was a tradeoff, though.
Wood glue can have a light yellow or amber tint, and Korey warned that this can alter the colors of the paper somewhat.
That's particularly worth thinking about if the appearance of your bead depends on pale colors, bright whites, cool tones, or subtle color relationships.
A finish doesn't merely protect what you've made.
It can become part of how the finished object looks.
And that gives us another variable to experiment with.
- What happens to white paper?
- What happens to blue?
- Does newspaper take on a warmer, aged appearance?
- Do reds and oranges become richer?
- Does a very pale bead noticeably change?
- How different does the same paper look before and after the adhesive dries?
Those would be interesting side-by-side tests for a future Materials Lab experiment.
A Small but Important Waterproofing Caveat
There is one distinction worth making here.
Korey's description reflects her experience with the wood glue and paper beads she has used. It shouldn't be taken to mean that every adhesive sold as “wood glue” automatically makes every paper bead completely waterproof.
Wood glues come in different formulations, and their resistance to water can vary.
Some products are designed to resist occasional moisture.
Others are formulated for much greater water exposure.
And the finished bead can also be affected by things like the paper, application, coverage, drying or curing time, and any additional finish being used.
So if water resistance is important for a particular project, check the manufacturer's information for the specific adhesive or finish you're using rather than assuming all wood glues behave identically.
And, of course, water-resistant craft jewelry still isn't necessarily something I'd deliberately wear swimming or leave soaking in water.
There's a difference between: “This survived getting wet.”
And: “This object is designed for prolonged water exposure.”
That's exactly the kind of distinction worth keeping in mind when we're experimenting.
The Finish Is Part of the Experiment
This opens up an entirely new branch of questions.
Suppose we make several beads from the exact same paper.
Use Glue-All on one bead.
Try an appropriate wood glue on another.
Try a different compatible sealer or finish on another.
Then compare them.
We could look at:
- color changes
- surface feel
- shine or matte appearance
- stiffness
- weight
- visible brush marks
- flexibility
- resistance to ordinary handling
- reaction to limited moisture exposure
Suddenly, we're no longer asking only: which glue sticks paper together?
We're asking: how does the finish change the material?
And that's potentially an entire Materials Lab experiment of its own.
From Flimsy Sheet to Functional Object
There's something especially interesting about this transformation when you remember where we started.
Take a single piece of paper in your hand.
Bend it.
Crumple it.
Tear it.
Get ordinary untreated paper wet and see how quickly its behavior changes.
It doesn't immediately suggest durable jewelry material.
But a paper bead isn't simply that original sheet anymore.
The paper has been cut.
Rolled or folded.
Layered.
Adhered.
Potentially sealed.
Those thin layers have accumulated into a completely different structure.
That's why saying: “But it's made out of paper,” doesn't really tell us everything we need to know about the finished object.
Yes, it is made from paper.
But what happened to that paper matters.
And perhaps that's one of the bigger lessons emerging from this experiment: a material's properties don't exist entirely independently of what we do to it.
Cutting changes it.
Folding changes it.
Rolling changes it.
Layering changes it.
Adhesive changes it.
Finishing changes it.
And by the time we're finished, the humble scrap of paper we started with may be capable of doing things we never would have expected from the original sheet.
Which means our little bead is finally ready for the next question: okay...now what can we make with it?
Pick three pieces of paper you already have. Cut similar strips from each, make one bead from each paper, and place them side by side.
Notice:
—Which was easiest to roll?
—Which changed most dramatically?
—Which surprised you?
—Which would you use again?
Then change one variable—paper shape, length, width, or technique—and see what happens.
Okay...Now What Can the Bead Become?
We've transformed paper into a bead.
Experiment complete?
Not quite.
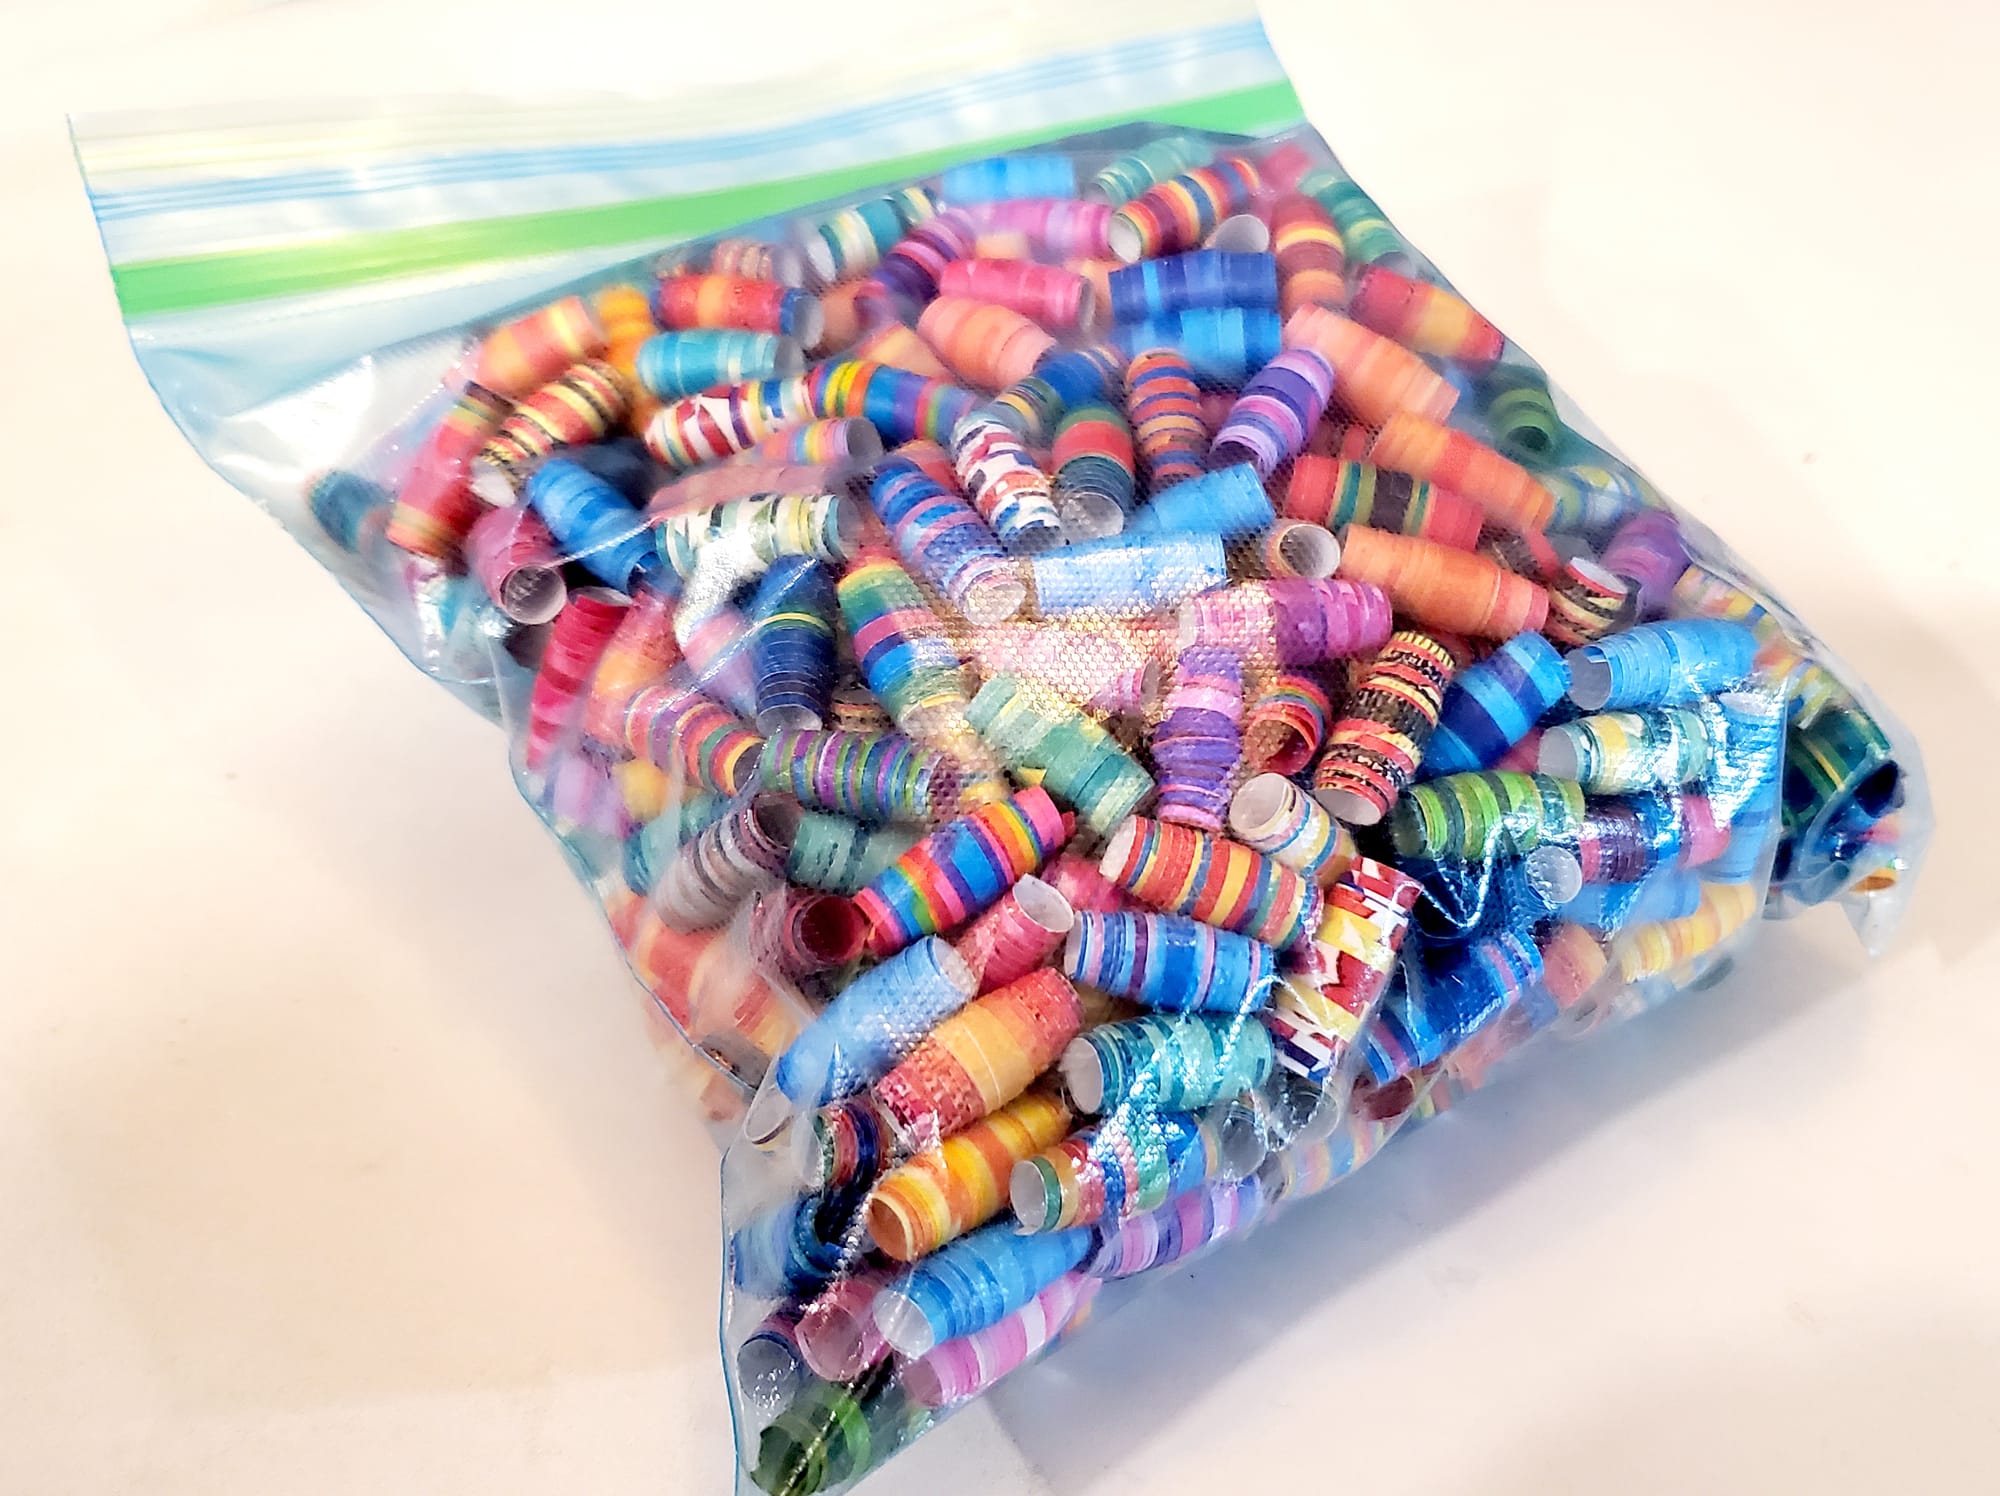
Because once you've made a pile of colorful little paper beads, there's another question waiting for you: okay...now what can these become?
That's where this experiment gets especially interesting.
A paper bead doesn't have to be the finished object.
It can become a material all over again.
The scrap of paper was our original material.
We transformed it into a bead.
Now the bead becomes a component we can use to create something else.
Paper → bead → ?
And suddenly we're right back where we started.
From Paper Beads to Wearable Art
This was the next step in Korey's Paper Bead Earrings class at Perennial.
Once we'd made our beads, we didn't simply collect them in a container and call the experiment finished.
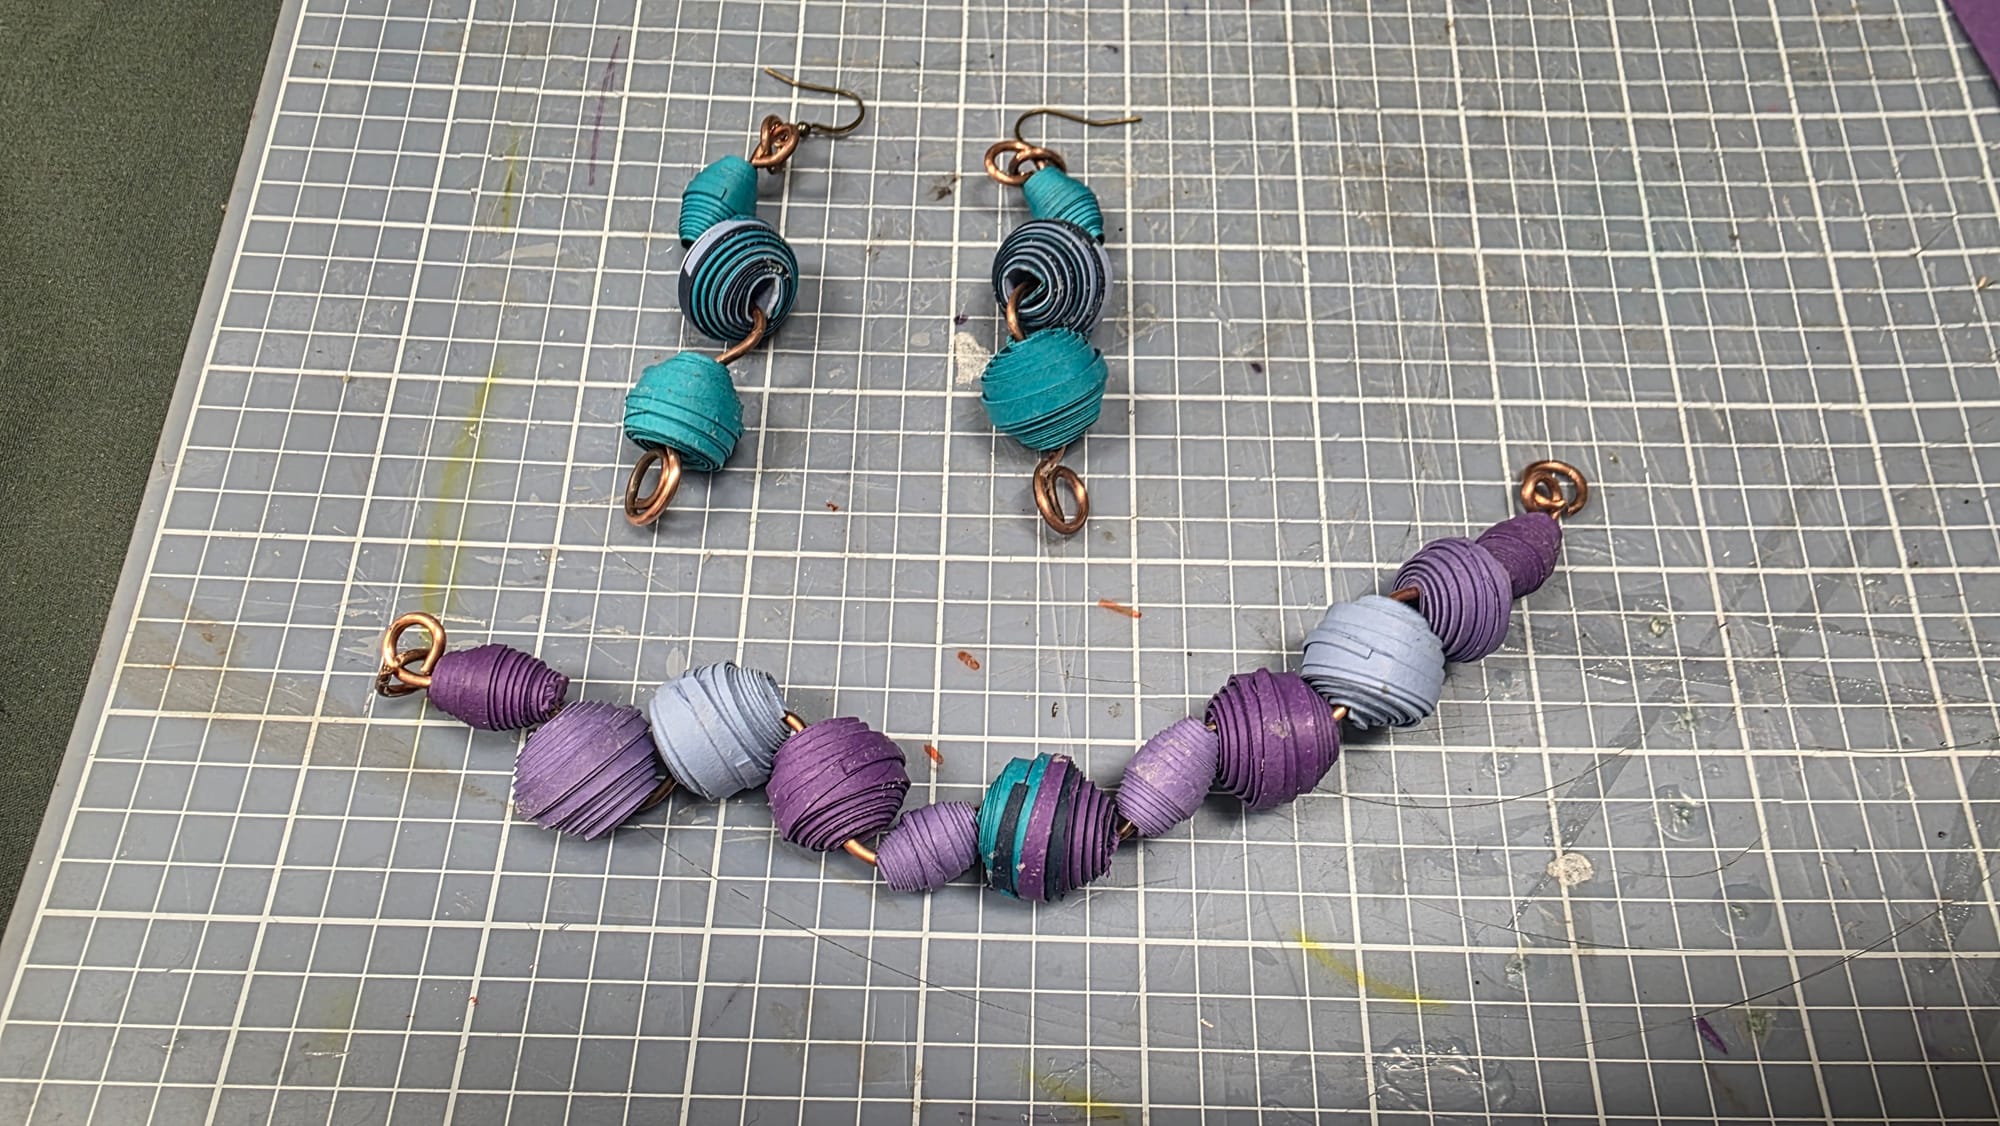
We turned them into jewelry.
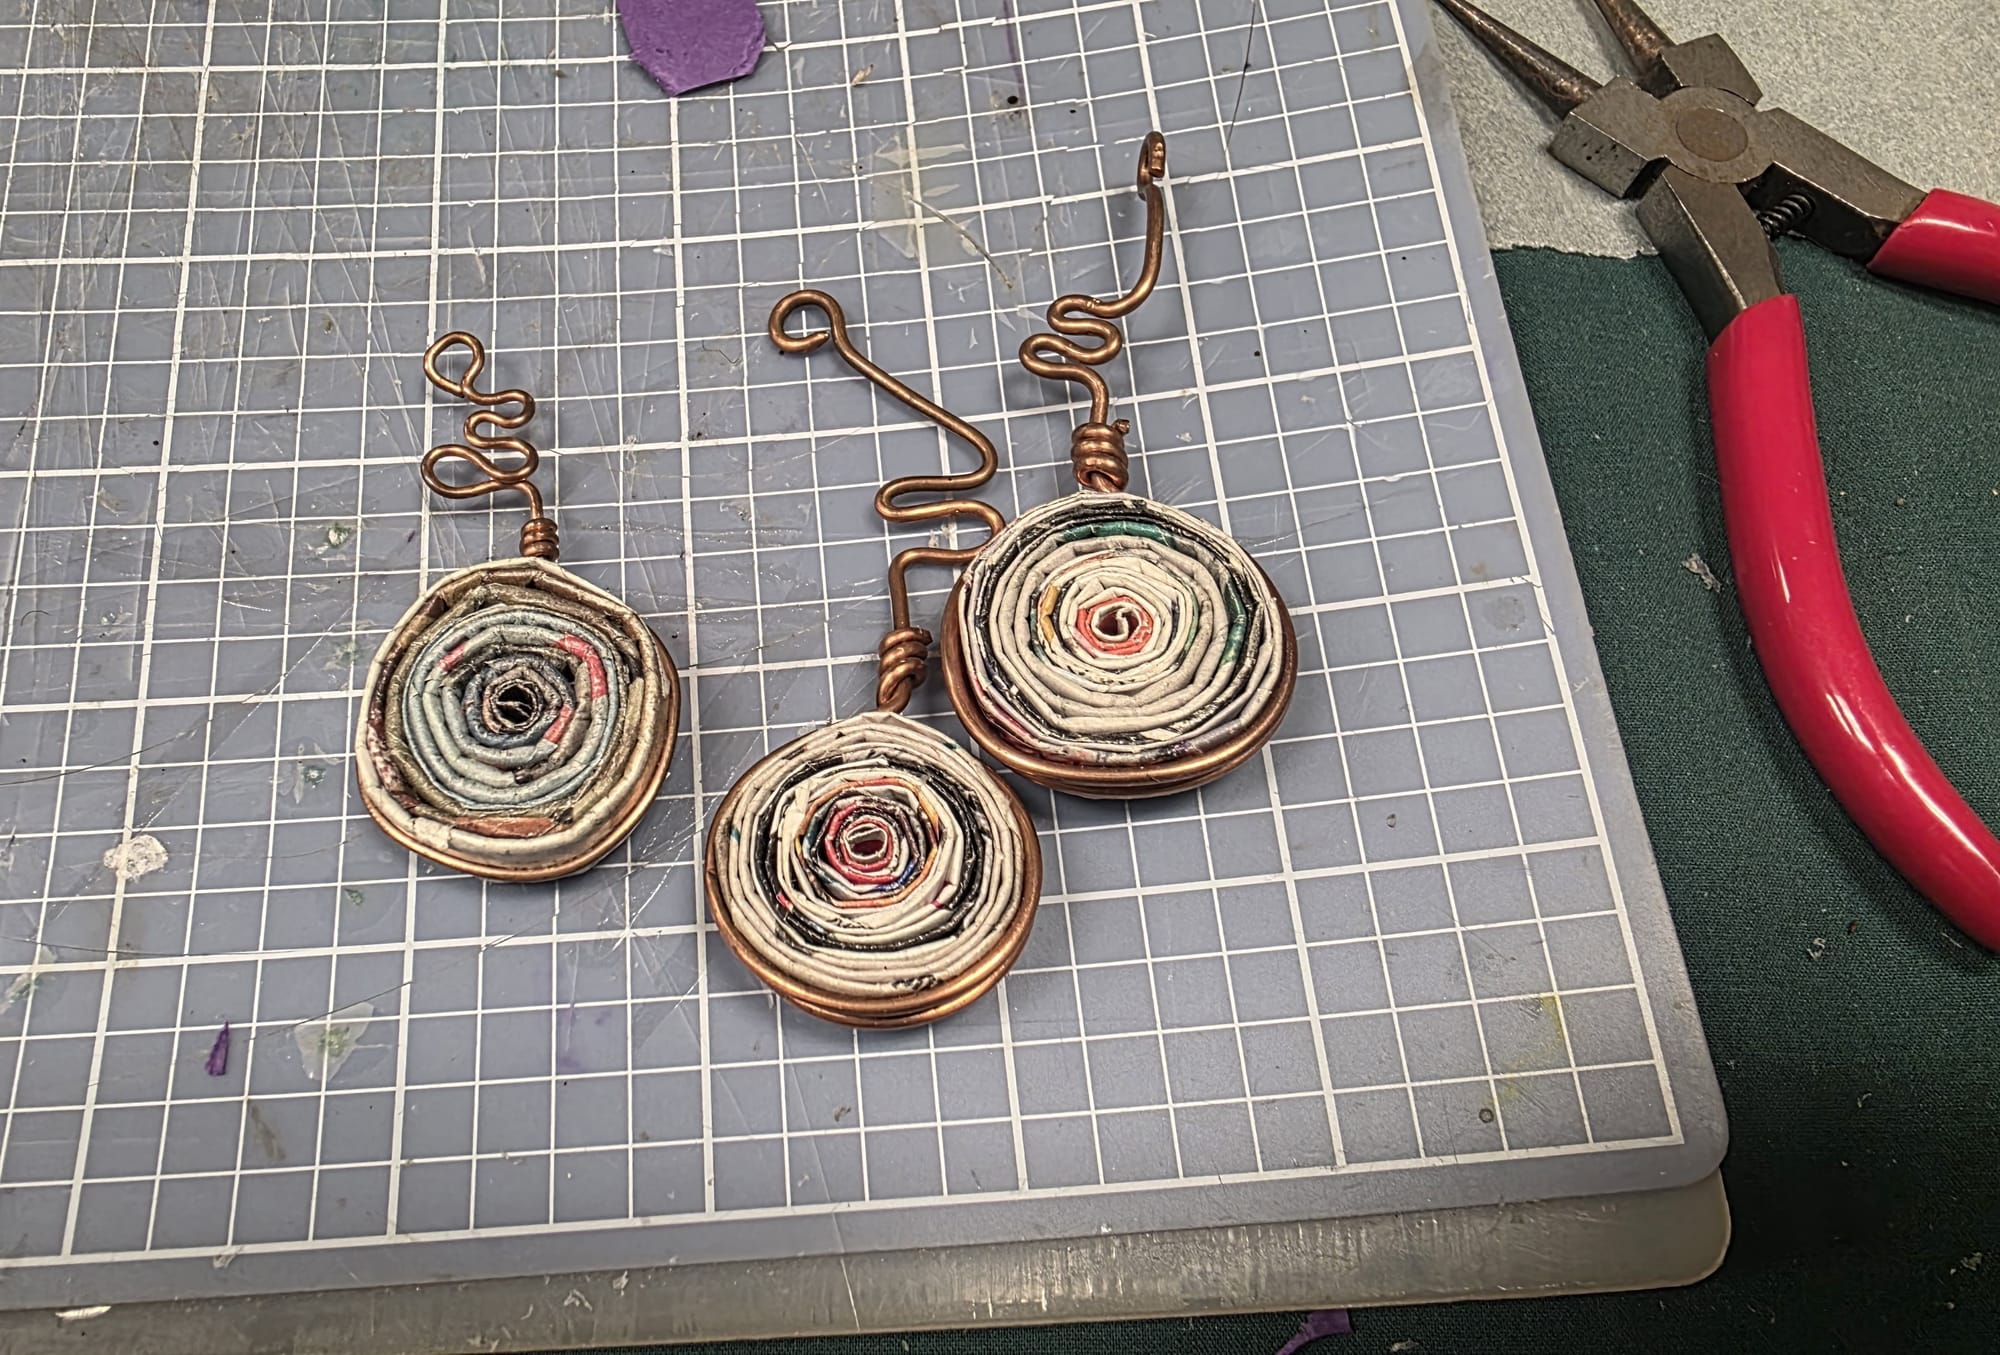
And another reused material entered the picture: salvaged copper electrical wire.
This was especially fun for me because I'd worked with the same material in Korey's earlier Copper Rings + Bracelets class.
Back then, we'd taken electrical wire and transformed it into rings and bracelets.
Now that same kind of wire had another job.
Using round-nose pliers, needle-nose pliers, and wire snips, we could shape the copper into loops, hooks, and connections that allowed our paper beads to become earrings.
So, now we had two transformations happening at once: discarded or leftover paper → handmade beads and salvaged electrical wire → jewelry components
Bring them together, and materials that weren't originally created to become jewelry could become something wearable.
I love that intersection.
Neither material has to remain confined to the purpose it originally served.
 Jessica Carey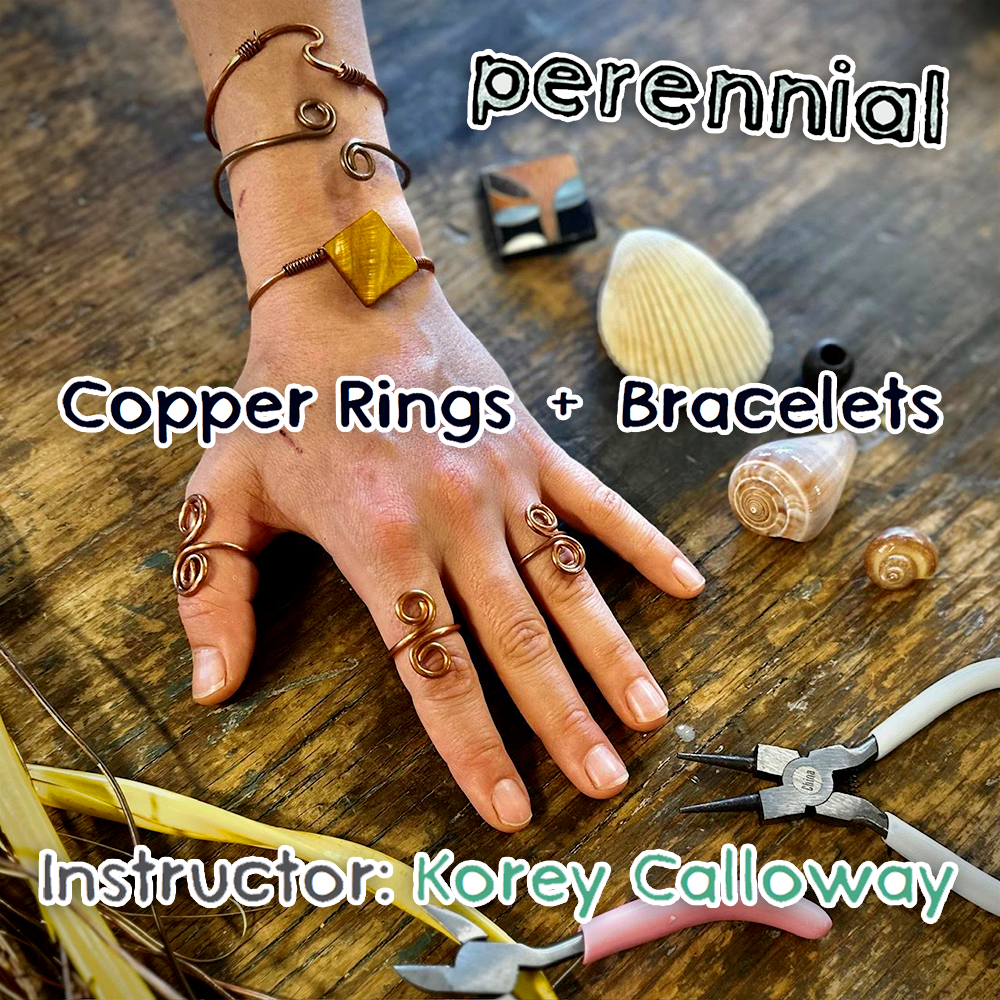
There Isn't One Paper-Bead Earring
Korey showed us several ways the beads could be arranged rather than giving everyone one exact design to reproduce.
That opened another little door for experimentation.
- How many beads? One? Several?
- Do you use beads of approximately the same size or combine larger and smaller ones?
- Should the two earrings match exactly?
- Could they coordinate without matching?
- What happens if you deliberately make them asymmetrical?
- How much copper should remain visible?
- Does the wire merely connect everything—or can it become part of the design itself?
Paper choice suddenly matters in another way, too.
Earlier, we were evaluating a bead by itself.
Now we're seeing it in relationship with other materials and other beads.
A bead that seemed unremarkable sitting alone on the table might become exactly what a particular earring needs.
Two beads you wouldn't necessarily have paired might suddenly make sense together.
A strange color might become an accent.
An imperfect bead might give the finished piece character.
Once again, context changes how we see the material.
And Then There Was a Necklace
The possibilities didn't stop with earrings.
Korey also showed us how paper beads could be connected together to create a necklace.
That seemingly small demonstration changed the scale of the project.
We weren't really learning to make paper bead earrings anymore.
We were learning a collection of techniques:
- how to make a bead
- how to manipulate wire
- how to create loops and connections
- how to arrange components
- how to combine individual pieces into a larger object
Once you understand those ideas, you aren't limited to reproducing the project named in the class description.
You're beginning to develop a kind of creative vocabulary.
A bead is one element.
Wire is another.
A loop is a connection.
A repeated bead can become a pattern.
Several connected elements can become a necklace.
Change the arrangement, and you change the object.
By the end of the class, I'd made both earrings and a necklace from the beads I'd created.
And there was something satisfying about seeing those little experiments finally assembled.
Individual beads that had been scattered across the table suddenly looked different when they were hanging from copper wire as finished jewelry.
The experiment had become something I could actually wear.
Paper → Bead → Jewelry
If we zoom out, there's something wonderfully strange about the entire sequence.
We began with scraps of paper.
Some might have been leftover from other projects.
Some might otherwise have been recycled or forgotten.
We cut them apart.
Rolled or folded them.
Added adhesive.
Turned them into beads.
Then we combined those beads with salvaged wire.
The wire was cut and shaped.
The beads were arranged and connected.
And eventually: paper → bead → earring
Or: paper → bead → necklace
At no individual step does the material suddenly become “creative.”
The creativity lives in the series of decisions and transformations.
And once you recognize that, there's no particular reason jewelry needs to be the final destination.
What Else Could Paper Beads Become?
A bead is really just a component.
And components can travel.
Paper beads could become part of:
Jewelry
- earrings
- necklaces
- bracelets
- pendants
- brooches or pins
- charms
Some of those I've already explored.
Others immediately raise new questions about construction, durability, weight, arrangement, and how paper beads interact with other materials.
But jewelry is only one direction.
Books, Journals & Bookmarks
Paper beads seem especially at home around books because there's something wonderfully circular about paper returning to paper in another form.
A bead could hang from the end of a cord or thread to create a decorative bookmark dangle.
Several smaller beads could become part of a tassel.
They could hang from a journal closure or spine.
They could become charms or decorative page markers.
And imagine making a bookmark using beads created from discarded book pages, old drawings, or papers connected to the contents of a journal.
The material itself could become part of the story.
Hanging & Decorative Objects
String enough beads together and they could become:
- garlands
- ornaments
- hanging decorations
- decorative strands
- mobiles
- window decorations
Change the scale, repetition, spacing, or materials between the beads and the visual effect changes again.
Everyday Objects
Depending on construction and durability, paper beads might also become:
- keychain components
- bag charms
- zipper pulls
- gift embellishments
- decorative tags
A tiny object doesn't necessarily need an enormous purpose.
Sometimes a little handmade detail is enough.
Mixed-Media Art
And perhaps one of the most interesting directions is bringing the beads back into artwork.
Instead of wearing them, what if we attach them to a mixed-media piece?
Build them into an assemblage?
Combine them with fabric?
Wire?
Found objects?
Collage?
Sculpture?
Fiber work?
The paper began as an art material.
Then it became an artwork.
Then the artwork became a bead.
And now the bead could become an art material again.
Material → artwork → material → artwork.
At some point, the distinction starts getting delightfully messy.
Creativity Without Buying Something New
There's another way to approach paper beads that begins before deciding what you want to make:
Look at what you already have.
Maybe there's an old magazine.
Scrapbook paper left over from another project.
A drawing you don't particularly want anymore.
A scrap you've been saving because it was too interesting to throw away—even though you had absolutely no idea what you were saving it for.
Maybe there's thread, yarn, ribbon, wire, buttons, old jewelry findings, or a broken necklace that could eventually be combined with the beads.
Once you begin looking at materials this way, the boundaries of the art-supply closet start getting a little fuzzy.
The recycling bin might contain paper.
The junk drawer might contain useful odds and ends.
An old artwork might contain colors and patterns worth transforming.
A leftover piece from one project might become the starting point for another.
That doesn't mean every object needs to be saved.
It simply means that before deciding you need something new, it can be worth asking: what do I already have that might work?
Creativity Still Has a Cost
It's tempting to describe a project like paper beads as “free art.”
But that isn't entirely accurate.
Even if the paper itself costs nothing, you may still need scissors, adhesive, something to roll the beads around, and whatever materials are necessary for the object you eventually want to create.
Jewelry can add another layer.
During the Perennial class, we used round-nose pliers, needle-nose pliers, wire snips, glue, and salvaged copper electrical wire in addition to our paper.
Finishes or sealers may add another cost.
So the lesson isn't: look, you can make art for free!
It's something more useful: not every part of a creative project has to be purchased new.
Maybe you already have scissors.
Maybe you can borrow a tool.
Maybe the paper comes from another project.
Maybe you reuse wire or findings.
Maybe you begin by making the beads and don't worry about turning them into jewelry yet.
Accessibility doesn't always mean reducing the cost to exactly zero.
Sometimes it means reducing the number of barriers between curiosity and participation.
Start With What You Have
New creative techniques have a funny way of turning into shopping lists.
You discover something that looks fun, then encounter specialized tools, beautiful materials, perfectly coordinated supplies, and suddenly: that looks fun.
Becomes: I don't have everything I need.
But you don't have to begin with everything.
Start with one scrap.
Make one bead.
Then another.
See whether you enjoy the process.
If you eventually want to go further, you can decide which additional tools or materials would actually help rather than buying an entire collection before you know what you need.
And using scraps, salvaged materials, or things you already own doesn't make the resulting work somehow less legitimate.
As I realized through my experience with paper beads: the paper beads weren't substitutes for “real” beads. They were real beads.
They simply carried a different story.
A paper bead isn't failing to be a glass bead.
Salvaged copper wire isn't failing because it didn't come from the jewelry aisle.
They're different materials with different properties, possibilities, limitations, and histories.
That doesn't mean specialized or professional art materials are unnecessary.
Sometimes they're exactly what a project needs, and their consistency, durability, formulation, or specialized properties may matter.
There is room for both.
Use the specialized material when you need it.
Experiment with the ordinary one when you're curious.
And don't assume price determines creative potential.
Look Twice, Not Forever
There is one important caveat to all this talk about creative reuse.
The goal isn't to become afraid of throwing anything away because: maybe someday I could make art with this.
Not everything needs another life.
Not every scrap needs to become a project.
And a home doesn't need to become a warehouse of potentially useful cardboard, paper, containers, strings, buttons, packaging, and mysterious little objects.
The goal is simply to develop the habit of looking twice.
Before something leaves your hands, ask: is there another possibility here?
Sometimes the answer will be no.
Recycle it.
Donate it.
Dispose of it appropriately.
Let it go.
But every once in a while, the answer might be: actually...yes.
And a scrap of paper becomes a bead.
So, What Did We Learn?
We started with an ordinary material: paper.
But the experiment quickly became about much more than whether paper can become a bead.
Different papers bring different possibilities.
Thickness, texture, imagery, pattern, and flexibility can all affect what happens when paper is transformed.
Change the shape of the strip, and you change the bead.
Change the way you manipulate the paper—rolling instead of folding, for example—and you change it again.
Adhesive can affect more than whether everything stays together. It can influence strength, surface, appearance, and durability.
And once the bead is finished, it can become a material all over again.
So, there isn't really one “best” paper, one perfect bead, or one universally correct result.
The more useful questions are:
- What am I trying to make?
- What do I want to experiment with?
- And what does this particular material do when I ask it to become something else?
Because even when we make deliberate choices, we don't control everything.
A dot can become part of a stripe.
A photograph can become fragments of color.
A piece of text can become a graphic mark.
Something we expected to look beautiful may not.
Something we nearly discarded might become our favorite.
We influence the outcome.
Then we let the material answer back.
What I'd Try Next
The more I've experimented with paper beads, the more questions they've created.
Which seems appropriate.
A good experiment doesn't necessarily end by answering everything.
Sometimes it leaves you more curious than when you started.
Different Paper Weights
- What happens if otherwise similar beads are made from very thin and much heavier papers?
- How does the weight affect rolling and shape?
- How quickly does the bead build dimension?
- At what point does a paper become too thick or stiff for a particular bead style?
Designing the Paper More Intentionally
My dot-marker experiments showed me how dramatically a flat design can change when rolled.
I'd love to take that further.
- What happens if colors are deliberately placed along particular edges?
- Could we predict which colors will appear most prominently?
- What about stripes, stamped patterns, paint, ink, collage, or handwriting?
- Could we design a flat artwork specifically for its eventual transformation—or would the bead still surprise us?
Tiny Scraps
Long strips are convenient for conventional rolled beads.
- But what about pieces that are too short, too narrow, or oddly shaped?
- Could several scraps be combined?
- Could they work better for folded beads?
- Could tiny leftovers become surface decoration rather than the entire bead?
Maybe the scraps left over from making paper beads could become another experiment themselves.
Shape
There's much more room to explore geometry, too.
- Long triangles.
- Short triangles.
- Wide bases.
- Narrow bases.
- Off-center points.
- Straight strips.
- Irregular cuts.
Then there are techniques such as pillow beads that abandon rolling altogether.
How many distinct bead shapes can we coax out of flat paper simply by changing how we cut and manipulate it?
Adhesives and Finishes
This could easily become its own Materials Lab experiment.
- What happens if similar beads are treated with different appropriate adhesives or finishes?
- How does each affect color, shine, texture, stiffness, weight, or surface feel?
- How do they respond to ordinary handling and limited moisture?
Rather than assuming one finish is universally “best,” we could explore which characteristics make different options useful for different purposes.
Beyond Jewelry
And perhaps the biggest remaining question is the simplest: what else can we actually make with these?
I've already turned paper beads into earrings and a necklace.
But what about bookmark dangles?
Journal charms?
Garlands?
Ornaments?
Mixed-media work?
Decorative strands?
Paper beads combined with fabric, salvaged wire, natural materials, buttons, or other found objects?
Maybe some of those ideas will work beautifully.
Maybe some won't.
Either way, we'll discover something.
One Experiment Creates Another
There's something I particularly like about all those unanswered questions.
They aren't shortcomings.
They're where the Materials Lab goes next.
One experiment reveals another variable. One unexpected result creates another question.
Paper beads could lead to an adhesive experiment.
An adhesive experiment could lead to durability testing.
Decorated paper could lead to an experiment about designing specifically for transformation.
Tiny leftovers could lead to another exploration of scraps.
And eventually, curiosity may carry us so far from the original paper bead that we're experimenting with something completely different.
That's part of the point.
Curiosity doesn't always travel in a straight line.
The Materials Lab Takeaway
So... what else can paper become?
Apparently, quite a lot.
Paper can become an artwork.
The artwork can become raw material.
The material can become a bead.
The bead can become jewelry, a bookmark, an ornament, part of another artwork—or something we haven't tried yet.
There isn't necessarily one moment where we have to declare: this is what the material is now, and this is what it will always be.
Creativity isn't only about making something from nothing.
Often, we're making something from something else.
Something ordinary.
Something left over.
Something we made years ago.
Something that didn't work the first time.
Something whose possibilities aren't obvious yet.
Paper beads make that idea wonderfully tangible because you can watch the transformation happen in your hands.
A flat strip wraps around itself.
Layer after layer accumulates.
Colors rearrange themselves.
The paper becomes dimensional.
Then the finished bead joins other materials and becomes part of something larger.
Nothing magical happened to the paper.
We simply changed what we asked it to do.
And perhaps that's the experiment worth carrying beyond paper beads.
The next time you encounter an art material, leftover scrap, old creation, or ordinary object that seems to have reached the end of its usefulness, you don't necessarily need to save it.
You don't necessarily need to turn it into art.
Sometimes its journey really is finished.
But every once in a while, it might be worth looking one more time.
Notice its color.
Its texture.
Its shape.
Think about what would happen if you cut it.
Folded it.
Painted it.
Combined it with something else.
Changed the context.
And ask the question at the heart of the Materials Lab: what else can it do?
Or, in this case: what else can it become?
 Jessica Carey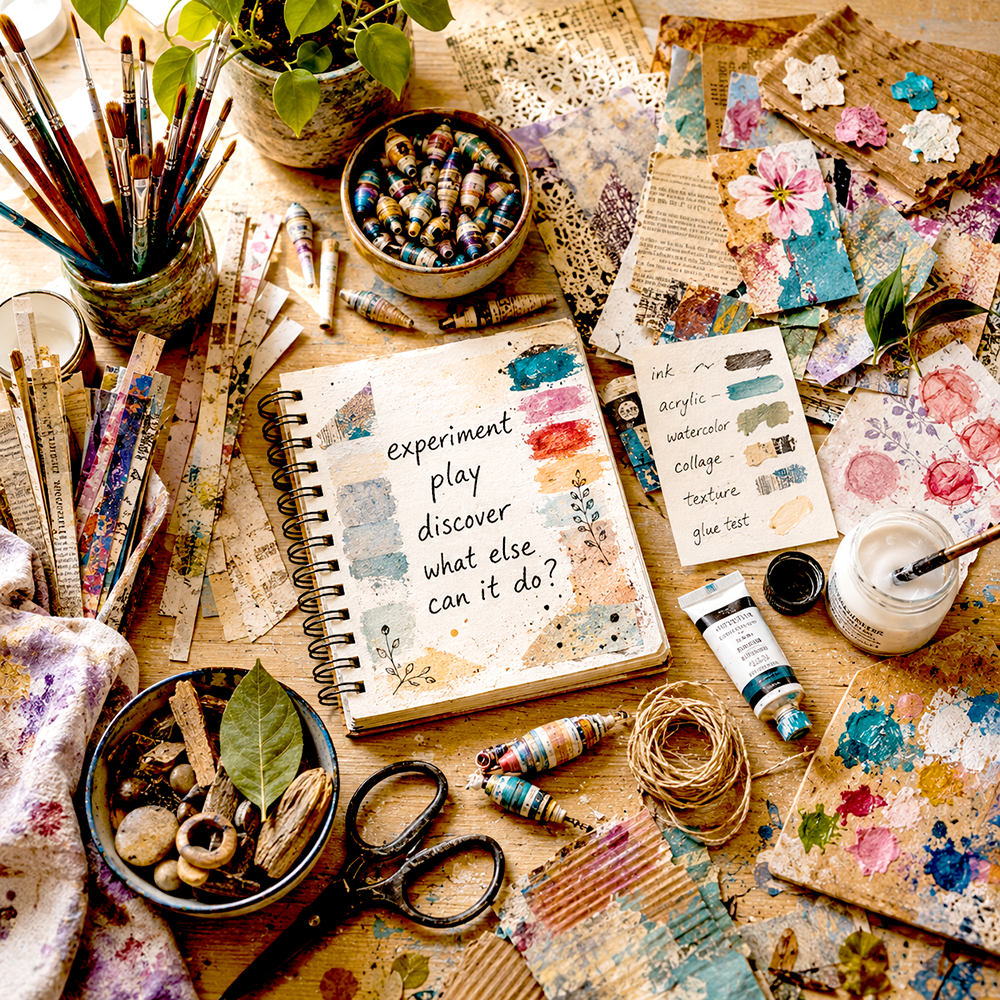
Want even more content about creativity and art?
Be sure to check out all of our creative chronicles!
If you'd like to see examples of my work, you can find some of my art and creations at Redbubble and Gumroad!
Want to check out other art spaces and resources?
Check out some of these articles:
-Hidden Gems for St. Louis Artists
-Perennial DIY Watercolors Class
-Leftovers and Upcycle Treasure Box
 Jessica Carey